5 Gas Stove Repair Basics Cleaning Tricks to Make Your Stove Like New
Meta Description: 5 gas stove repair basics cleaning tricks, to help turn your dirty, poorly working stove back into a like-new appliance — find out the 5 secret methods pros don’t always reveal.
I’ll be honest with you. My gas stove appeared to have been the site of a crime.
Grease splattered across every burner. Black crust formed around the grates. One burner clicked and clicked but wouldn’t light. Another burned with a feeble, uneven flame that could barely boil water.
I was about to pick up the phone and call a repair technician. The quote? $150 just to show up.
Instead, I took a weekend to learn the gas stove repair basics cleaning hacks that work. Not the generic advice you see everywhere. These are deep, practical methods that remedied every problem and made my stove look and perform as if it just emerged from the box.
This article explains all five of those tricks. Step by step. No fluff.
Whether your stove won’t light, burns unevenly, smells funny or just looks terrible — these tricks cover it all.
Why So Many People Never Get Their Gas Stove Fixed Properly
Most people just towel off their stove and declare it clean.
This is kind of like wiping your car down with a napkin. You’re just shuffling the dirt around.
The real trouble on a gas stove is what’s going on underneath — inside the burner caps, inside the igniter ports and deep in between the grates. Over time, grease and food particles accumulate in those nooks and crannies; they obstruct the flow of gas, gum up ignition systems and lead to uneven flames.
The good news? You can fix this without expensive products or professional tools.
All you need is the right knowledge and around two hours of your Saturday.
What You’ll Need Before Getting Started
Before we dive into the five tricks, gather these supplies. These are mostly already in your home.
| Supply | Purpose |
|---|---|
| White vinegar | Cut through grease and mineral deposits |
| Baking soda | Gentle abrasive for scrubbing |
| Dish soap | Break down oily buildup |
| Toothbrush (old) | Scrub tight spaces and igniter ports |
| Toothpick or needle | Clear clogged burner holes |
| Paperclip | Clean igniter slots |
| Warm water | Rinse, soak |
| Microfiber cloths | For streak-free wiping |
| Bowl or sink basin | Soak grates and caps |
| Plastic scraper (or spatula) | Lift hardened residue without scratching |
That’s it. No fancy degreasers needed (but you could use one, if you have it).
Trick No. 1 — The Overnight Soak That Melts Years of Grime
This was the first trick that really surprised me.
For months, I had been scrubbing my cast iron grates. They never came fully clean. The burnt-on grease just mocked my sponge.
So then I tried the overnight soak method.
How to Do It
Remove the grates and burner caps from your stove. Place them in a large sink or basin.
Add hot water to the basin. Pour in half a cup each of dish soap and white vinegar. Stir it slightly.
Submerge everything completely. Then walk away.
Let them soak for at least 8 hours. Overnight is ideal.
In the morning, the grease and carbon are soft. Most of it can be wiped off with a cloth. Stubborn spots come off with light scrubbing with an old toothbrush.
Why It Works
Hot water slightly expands the metal and opens pores in the buildup. Dish soap dissolves grease molecules to break up their bonds with metal surfaces. Vinegar breaks down mineral deposits and hard water spots.
Collectively, they do all of the scrubbing work for you while you rest.
Pro Tip
For extra power, add two tablespoons of baking soda to the soak. It interacts with the vinegar, resulting in a gentle fizzing action that loosens residue from uneven surfaces.
Make sure you rinse everything very well before putting it back. Soap residue can impact your burner flame.
Trick No. 2 — Clearing Clogged Burner Ports Using a Toothpick
This is the least-known of all gas stove repair basics cleaning hacks.
The burner has a ring of small holes around its edge. These are called burner ports. Flame is formed as gas moves through them.
When food, grease or boiled-over liquids clog even a couple of those holes, the flame gets uneven. You’ll notice it burning more brightly on one side than the other. Other times the burner will not light at all.
The fix takes five minutes.
How to Do It
First, ensure the stove is fully off and cool.
Remove the burner cap (the flat disc that sits atop the burner base). Set it aside.
Look at the burner base. There’s a band of small holes along the outer edge. These are the ports.
Grab a toothpick and gently poke it into each hole. Push it in a bit and twist it. This dislodges any debris inside.
Do not use a metal wire or drill bit. They can widen the holes and damage your burner permanently.
Once you’ve cleared all the ports, use a can of compressed air to blow away any loosened debris. If you lack compressed air, blow softly through a straw.
How to Tell It Worked
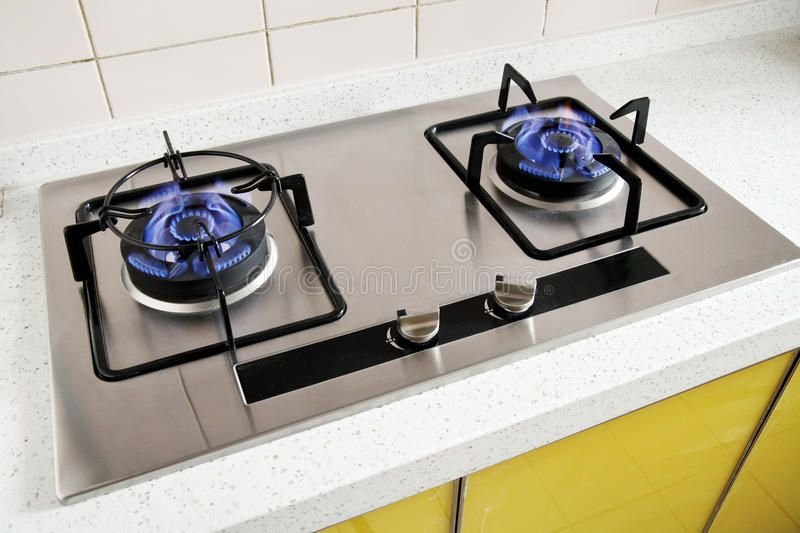
Reattach the burner cap and light the flame. A good gas burner will have a consistent, uniform ring of blue flames — without yellow spots or gaps.
Yellow or orange flames generally indicate that the gas-to-air ratio is slightly off. This is usually resolved after a few minutes of burning. If not, check that the burner cap is seated properly.
Trick No. 3 — The Stovetop Surface Baking Soda Paste
The stovetop surface — the flat section surrounding your burners — builds up an alarming amount of grease over time.
Regular cleaning sprays make little dent in it. Especially the things so baked onto the surface.
This is where the magic of baking soda paste comes into play.
How to Make the Paste
Combine three parts baking soda to one part warm water. Stir until it thickens to a paste. It should cohere without running.
How to Apply It
Spread the paste all over the surface of the stovetop. Spend extra time on the dark, stained spots and in corners where the grease collects.
Let it sit for 20–30 minutes. Don’t wipe it yet.
After 20 minutes, apply white vinegar to the paste with a sprayer or by drizzling. It will fizz. This fizzing reaction loosens the grease from the surface for you.
Wait another five minutes. Then use a damp microfiber cloth, rubbing in circular motions.
Use an old toothbrush for edges and tight corners.
Wipe it all away with a clean damp cloth. You may need two or three passes to remove all the paste residue.
What You’ll See
The results are genuinely surprising. Stains that withstood years of casual wiping come right off. The surface appears lighter, cleaner and in some cases nearly shiny.
Surface-Specific Notes
| Stovetop Material | Safe to Use Paste? | Extra Tip |
|---|---|---|
| Enamel-coated steel | Yes | Avoid metal scrapers |
| Stainless steel | Yes | Scrub with the grain |
| Cast iron grates | Yes | Dry thoroughly after |
| Ceramic/glass | No | Use dedicated glass cleaner |
| Painted surfaces | Test first | Patch test in hidden area |
Trick No. 4 — Repairing a Constantly Clicking Igniter
For stoves that click constantly — even when you’re not using them — this section is for you.
That was my most vexing problem. The clicking would keep me up at night. I thought the stove was broken.
It wasn’t. It was dirty.
Why Igniters Click Non-Stop
The igniter is the tiny ceramic nub next to each burner. It sparks and ignites the gas.
When water or food residue surrounds the igniter, it causes a constant clicking. The igniter thinks it needs to keep sparking.
The Cleaning Fix
Turn the stove off completely. If the clicking is occurring, disconnect the stove from its wall outlet or turn off its circuit breaker.
Allow the igniter to cool and dry for 30 minutes.
Dry-scrub the tip of the ceramic igniter with a toothbrush. Hold off on using water for now — you need to clear away dry debris first.
Then, dip a cotton swab in rubbing alcohol. Clean around the base of the igniter where it meets the burner. Alcohol evaporates quickly, which is why it’s more effective than water in this regard.
Gently remove debris around the igniter base in the narrow slot with a straightened paperclip. That’s where food particles like to accumulate.
Drying Is Critical
Air-dry everything for at least an hour before switching the stove on again.
If you’re low on time, point a low-heat hair dryer at the igniter to quicken the drying process. Maintain a distance of six inches from the igniter.
After the Fix
Re-plug the stove or turn on the breaker. Test each burner.
Usually, the clicking stops immediately. If it persists, moisture could be in the igniter module itself. Repeat the drying process and allow it more time.
If the clicking persists after thorough drying and cleaning, the igniter switch probably needs actual replacement — it’s a $10–$20 part found at any hardware store.
Trick No. 5 — Deep Clean Under the Stovetop Lid
Most people don’t even know the stovetop lifts up.
On most freestanding gas ranges, the whole cooktop surface tilts up at the back — like a car hood.
What’s underneath? Usually a nightmare.
Oils, liquid spills, crumbs and debris accumulate there over years of cooking. This buildup can restrict gas lines, attract pests and even pose a fire risk. According to the U.S. Fire Administration, cooking equipment is the leading cause of home fires — and neglected stovetop interiors are a significant contributing factor.
How to Access It
Ensure the stove is off and cooled.
On most models, there are two clips or notches — one on either side near the front corners of the stovetop.
Gently insert a flat-head screwdriver into each clip and press back. The stovetop should then tilt up away from you.
Use something solid to prop it open. Certain stoves have a built-in prop rod. Others need to rest against the backsplash or be propped up with a wooden spoon.
Important: Do not touch any gas lines. Don’t disconnect anything. Only clean surfaces you can see.
What to Clean Under There
Wipe off the metal tray or surface with a degreaser or your baking soda paste.
Wipe away crumbs, debris and pooled grease with a dry cloth, followed by a damp one.
Focus on the spaces just underneath each burner. Grease usually drips down and collects in these areas.
If there is a lot of liquid, soak it up first with paper towels before wiping.
After Cleaning
Carefully lower the stovetop back down. Ensure that the clips snap back into place.
Test all burners to verify everything sits properly.
How Often Should You Do These Tricks?
| Cleaning Task | Recommended Frequency |
|---|---|
| Overnight soak (grates & caps) | Once every 1–2 months |
| Clearing burner ports | Once every 2–3 months |
| Baking soda paste on surface | Once every 2–4 weeks |
| Igniter cleaning | As needed / after spills |
| Under-stovetop deep clean | Every 3–6 months |
Incorporating this into a routine prevents the kind of buildup that takes hours to remove. A monthly clean keeps everything in working order.
When Your Stove Needs More Than Cleaning
These five tricks take care of most common gas stove issues. But there are some problems that can’t be cleaned away.
Watch for these warning signs:
Gas smell when burners are not in use — This is a major safety concern. Do not clean — call your gas company right away.
Orange or yellow flame that doesn’t resolve after cleaning — Could indicate an issue with gas pressure or a blocked line.
Burner that won’t light at all after cleaning — The igniter tip may be cracked, or the wiring could be damaged.
Clicking that continues after thorough drying — You may need to replace the igniter module or switch.
Visible cracks in burner components — Cracked burner heads or caps should be replaced, not cleaned.
For any of these problems, call a licensed appliance repair technician. Cleaning is only effective if the parts themselves are intact.
Before and After: What to Expect
| Problem | Before Cleaning | After These Tricks |
|---|---|---|
| Grates | Black, crusty, sticky | Clean, smooth, original color |
| Burner flame | Uneven, weak, one-sided | Steady, even blue ring |
| Igniter clicking | Non-stop | Stops completely |
| Stovetop surface | Greasy, stained | Clean with restored color |
| Under stovetop | Heavy grease buildup | Clear tray |
| Burner lighting | Slow to catch fire | Fast, consistent ignition |
These aren’t dramatic promises. These are the actual results I achieved — and the results shared by others who have used these exact strategies.
Frequently Asked Questions
Q: Can vinegar be used safely on gas stove parts? Yes. White vinegar is safe on metal burner grates, caps, and stovetop surfaces. Avoid using it repeatedly on shiny aluminum parts, as it can cause slight oxidation over many uses. Always rinse thoroughly after using vinegar.
Q: Can I wash my burner grates in the dishwasher? Some cast iron grates are dishwasher safe, but frequent trips through the dishwasher will remove seasoning and likely lead to rust. Soaking overnight is a more effective and gentler method.
Q: Why is my flame yellow rather than blue? A yellow flame generally indicates incomplete combustion — either a blocked burner port, an improperly seated burner cap or a problem with the gas-to-air mixture. Try Trick No. 2 to clear the ports, and reseat the cap. If the yellow flame persists, call a technician.
Q: How do I determine if my igniter needs replacing or just cleaning? If cleaning and thorough drying do not solve the clicking or ignition issue, examine the igniter tip. If the ceramic tip is cracked or visibly damaged, it must be replaced. A tip that’s clean and intact but still doesn’t spark after drying may have a wiring problem.
Q: My stove smells of burning after I cleaned it. Is that normal? A slight burning smell for the first several uses after deep cleaning is normal. It is probably residual cleaning product or moisture burning off. If the smell is strong or smells more like gas than burning, turn the stove off immediately.
Q: Is it safe to use steel wool on my stove grates? Don’t use steel wool on enamel-coated grates — it can scratch and damage the coating. If your grates are bare cast iron, a stiff-bristle brush works better and leaves no metal particles behind.
Q: My stovetop doesn’t lift. What do I do? Not every model has a hinged stovetop. Consult your stove’s manual or search for your model number online to confirm. On some models, the stovetop doesn’t lift but the burner bowls (the recessed surfaces underneath each individual burner) can be removed for cleaning instead.
Q: How soon can I use the stove after cleaning? Allow a minimum of 1 hour of dry time after wet cleaning. Moisture near gas burners or igniters can interfere with ignition. If you’re unsure, allow additional time.
Wrapping It All Up
Here’s the thing: the vast majority of gas stove problems are maintenance problems, not mechanical ones.
Clogged ports. Dirty igniters. Grease-soaked grates. Neglected undersides. These are not signs of a broken stove. They are signs of a stove in need of attention.
These five gas stove repair basics cleaning tricks aren’t rocket science. They are free and do not require professional assistance or pricey materials. What they need is a little time, some household supplies and the knowledge of precisely what to clean and how.
I went from a non-lighting, constantly-clicking, filthy stove — to one that works perfectly and looks nearly new. All in one weekend. For almost no money.
Start with the overnight soak. It is the simplest and most satisfying. Then work through the rest according to what problems you face.
Your stove is worth saving. And you’re better equipped to do so than you realize.