Meta Description: Gas stove safety rules a guide for beginners every kitchen gas appliance repair. Discover 7 essential rules you need to know to ensure your safety, avoid accidents, and get repairs done correctly.
7 Must-Have Gas Stove Repair Safety Rules For Every Kitchen
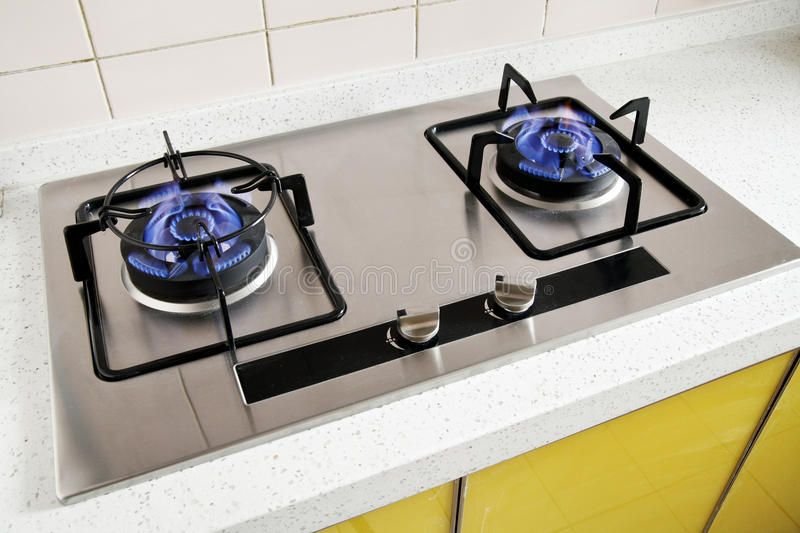
Gas stoves are the workhorses of most kitchens. They cook quickly, heat evenly and put you in real control of the flame. But they also have substantial risks if something goes awry.
A gas leak, a malfunctioning igniter or a faulty burner can make a simple cooking experience a hazardous one. That’s why learning the gas stove repair basics safety rules isn’t just useful — it’s essential.
You don’t have to be an expert technician to be safe. All you need to know is what to do, what not to do and when to ask for help.
This guide covers the 7 important safety rules every household should abide by. Whether you’re tackling a minor repair on your own or biding your time for a repair technician to arrive, these rules will keep you and your family safe.
Why Gas Stove Safety Rules Matter, Actually
Thousands of house fires and gas-related injuries happen each year as a result of stove misuse or DIY repairs gone wrong.
Gas is invisible. It has no color. What you smell is actually an added chemical, mercaptan — it’s intentional so you can detect leaks. Without that smell, you wouldn’t have known danger was accumulating in your vicinity.
One spark is all it takes to create an explosion or fire when gas collects in a confined space — even the flip of a light switch.
Knowing the gas stove repair basics safety rules enables you to be alert and work fast, preventing small problems from becoming bigger emergencies.
Rule #1 — Smell Gas? Stop Everything and Get Out
This is the biggest rule on this whole list.
If you smell gas near your stove or anywhere in your kitchen, do not attempt to locate the leak yourself. Do not flip any switches on or off. Stop using your phone when inside the house. Never light a match or a candle.
Just leave. Immediately.
Here’s exactly what to do:
- Exit the house and leave a door open behind you (this encourages ventilation)
- Do not flip any electrical switches on or off
- Once you’re outside, call your gas company’s emergency number
- If the smell is strong, or if you feel dizzy, call 911
- Stay out until a professional clears you to go back in
A tiny gas leak can fill a room very quickly. The danger of explosion or carbon monoxide poisoning is very real.
This rule heads every list of gas stove repair basics safety rules because failure to heed it has caused more deaths than any other stove-related mistake.
Rule #2 — Always Switch Off the Gas Supply Before Any Repairs
You need to cut off the gas before you touch any part of your stove to repair it.
While this may seem obvious, plenty of people skip this step — particularly for “minor” fixes such as replacing a burner cap or cleaning out a clogged port.
Where Is the Gas Shutoff?
Most gas stoves have a valve that can be turned off behind or under the unit, where it connects to the wall. It normally appears as a lever or circular knob.
- Lever valve: Rotate perpendicular (sideways) to the pipe to shut off
- Round knob: Turn clockwise until it stops
If you can’t find the shutoff behind the stove, your home will have a main gas shutoff somewhere close to the meter outside. Use that one.
Why This Step Is Non-Negotiable
Gas still flows through the internal lines of the stove, even if all the burners are off. A loose connection or a mishap when making a repair can release gas.
Turning off the supply removes that risk entirely.
| Step | Action | Why It Matters |
|---|---|---|
| 1 | Turn off stove burners | Stop flames from burning |
| 2 | Locate shutoff valve | Identify correct valve to use |
| 3 | Turn valve off | Stop gas reaching stove |
| 4 | Wait 5 minutes | Let residual gas clear out |
| 5 | Begin repair work | It’s safe now to proceed |
Rule #3 — Ventilate the Kitchen While Working on Any Repairs
Good airflow isn’t just a comfort — it’s a safety measure.
When you do any kind of gas stove work, even with the supply shut off, trace amounts of gas may continue to linger in the lines or escape at the time of disconnection. Proper ventilation prevents those small amounts from accumulating.
What You Can Do to Ventilate Your Kitchen
- Ensure all kitchen windows and doors are open
- Switch on the range hood or kitchen exhaust fan
- Place a box fan near a window to pull air out
- Do not tackle an airtight or windowless kitchen without professional help
Do Not Use an Indoor Fan Blowing In
This is a mistake people make. Outside air blown into the kitchen can propel gas deeper into a house. Instead, establish airflow that exhausts air out.
Think of it this way: you want air to escape, not circulate.
Ventilation also protects you from fumes that cleaning agents, solvents or rust removers you use during repair work can generate. Some of these chemicals are flammable and hazardous to inhale in an enclosed area.
This is one of those gas stove repair basics safety rules that feels excessive but gets ignored — until something goes awry.
Rule #4 — The Soap-and-Water Leak Test Is Never to Be Overlooked
Once you’ve completed any repair — even a small one — you have to check for gas leaks before restoring the supply and walking away.
Professionals use specialized gas detectors. At home, the soap-and-water approach is reliable and free.
How to Do a Proper Leak Test
What you’ll need:
- Dish soap
- Water
- A small brush or cloth
Steps:
- Combine dish soap with some water to create a bubbly solution
- Slowly turn on the gas supply again
- Apply soapy water to all connection points, joints and fittings that you have worked on
- Watch closely for bubbles forming
If there are bubbles — even little ones — gas is leaking from that point. Shut the supply off again immediately and tighten or reseal the connection.
No bubbles = no leak. That’s your green light.
It takes fewer than five minutes and it might save your life. Don’t skip it, even if you’re sure the repair was performed properly.
When to Use a Gas Detector Instead
Electronic gas detectors are inexpensive (about $20–$40) and will sound an alarm if there is gas in the air. Regardless of whether you do DIY repairs or not, they’re worth having in every kitchen.
Rule #5 — Know What Repairs Are DIY-Friendly and What Aren’t
One of the most common errors committed by homeowners is attempting to repair something they are not equipped to handle.
Some problems with gas stoves are safe and easy to fix on your own. Others require a licensed gas technician, and attempting them without proper training can be deadly.
What You Can Safely Repair at Home
| Issue | DIY-Friendly? | Notes |
|---|---|---|
| Clogged burner ports | ✅ Yes | Clean with pin or toothpick |
| Dirty burner caps | ✅ Yes | Wash with warm soapy water |
| Loose knobs | ✅ Yes | Usually can just push back on |
| Burner not lighting (no spark) | ⚠️ Maybe | Check if igniter is dirty first |
| Replacing burner grates | ✅ Yes | Simple swap |
| Gas valve replacement | ❌ No | Requires licensed technician |
| Internal gas line repair | ❌ No | Extremely dangerous |
| Regulator issues | ❌ No | Licensed work only |
| Oven igniter replacement | ⚠️ Maybe | Some models allow this; check manual |
A Good Rule of Thumb
If the repair requires disconnecting a gas line, replacing internal valves or working inside the stove’s gas supply system — call a professional.
If you need a repair involving the cooking surface, burner caps, grates or electronic ignition cleaning — that’s generally safe for you to do yourself.
Understanding this boundary is one of the core principles of the gas stove repair basics safety rules that every homeowner should know before attempting any stove repair.
Rule #6 — Only Use the Right Tools and Right Materials
Using the wrong tools to repair a gas stove is not just an inconvenience — it could cause actual damage or worsen a leak.
Tools You Should Have Ready
- Adjustable wrench — for fittings and connections
- Pipe thread sealant tape (PTFE/Teflon tape) — for sealing gas-rated threaded connections
- Flathead and Phillips screwdrivers — for removing panels and screws
- Soft cloth and warm water — for cleaning
- Toothpick or thin wire — to clear clogged burner ports
- Flashlight — so you can see panel interiors clearly
Materials Unsafe for Gas Lines
This is critical. Never use the following on gas connections:
- Regular plumber’s tape not rated for gas
- Silicone caulk or bathroom sealant
- Duct tape or electrical tape (never)
- WD-40 or spray lubricants near burners
Only use materials that are specifically identified for gas line use. The tape and sealant you might be using on water pipes may not be rated for gas pressure or chemical resistance.
According to the U.S. Fire Administration, using incorrect materials on gas appliances is a significant contributing factor in residential gas fires and should always be avoided.
Further, do not wear loose or synthetic clothing when making repairs on the stove. Loose sleeves can snag on parts, and synthetics can melt or become heat reactive.
These small details may seem like overkill, but they’re part of what distinguishes a safe repair from a dangerous one.
Rule #7 — Maintain a Log and Periodically Service Your Stove
Gas stove safety usually only enters people’s minds when something breaks. However, waiting until a problem has arisen is not the right approach.
Small problems are taken care of before they become dangerous ones with routine maintenance. And maintaining records allows you to keep track of what has been done, which parts have been replaced and when your next checkup is due.
What Regular Maintenance Looks Like
Monthly:
- Clean burner caps and grates
- Wipe the stovetop and inspect for cracked surfaces
- Look and listen for unusual hissing noises near the stove
- Test the igniter on all burners
Every 6 Months:
- Perform a complete soap-and-water leak test at connection points
- Inspect the flexible gas hose behind the stove
- Check for rust, corrosion or wear on external fittings
- Make sure the space behind and underneath the stove is free and clear
Annually:
- Schedule a professional inspection
- If a flexible gas connector hose is over 5–7 years old, replace it
- Check your carbon monoxide detector and change the batteries
Why Record-Keeping Helps
Note all repairs made, including the date the work was done, what part was replaced and by whom.
This can be especially handy if you ever sell your house, file an insurance claim or need a technician to troubleshoot a recurring issue in a hurry.
| Maintenance Task | Frequency | DIY or Professional? |
|---|---|---|
| Clean burner caps | Monthly | DIY |
| Check for gas smell | Weekly | DIY |
| Soap-water leak test | Every 6 months | DIY |
| Inspect gas hose | Every 6 months | DIY |
| Full inspection | Annually | Professional |
| Gas hose replacement | Every 5–7 years | Professional |
Quick Reference: 7 Safety Rules at a Glance
Here’s a summary you can print out and keep taped inside a kitchen cabinet:
- Smell gas? Get out now — don’t touch switches, don’t call from inside
- Never start any repair without switching off the gas supply
- Keep the kitchen ventilated with open windows and positive airflow
- Perform the soap-and-water leak test after every repair, no exceptions
- Know your limits — some repairs are for professionals only
- Use gas-rated tools and materials — never substitute with wrong products
- Maintain and inspect regularly — don’t wait for something to break
Typical Gas Stove Issues and What They Typically Mean
Things go wrong sometimes, even when the maintenance is as good as it gets. Here’s a quick rundown of common symptoms and what they usually suggest:
| Symptom | Likely Cause | DIY Fix? |
|---|---|---|
| Burner won’t ignite | Clogged igniter or port | ✅ Clean it |
| Orange or yellow flame | Incomplete combustion, dirty burner | ✅ Clean burner |
| Clicking sound that won’t stop | Wet or dirty igniter | ✅ Dry and clean |
| Weak or low flame | Low gas pressure or blocked port | ⚠️ Check and clear first |
| Gas smell but no leak found | Faulty valve or internal fault | ❌ Call a pro |
| Oven not heating properly | Faulty thermostat or igniter | ⚠️ Check manual first |
| Hissing near the back | Gas line issue | ❌ Call immediately |
FAQs About Gas Stove Repair Basics Safety Rules
Q: Can I fix my gas stove myself?
Sure — but only for cosmetic issues like cleaning burners, replacing grates or securing loose knobs. Any work on gas lines, internal valves or regulators needs to be performed by a licensed technician.
Q: How can I tell if my gas stove is leaking?
Signs include a rotten egg or sulfur smell. You can also use the soap-and-water method to test connection points, or buy a gas leak detector. If you feel symptoms such as dizziness, headaches or nausea in your kitchen, get out immediately and call your gas company.
Q: Is a gas stove safe to use without a working igniter?
You can technically light the burner manually with a long lighter or match, but it’s best to repair a broken igniter as soon as possible. Neglecting it increases the possibility of gas accumulating before it is ignited.
Q: How frequently should a gas stove be professionally inspected?
The ideal for most households is once a year. If your stove is more than 10 years old, you might want to make that twice a year.
Q: What does a yellow flame on my gas stove indicate?
A healthy gas flame is blue. Yellow or orange flames indicate incomplete combustion and can produce carbon monoxide. A dirty burner is the most common cause. Clean the burner caps and ports, and if that doesn’t solve the problem, call a technician.
Q: What is the lifespan of gas stove flexible hoses?
Flexible gas connector hoses usually have a 5- to 7-year service life. After that, they can crack or corrode, even if they seem fine from the outside. Replace them proactively.
Q: Should I put a carbon monoxide detector near my gas stove?
Absolutely. Carbon monoxide is odorless and colorless, and it can accumulate as a result of incomplete combustion in a gas stove. Install a CO detector in or near the kitchen, and test it once per month.
Wrapping It All Up
Gas stoves are dependable, efficient and excellent for cooking — but they require respect.
The gas stove repair basics safety rules in this article are not complex. They don’t require a degree or special training. They just take some awareness and a little discipline.
To recap:
- Consider every gas smell a true emergency
- Do not start any repair without turning off the gas supply
- Make sure your kitchen is well ventilated while you tackle any repair
- When you finish, always test for leaks
- Learn what’s safe to repair, and what isn’t
- Use only gas-rated tools and materials
- Keep up on routine maintenance and checkups
These seven rules won’t just protect your stove — they will protect your house and everyone in it.
The safest answer is always to call a professional if you’re not sure about a repair. No savings are worth the risk of a gas leak or fire.
Stay safe, stay informed and give your gas stove the care it deserves.