7 Quick Gas Stove Repair Basics Maintenance Fixes For Anyone
Meta Description: Do not be scared if you need gas stove repair basics. Discover 7 basic maintenance solutions anyone can do at home to keep your stove working safely and effectively.
Your gas stove is one of the hardest-working appliances in your kitchen. It ignites breakfast, fuels dinner and manages all the snacks in between. But like any machine, it requires a bit of care — and sometimes, a little repair.
The good news? You don’t have to be a pro technician to fix basic gas stove problems. The more common problems are usually straightforward to diagnose and relatively easy to solve if you follow the right steps.
This guide takes you step by step through 7 practical gas stove repair basics that any homeowner can safely tackle. No fancy tools. No confusing manuals. Just simple, straightforward help that makes real sense.
Let’s get into it.
Before You Touch Anything — Safety Precautions
Before you begin any repair or maintenance task on your gas stove, safety is paramount.
Here are the ground rules:
- Before doing any internal work, switch off the gas supply.
- If the stove has an electric ignition system, unplug it.
- Never attempt to detect a gas leak with an open flame. Use soapy water instead.
- Air out your kitchen — open windows and run your exhaust fan.
- If you strongly smell gas, leave the house and call your gas company immediately. Don’t flip any switches.
These steps take under two minutes but can save you from a serious accident. Always start here.
Fix #1 — Burner Won’t Light (Clicks But No Fire)
This is probably the most popular gas stove complaint. You turn the knob and hear clicking, but the burner won’t light.
Why This Happens
The igniter gets dirty. Grease, food spills and moisture prevent the spark from contacting the gas. It’s that simple.
How to Fix It
Step 1: Remove the burner grate, then lift off the burner cap. These typically just sit on top — no screws required.
Step 2: Look at the igniter. That’s the small white or ceramic piece next to the burner. If it’s covered in gunk, that’s your issue.
Step 3: Gently scrub the surface of the igniter with a soft toothbrush and a small amount of rubbing alcohol. Don’t soak it.
Step 4: Allow it to dry completely — a minimum of 30 minutes.
Step 5: Put everything back together and try again.
This usually solves the issue in most cases. If the burner still won’t light after cleaning, the igniter itself may need to be replaced — an inexpensive part (usually around $10–$30).
Fix #2 — Flame Is Weak or Looks Wrong
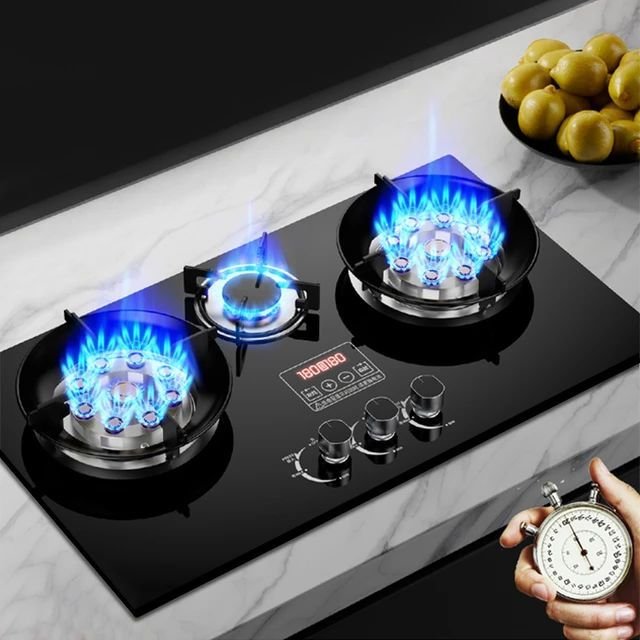
A healthy flame from a gas burner should be blue with small yellow tips. If your flame burns orange, yellow or unevenly, something is wrong.
What Causes a Bad Flame?
| Flame Color/Pattern | Likely Cause |
|---|---|
| Orange or yellow flame | Clogged burner ports |
| Flame only on one side | Blocked gas ports on one side |
| Very small, weak flame | Partially clogged supply line or ports |
| Flame lifts off burner | Too much air in the mixture |
How to Clean the Burner Ports
Step 1: Take off the burner cap and base.
Step 2: Look for the small holes around the edge of the burner head — these are your gas ports.
Step 3: Poke a toothpick or straightened-out paper clip through each hole. Avoid anything metal that might enlarge the holes.
Step 4: Rinse the burner parts with warm soapy water, then dry completely before replacing them.
Never use a toothpick that’s been soaked in water — moisture in the gas ports can lead to ignition problems. Always dry everything completely.
Fix #3 — Burner Won’t Stop Clicking, Even When Off
You finished cooking. You turned the knob to off. But the stove continues to click like it’s trying to start a fire.
The Underlying Cause
The cause is almost always moisture. If liquid boiled over or you cleaned the stove with a wet cloth, moisture can reach inside the igniter and cause a temporary short.
The Simple Solution
Step 1: Remove the burner caps and grates.
Step 2: Dry the area around the igniter thoroughly using a clean dry cloth or paper towels.
Step 3: If it continues clicking, use a hair dryer set to low and blow warm air around the igniters.
Step 4: Allow the stove to ventilate for 1–2 hours before reusing.
This usually solves it. If the clicking continues regardless of how dry it is, you likely need to replace the igniter switch — it has worn out.
Fix #4 — Smell of Gas When Stove Is Off
You can’t ignore this one. A faint smell of gas when the stove is off may indicate a minor leak at a burner seal or connection point.
Don’t Panic — But Don’t Ignore It Either
A slight, brief smell of gas around a burner is sometimes normal when you first turn off the stove. But an ongoing smell is not normal. According to the U.S. Consumer Product Safety Commission, persistent gas smells should always be investigated promptly.
How to Safely Check for a Leak
Step 1: Mix one part dish soap with one part water in a small bowl.
Step 2: Turn the gas supply back on, but keep all burners off.
Step 3: Using a soft brush or your fingers, apply the soapy mixture to the burner base, gas valve connections and supply line fittings.
Step 4: Watch for bubbles. Bubbles forming = gas leak at that spot.
Step 5: Immediately turn off the gas at the point where you saw bubbles.
If the leak is at a burner base, it’s likely a worn burner seal that you can replace. If it’s at a valve or supply line, stop — that’s a job for a licensed professional.
When to Call a Pro
| Leak Location | DIY Safe? |
|---|---|
| Burner seal/gasket | Yes, carefully |
| Burner cap connection | Yes |
| Gas valve | No — call a pro |
| Supply line fitting | No — call a pro |
| Behind the stove | No — call a pro |
Fix #5 — Stove Grates Wobble or Won’t Sit Flat
This isn’t a gas problem, but a wobbly grate can be very dangerous. Pots can tip. Spills happen. Burns follow.
Why Grates Stop Sitting Flat
Over time, grates warp from constant heating and cooling. They also accumulate heavy, baked-on grease on their feet that throws off the balance.
The Solution Is Simpler Than You Think
Step 1: Lift out the grates and examine the small rubber or plastic feet on the underside. If any are broken or missing, that’s your culprit.
Step 2: Wipe the cooktop surface underneath where the grates rest. Baked-on buildup can create tiny ramps that tilt the whole grate.
Step 3: Inspect the grate itself for visible bending or warping. Place it on a flat counter to check if all four points touch.
Step 4: If the rubber feet are missing, replacement grate feet are under $5 at most hardware stores and come in universal fit.
Step 5: If the grate is deformed, it’s time for a new one. Replacement grates for most brands cost $15–$40.
Fix #6 — Pilot Won’t Stay Lit (Older Stoves)
If you have a stove with an older standing pilot system (common on stoves made before 2000), you may find the pilot flame keeps going out.
What Is a Standing Pilot?
Unlike modern electronic ignition systems, a standing pilot is a small, always-burning flame that sits near the oven burner. When you turn on the oven, gas flows to that flame and ignites the burner.
Why the Pilot Flame Goes Out
- Drafts from nearby vents or windows
- Dirty or clogged pilot opening sealed with grease or debris
- Thermocouple failure — the safety device that detects whether the pilot is lit
How to Relight and Keep the Pilot Going
Step 1: Locate the pilot assembly — it’s typically at the bottom of the oven, toward the back.
Step 2: Find the pilot adjustment screw — usually a small flathead screw next to the gas valve.
Step 3: Use a toothpick to clean any debris from the pilot opening.
Step 4: Press down on the pilot button (if your model has one) and light the pilot with a long match or lighter.
Step 5: Hold the button down for 30–60 seconds to allow the thermocouple to heat up after lighting.
If it still won’t stay lit, the thermocouple is most likely bad. The part sells for $10–$25 and is easily replaced by a DIYer with a wrench and basic instructions.
Fix #7 — Flame Too High or Too Low on the Same Knob Setting
You turn the knob to “low” and get a roaring flame. Or you turn it to “high” and barely get enough heat to boil water. The flame doesn’t match the setting.
The Cause: Misadjusted Simmer Screw
Each burner valve contains a small set screw that regulates minimum gas flow. This can shift over time and leave the low-flame setting way off.
Step-by-Step Adjustment
Step 1: Remove the burner knob — most just pull straight off.
Step 2: Check for a tiny flathead screw inside the knob shaft opening.
Step 3: Set the burner to the lowest heat setting (or “simmer”).
Step 4: Turn the simmer screw slowly — clockwise to reduce flame, counterclockwise to increase.
Step 5: The flame should be low but steady — not flickering or on the verge of going out.
Step 6: Replace the knob and test at all settings.
This adjustment takes about five minutes per burner and allows for much better cooking control.
Maintenance Schedule — Prevent Issues from Recurring
Fixing issues is great. Preventing them is even better. Here is a basic maintenance schedule to stick with:
| Task | How Often |
|---|---|
| Wipe down burner caps and grates | After every use (once cool) |
| Deep-clean burner ports | Once a month |
| Check grate feet for damage | Every 3 months |
| Inspect gas connections with soapy water | Every 6 months |
| Clean igniter tips | Every 1–2 months |
| Check pilot flame (older stoves) | Every 3 months |
Committing to this routine takes less than 30 minutes a month and may add years to your stove’s lifespan.
Tools You’ll Actually Need
None of these fixes require a mechanic’s toolbox. Here’s what comes in handy:
- Old toothbrush — to clean igniters and burner ports
- Toothpicks or paper clips — to clear burner holes
- Rubbing alcohol — to wipe down igniter tips
- Dish soap and water — to detect leaks
- Small flathead screwdriver — to adjust simmer screws
- Dry cloth or paper towels — for drying moisture from igniters
- Long matches or grill lighter — to relight pilot lights
- Wrench — used only for thermocouple replacement
The total cost to put together this kit? Under $15. Much of it you likely already have.
How to Tell When You Shouldn’t DIY
Not all gas stove issues are weekend jobs. These are the signs it’s time to call a pro:
- You can smell gas and cannot identify where it’s coming from
- The gas valve is leaking
- The oven won’t heat at all — even though the burners work
- The electronic ignition board has failed
- You notice scorch marks or melted components inside the stove
- Repairs require disconnecting the main gas line
There’s no shame in calling a pro. Some things are simply not DIY territory, and gas isn’t something to mess around with.
FAQs On Gas Stove Repair Basics
Q: Can I safely repair a gas stove myself? Yes — for surface-level issues like cleaning igniters, adjusting flames and replacing grates. Always turn off the gas supply before attempting any work, and avoid anything that involves gas valves or supply lines.
Q: My gas stove clicks but doesn’t light. What’s wrong? The most frequent cause is a dirty igniter clogged by food and grease. Clean the igniter with a dry toothbrush and some rubbing alcohol, let it dry completely, and try again.
Q: What does a healthy gas stove flame look like? A healthy flame is blue with little yellow or orange tips at the top. A flame that’s predominantly orange, yellow or very uneven typically indicates clogged burner ports.
Q: Is it OK to use water to scrub gas burner parts? Yes, but make sure everything is completely dry before reinstalling. Water near the igniter or in burner ports can interfere with ignition and trigger non-stop clicking.
Q: How can I tell if my gas stove has a leak? With the burners off and the gas on, apply soapy water to all connection points. If you see bubbles forming anywhere, that area has a gas leak. Turn off the gas immediately.
Q: The pilot light keeps going out. What should I do? Check for drafts near the stove, clean out the pilot opening and inspect the thermocouple. If the thermocouple is defective, it won’t detect the flame and will shut off gas to the pilot as a precaution.
Q: How often should I clean my gas stove burners? Wipe down the burner caps and grates after each use. Perform a deep clean of the burner ports once a month to ensure everything is functioning properly.
Q: What’s a simmer screw and what does it do? It’s an adjustment screw inside the burner valve that controls minimum gas flow. When the low-flame setting is too high or too low, turning this screw quickly corrects it.
Q: Can a gas stove be damaged by water? It can cause temporary issues — primarily with ignition. Moisture near the igniter causes continuous clicking and misfires. The stove typically functions normally again once it’s dried out.
Q: When is it time to replace my gas stove rather than repair it? If it needs repairs constantly, if parts are no longer available, or if the cost of professional repair exceeds half the price of a new stove, it’s probably time to replace it.
Final Thoughts — Little Changes, Big Impact
Gas stove repair basics are easier and more accessible than most people assume. You don’t need years of experience or a bag full of specialty tools.
A toothbrush and some rubbing alcohol can clean a burner that won’t ignite. A simple paper clip can restore a true flame. A tiny screwdriver can bring back cooking precision you thought was lost forever.
The secret is knowing what to look for, taking common-sense precautions and tackling one issue at a time. The majority of stove problems are minor to begin with — and only grow worse because people ignore them.
Start with the simplest solution — clean those igniters. Then work your way through your stove methodically. With a little care, you’ll be surprised at how much better it runs.
And if something feels outside your comfort zone? That’s what professionals are for. Gas is powerful and useful — and it warrants respect.