

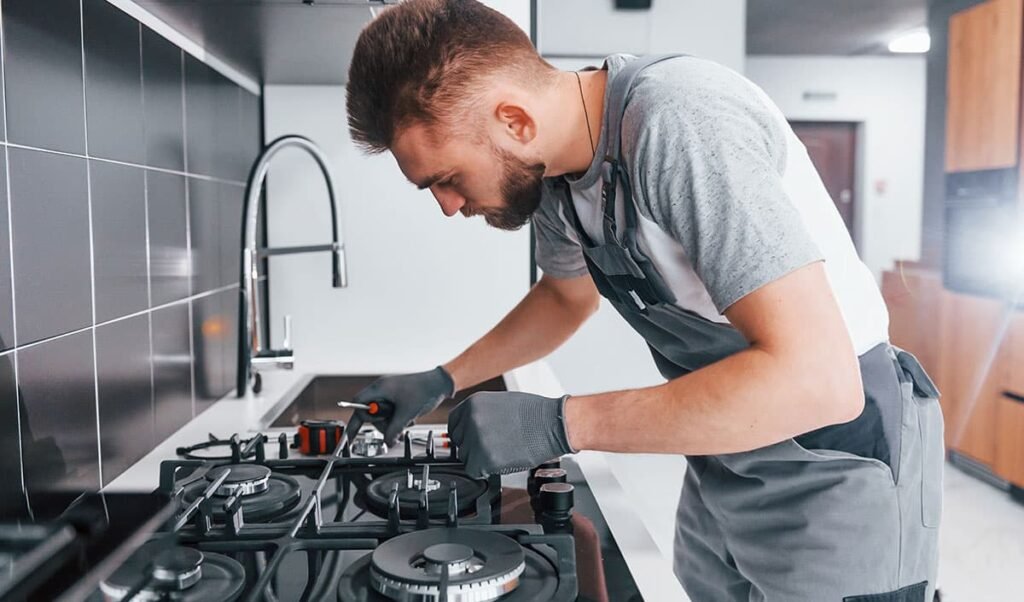
Introduction to Gas Stove Safety During Repairs
Gas stoves are a staple in many kitchens, providing that quick heat for cooking everything from a simple stir-fry to a elaborate family dinner. But when something goes wrong—like a burner that won’t light or a strange smell lingering in the air—it’s tempting to roll up your sleeves and fix it yourself. After all, who wants to wait for a technician or pay a hefty bill? However, diving into gas stove repairs without prioritizing safety can turn a minor issue into a major hazard. Fires, explosions, gas leaks—these aren’t just scare tactics; they’re real risks that have led to countless accidents in homes around the world.
I remember a story from a neighbor years ago. He thought he could tweak the igniter on his old gas range without much fuss. Skipped a few steps, didn’t ventilate the room properly, and next thing you know, there’s a small flash fire that singed his eyebrows and scorched the cabinets. Luckily, it wasn’t worse, but it drove home the point: safety isn’t optional. It’s the foundation of any repair job. This article dives into six essential safety ideas for gas stove repairs that can help prevent accidents. These aren’t complicated rules; they’re practical steps drawn from common sense, expert advice, and lessons learned from real-life mishaps.
Why focus on safety? Gas stoves run on natural gas or propane, both highly flammable. A tiny leak can build up and ignite with a spark from a light switch or even static electricity. According to reports from fire departments, thousands of home fires each year stem from appliance malfunctions, and gas stoves are often culprits. But with the right precautions, you can handle basic repairs confidently. We’re talking about things like replacing a burner grate, fixing a faulty thermocouple, or cleaning out clogged ports—tasks that don’t require professional certification but do demand respect for the dangers involved.
Before we get into the specifics, let’s set the stage. Always start by assessing whether the repair is within your skill level. If it involves major components like the gas line or internal wiring, call a pro. For basics, though, these safety ideas will guide you. They’ll cover preparation, tools, environment, and post-repair checks. Think of them as your personal checklist to keep things smooth and incident-free.
One key thing: education is power. Understanding how your stove works helps. A typical gas stove has burners connected to a gas manifold, controlled by valves and ignited by sparks or pilots. Leaks often happen at connections, and improper handling can exacerbate them. By following these ideas, you’re not just fixing a problem; you’re ensuring your home stays safe for everyone in it.
Now, let’s move into the first safety idea, which forms the bedrock of any gas-related work.
Safety Idea 1: Always Shut Off the Gas Supply Before Starting
The very first step in any gas stove repair should be isolating the gas source. It sounds basic, but you’d be surprised how many people overlook it in their eagerness to get the job done. Shutting off the gas prevents any fuel from flowing while you’re poking around, eliminating the risk of an unexpected leak turning into a fireball.
How do you do this? Locate the shut-off valve. On most stoves, it’s behind the unit, connected to the gas line. It’s usually a lever or knob—turn it perpendicular to the pipe to close it. If your stove is hardwired into the home’s gas system, there might be a main shut-off elsewhere, like in the basement or utility room. Test it by trying to light a burner; if nothing happens, you’re good.
Why is this so crucial? Gas is odorless in its pure form, but suppliers add mercaptan to make it smell like rotten eggs. Still, if you’re working in a confined space, you might not notice a slow leak right away. I’ve heard of cases where folks disassembled parts without cutting the supply, and a loose fitting let gas seep out. One spark from a tool, and boom—disaster. By shutting off the gas, you create a zero-risk environment for that phase.
But don’t stop there. After shutting off, ventilate the area. Open windows, turn on fans, or even use an exhaust hood. This disperses any residual gas. Wait at least 5-10 minutes before starting work. If you smell gas at any point, stop everything, evacuate, and call emergency services. No repair is worth risking carbon monoxide poisoning or an explosion.
Tools matter here too. Use a wrench that’s the right size for the valve to avoid stripping it. And wear gloves—not just for grip, but to protect against sharp edges or hot parts if the stove was recently used. Speaking of which, ensure the stove is cool before touching anything. Burns from residual heat are common slip-ups.
Extending this idea, label your shut-off valve if it’s not obvious. In older homes, these can be hidden or rusty. A quick photo on your phone for reference can save time in future repairs. Also, consider installing a gas detector alarm near the stove. These devices beep if levels rise, giving you an early warning.
In practice, let’s say you’re repairing a burner that won’t ignite. After shutting off the gas, remove the grates and caps carefully. Clean with soapy water, not abrasives that could damage surfaces. Reassemble, then turn the gas back on slowly, checking for leaks with a soap solution—bubbles mean trouble.
This step alone has prevented countless accidents. Fire safety organizations emphasize it in their guidelines, and for good reason. It’s simple, effective, and sets a safe tone for the rest of the repair.
Moving on, once the gas is off, you need to think about your workspace.
Safety Idea 2: Prepare a Well-Ventilated and Clutter-Free Workspace
A cluttered kitchen counter or poor airflow can turn a straightforward repair into a chaotic mess with hidden dangers. Safety idea number two is all about setting up your environment properly. Good ventilation clears out fumes, and a clear space reduces trips or knocks that could cause sparks or spills.
Start with ventilation. Gas repairs release potential vapors, even with the supply off. Open multiple windows for cross-breeze, or use portable fans to push air out. If your kitchen has a range hood, run it on high. Avoid working in enclosed spaces like a tiny apartment kitchen without doors open. Fresh air dilutes any gas pockets and keeps you alert—stale air can make you drowsy, leading to mistakes.
Now, declutter. Move pots, pans, utensils, and anything flammable away from the stove. Paper towels, dishcloths, oils—these can ignite easily if a stray spark happens. Clear a radius of at least three feet around the stove. If you need to pull the stove out from the wall, do so gently to avoid straining the gas line or electrical cord.
Lighting is part of this too. Work in bright conditions to spot issues clearly. Use a flashlight for under-the-stove peeks, but ensure it’s not one that could spark—LEDs are safe. Natural daylight is best, but if it’s evening, add lamps without extension cords snaking across the floor, which are trip hazards.
Personal protective equipment fits here. Safety goggles protect eyes from debris or splashes, gloves shield hands, and closed-toe shoes prevent stubbed toes on heavy parts. If you’re sensitive to smells, a mask can help, though it’s not always necessary for basic repairs.
Let’s apply this to a real scenario: fixing a loose oven door hinge. With the area clear, you can lay out tools like screwdrivers and pliers without them getting lost in clutter. Ventilation ensures no buildup if you accidentally nudge a connection. I’ve fixed similar issues in my own home, and having space to maneuver made it stress-free.
Moreover, keep kids and pets out. A curious cat knocking over a tool could spell trouble. Post a sign or close the door. And have a fire extinguisher handy—rated for Class B (flammable liquids and gases). Know how to use it: pull, aim, squeeze, sweep.
This preparation extends to mental readiness. Don’t rush. If you’re tired or distracted, postpone the repair. Accidents spike when people are hurried.
By creating this safe zone, you’re minimizing external risks, letting you focus on the task.
Safety Idea 3: Use the Right Tools and Parts for the Job
Using makeshift tools or incompatible parts is a recipe for failure—and danger. The third safety idea stresses selecting proper equipment to ensure repairs are done correctly without compromising the stove’s integrity.
First, identify what you need. For gas stoves, common tools include adjustable wrenches, screwdrivers (Phillips and flathead), needle-nose pliers, and a multimeter for electrical checks. Avoid using kitchen knives as screwdrivers; they slip and cause injuries. Invest in a basic toolkit if you don’t have one.
Parts are trickier. Always use manufacturer-approved replacements. For example, if replacing a burner orifice, get the exact match for your model. Wrong sizes can lead to uneven flames or leaks. Check your stove’s manual (usually online if lost) for part numbers. Order from reputable suppliers, not cheap knockoffs that might not seal properly.
Why does this matter? Improper tools can damage fittings, leading to gas escapes. A stripped screw might mean you can’t reassemble tightly. In one instance I recall from online forums, someone used pliers on a delicate valve and cracked it, causing a persistent leak that required professional intervention.
Safety checks with tools: Inspect them for wear. Rusty wrenches can slip. And for electrical parts, like testing igniters, unplug the stove first—even with gas off, shocks are possible.
Technique is key. Tighten connections firmly but not overly; overtightening can crack components. Use thread sealant tape on gas fittings if recommended, but sparingly to avoid clogs.
Extend this to learning proper methods. Watch tutorials from trusted sources, like appliance manufacturer videos, not random YouTube clips that might skip safety.
In essence, right tools mean efficient, safe repairs. They prevent frustration and the temptation to cut corners.
Safety Idea 4: Detect and Handle Gas Leaks Properly
Even with precautions, leaks can occur. The fourth idea is about detection and response, crucial for preventing buildup that leads to explosions or poisoning.
Detection starts with your nose. That sulfur smell is your first clue. But don’t rely solely on it; some people have poor sense of smell, or the odorant can fade. Use a gas leak detector—a handheld device that beeps near leaks. Or, the classic soapy water test: mix dish soap with water, apply to connections, and watch for bubbles.
Where to check? Joints, valves, hoses—anywhere gas flows. After repairs, always test before full use. Turn gas on, apply solution, and observe.
If you detect a leak? Don’t panic. Shut off gas immediately, ventilate, and avoid sparks—no lights, phones, or appliances. Leave the house if strong, call pros from outside.
Prevention: Regularly inspect flexible hoses for cracks; replace every 5-10 years. Ensure connections are secure.
A friend once ignored a faint smell during a repair, thinking it was residual. It wasn’t; a loose nut was the issue. Quick fix, but lesson learned.
Carbon monoxide detectors are allies here. Gas stoves can produce CO if malfunctioning. Place one nearby.
This idea ties back to vigilance. Regular maintenance spots issues early.
Safety Idea 5: Follow Proper Electrical Safety Protocols
Gas stoves often have electrical components like igniters or clocks. The fifth idea covers electrical safety to avoid shocks or fires.
Unplug the stove before starting. Even if gas-focused, electricity powers sparks. If hardwired, turn off the breaker.
Inspect cords for frays; replace if damaged. When working, keep hands dry—no wet floors or sweaty palms.
For testing, use a multimeter safely—set to correct mode, probe carefully.
Why important? A short can ignite gas residues. Stories abound of shocks during repairs.
Ground yourself to avoid static—touch a metal surface.
If unsure about wiring, stop and call help. DIY limits exist.
This ensures comprehensive safety, covering all angles.
Safety Idea 6: Conduct Thorough Post-Repair Testing and Maintenance
The final idea is testing after repairs. Don’t assume it’s fixed; verify.
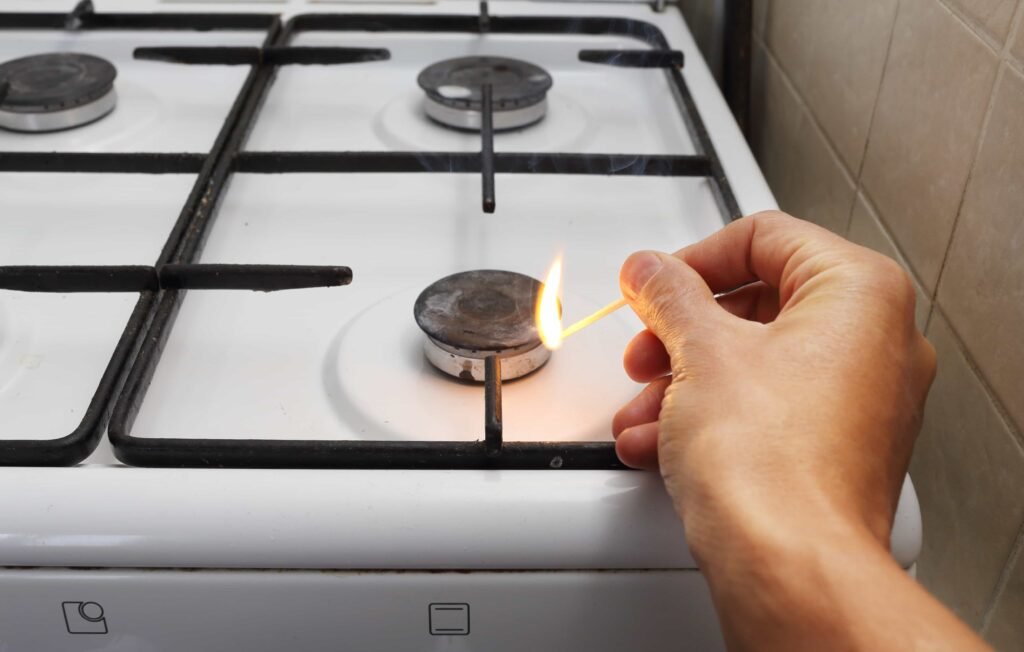
Reassemble, turn gas on slowly, check for leaks. Light burners, observe flames—blue and steady is good; yellow means issues.
Run the oven, check temperatures. Use for a short cook to monitor.
Document what you did for future reference.
Ongoing maintenance: Clean regularly, inspect annually.
This prevents recurring problems and ensures longevity.
Wrapping Up Gas Stove Repair Safety
These six ideas—shutting off gas, preparing workspace, using right tools, detecting leaks, electrical safety, and post-testing—form a solid framework. They turn potential hazards into manageable tasks. Remember, safety first keeps your home secure. If in doubt, seek professional help. Stay safe in the kitchen.