

5 Gas Stove Repair Basics That Were Fixed In Minutes
Meta Description: 5 Easy Gas Stove Repair Basics every homeowner should know. Fix clicking burners, weak flames, and ignition issues fast — no technician needed, just simple tools.
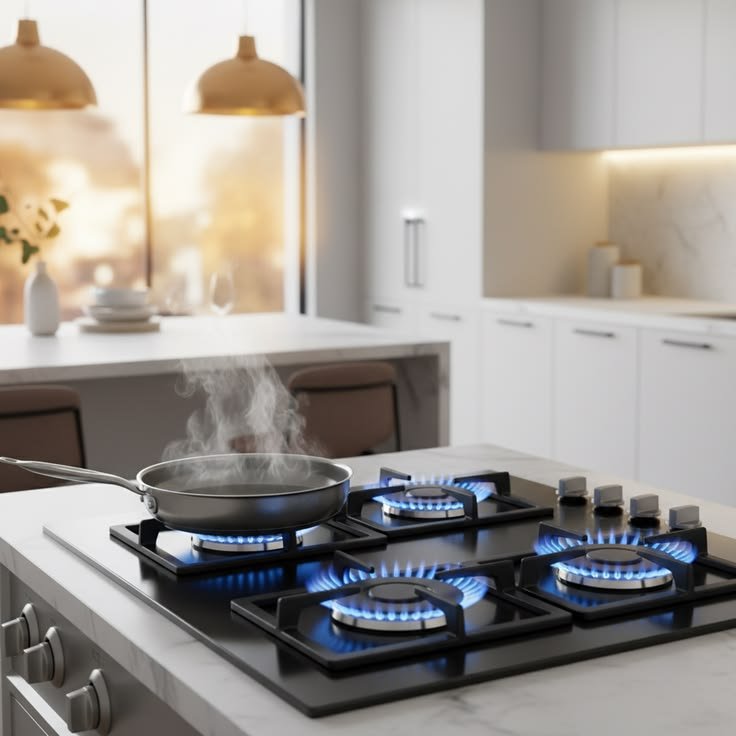
Your Gas Stove Is Misbehaving — Here’s the Good News
Your pasta water won’t boil. One burner clicks endlessly. Another hardly puts out a flame. Sound familiar?
It feels like a major emergency to have a broken gas stove. But here’s the thing — most problems with gas stoves are surprisingly simple to solve. You do not require a degree in appliance repairs. There’s no point in paying $150 for a service call. And you certainly don’t have to wait three days for a technician.
In this guide, you’ll discover 5 simple gas stove repair fundamentals that actual homeowners have used to get their stoves working again — most times in less than 10 minutes.
These fixes address the most common issues: burners that won’t light, flames that don’t look right, igniters that won’t stop clicking, and more. Each fix employs tools you already have lying around the house.
Let’s get your stove working again.
Before You Do Anything — Safety First
This cannot be skipped.
Gas stoves are generally safe to work on as long as you take proper precautions. The problem is that gas is flammable, and when safety steps are cut, a small fix can create a serious hazard.
Do these things before each and every repair:
- Switch off all the burner knobs
- Sniff around your stove — if you smell a strong gas odor, DO NOT try to make any repairs. Get out of the house and call your gas company right away.
- Ensure the stove has cooled before you get going
- If removing burner parts, turn off the gas supply valve
- Leave a window open for airflow
A slight odor of gas immediately after lighting a burner is normal. A powerful, persistent whiff of gas is not. Trust your nose on this one.
Once you’ve verified that everything is safe and secure, get to work.
Fix #1 — The Burner Doesn’t Ignite (Clogged Burner Ports)
By far the most common problem with gas stoves.
You twist the knob, you get the click, you might see a spark — and no flame. Or the flame only lights on one side of the burner and not the other. It is almost always a blocked burner port.
Why Does This Happen?
Each burner has small holes around its perimeter called ports. Gas flows through these ports to form the flame ring. When food spills, grease, or debris clog these holes, gas can’t flow freely. No flow, no flame.
This happens to everyone. That doesn’t mean your stove is broken — it just needs a cleanup.
What You’ll Need
- Straight pin, toothpick, or very thin needle
- Warm soapy water
- A small brush (an old toothbrush is ideal)
- A dry cloth or paper towels
How to Fix It
Step 1: Allow the burner to cool completely. Take off the grate that rests on top of the burner.
Step 2: Remove the burner cap — it just sits on top and lifts straight off in most stoves.
Step 3: Inspect the burner head. You’ll notice a ring of small holes. Shine a flashlight on them. Clogged ones will appear darker or have residue in them.
Step 4: Insert the pin or toothpick through each clogged hole. Work carefully — you want to avoid making the holes larger.
Step 5: Rinse the burner cap in warm soapy water. Scrub it with the toothbrush. Rinse and dry it completely. Avoid putting it back while it’s still wet.
Step 6: Reassemble and test. The flame will usually ring evenly and ignite within one or two clicks.
Pro Tip: Do not use a toothpick that may break off and become lodged in the hole. The safest tool for this task is a metal sewing needle.
Fix #2 — The Igniter Keeps Clicking
This one is incredibly annoying. You’re not even touching the stove, and click-click-click continues.
Why Does This Happen?
The igniter clicks when moisture or food debris enters the igniter module. It tricks the system into believing that you are attempting to light a burner.
This usually happens right after:
- A boil-over or spill
- Cleaning the stove with excessive water
- High humidity in the kitchen
What You’ll Need
- Dry cloth
- Rubbing alcohol
- Cotton swabs
- Hair dryer (optional but extremely useful)
How to Fix It
Step 1: Turn off all burner knobs. Ensure that nothing is in the process of being cooked.
Step 2: Carefully take out the burner grates and caps.
Step 3: Inspect the igniter — it’s the tiny white ceramic nub just to one side of each burner. See if it appears wet, dirty, or food-covered.
Step 4: Dry the affected area with a cloth first. Next, soak a cotton swab in rubbing alcohol and carefully wipe around the igniter tip. Alcohol evaporates quickly, which helps to dry out the moisture.
Step 5: Blast the area dry using a low setting on the hair dryer for 2–3 minutes. Keep it at least 6 inches away.
Step 6: Put grates and caps back on. Wait 5 minutes. Test the stove.
Usually, the clicking stops right after drying.
If the clicking persists with everything dry and clean, the igniter switch itself may be defective. That’s a part replacement — but it’s still DIY-friendly and typically runs $15–$30 on most stove models.
For more detailed guides on igniter issues and other common problems, visit Gas Stove Repair Basics — a helpful resource for homeowners who prefer to fix things themselves.
Fix #3 — Weak or Uneven Flame
Your burner ignites, but the flame appears feeble, uneven, or yellowish rather than blue. This is a signal that something isn’t right — and it’s generally easy to correct.
Reading Your Flame Color
| Flame Color | What It Means |
|---|---|
| Blue with tiny yellow tips | Normal and healthy |
| Mostly yellow or orange | Poor air-to-gas ratio or dirty burner |
| Only on one side | Clogged ports on that side |
| Very low/weak | Partially blocked gas flow |
| Red or dark orange | Possible damaged burner or wrong gas setup |
A blue flame indicates your stove is burning gas properly. Yellow flames are less efficient, wasting gas and generating more carbon monoxide. Fix this quickly.
According to the U.S. Consumer Product Safety Commission, improper gas combustion — indicated by yellow or orange flames — can increase carbon monoxide output in your home, making prompt attention to flame quality an important safety matter.
Why Does This Happen?
Typically, uneven flames are the result of one of two things:
- Clogged burner ports (same problem as Fix #1)
- A burner cap that was put back crooked after cleaning
How to Fix It
Step 1: Perform the cleaning steps in Fix #1. Partially clogged ports can also lead to uneven flames.
Step 2: After cleaning, take care to get the burner cap back in the correct position. It should lie flat and centered. Even a slight tilt causes an uneven flame.
Step 3: Most burner caps have a notch or groove that lines up with a pin on the burner base. Line these up every time.
Step 4: Start the burner and watch the flame for 30 seconds. It should create a perfect, even ring of blue flame.
That fix alone solves most complaints about uneven flame. Once you know what to look for, it only takes about 5 minutes.
Fix #4 — Burner Flame Goes Out Immediately After Ignition
You light the burner, press in the knob, it flames up — and then as soon as you let go of the knob, the flame dies. Frustrating.
Why Does This Happen?
Most modern gas stoves come with a safety feature referred to as a thermocouple (occasionally called a flame sensor or thermopile). This small device senses the heat from the flame. It holds the gas valve open when it detects heat. When it doesn’t detect heat — like if a flame unexpectedly goes out — it turns off the gas to prevent leaks.
If a thermocouple is dirty or its tip is out of alignment, it can’t detect the flame. So it turns off the gas even when the flame is burning just fine.
What You’ll Need
- Fine steel wool or very light grit emery cloth
- Soft cloth
- Flashlight
How to Fix It
Step 1: Let the burner cool. Locate the thermocouple — a thin copper or metal rod sitting just next to the spot where the flame actually burns. It is approximately 1–2 inches long.
Step 2: Examine the thermocouple tip. If it has a layer of dark residue or buildup, you’ve found your problem.
Step 3: Lightly polish the tip with fine steel wool. You’re only clearing away what’s on the surface, not grinding it down. Ten to 15 gentle strokes typically suffice.
Step 4: Wipe clean with a soft cloth.
Step 5: Check the positioning. The tip of the thermocouple should be directly in the path of the flame — close enough that it gets hot within seconds of the burner lighting. If it has been bent away from the burner, gently and cautiously bend it back toward the flame.
Step 6: Test the burner. After lighting, hold the knob in for 10–15 seconds to allow the thermocouple time to heat up. Then release. The flame should stay on.
If the cleaning doesn’t work, replacing the thermocouple is a common repair. It costs $5–$20 for the part and takes about 15 minutes.
Fix #5 — The Stove Knob Won’t Turn or Feels Stuck
This one never gets enough attention. A stuck or stiff knob can make the entire stove feel broken — but it’s almost never actually broken.
Why Does This Happen?
Over time, grease, sticky spills, and food residue build up behind and around the knob stem. The knob itself can also crack or warp from heat, making it harder to turn smoothly.
What You’ll Need
- Dish soap and warm water
- A small brush or cotton swab
- Food-safe lubricant or a drop of cooking oil
- Replacement knob (if cracked — often less than $10)
How to Fix It
Step 1: Pull the knob straight off. Most knobs on a gas stove do not require unscrewing — they just pull straight off.
Step 2: Examine the knob stem (the D-shaped piece of metal). Look for sticky residue around its base.
Step 3: Soak a cotton swab in warm soapy water and wipe around the stem and through the hole in the stove panel where the knob sits. Get in there thoroughly.
Step 4: Dry everything well.
Step 5: Spread a very small amount of food-safe lubricant or even a drop of cooking oil on the inner ring of the knob before pushing it back on. This helps it turn smoothly.
Step 6: Firmly push the knob back on and test.
If the knob is cracked or the inner D-hole is stripped, replace it. Search your stove’s model number (typically found inside the drawer or on a label underneath the stovetop) along with “replacement knob” and you’ll find the right part quickly and affordably.
Troubleshooting Gas Stoves: Quick Reference
| Problem | Most Likely Cause | Fix Time |
|---|---|---|
| Burner won’t light | Clogged burner ports | 5–10 minutes |
| Igniter keeps clicking | Moisture or food debris | 5–10 minutes |
| Weak or yellow flame | Blocked ports or misaligned cap | 5 minutes |
| Flame dies after lighting | Dirty or misaligned thermocouple | 10–15 minutes |
| Knob is stiff or stuck | Grease buildup or cracked knob | 5–10 minutes |
Tools That Every Home Cook Should Have Close At Hand
You do not require an elaborate toolkit. But with these items on hand, you can address any of those gas stove repair basics as soon as something goes wrong.
- Straight pin or sewing needle — for cleaning burner ports
- Old toothbrush — for cleaning burner caps and heads
- Cotton swabs — for cleaning around igniters and stems
- Isopropyl alcohol — quick drying and effective cleaner
- Fine steel wool — for thermocouple cleaning
- Hair dryer — to dry up moisture following spillages
- Flashlight — for illuminating what is really happening
- Food-safe lubricant — for knobs and other moving parts
Store these in a kitchen drawer and you’re always ready.
When DIY Isn’t the Answer
These five fixes will address a large portion of common gas stove problems. But some problems really do need a licensed technician. Know when to step back.
Call in the pros if you notice:
- A distinct or lingering smell of gas that won’t go away
- A hissing sound next to the gas line or valve
- A visible crack in the gas line or connection
- Problems that re-appear as soon as they’re fixed
- Error codes on digital stoves that point toward internal component failure
- Any indication of gas leakage detected by a detector alarm
These are not DIY situations. Your safety is always worth more than the cost of a repair.
How to Keep Your Gas Stove in Good Working Order
Prevention is always easier than repair. Make these habits a part of your routine and you may seldom need to troubleshoot.
Weekly:
- After cooking, wipe burner caps and grates with a damp cloth
- Clean up spills once the stove is cool
Monthly:
- Remove burner caps and wash them in soapy water
- Check igniter tips for buildup
Every 6 Months:
- Perform a deep clean on all burner parts
- Remove knobs and clean around the stems
- Inspect the thermocouple tip for residue
A clean stove is a working stove. With regular maintenance, the majority of repair calls can be eliminated altogether.
Basic Gas Stove Repair: FAQs
Q: Is it safe to fix a gas stove by myself? Yes — for the fixes mentioned here, it is perfectly safe as long as you adhere to the safety steps at the top of this article. None of these repairs require interacting with gas lines or any internal valves.
Q: My burner lights up, but it takes 5–6 clicks. Is that normal? One or two clicks is normal. Five or more typically indicates moisture around the igniter or partially blocked ports. Try Fix #1 and Fix #2 from this guide.
Q: Why is my burner flame orange? If you see orange or yellow flames, the gas-to-air mixture is off or the burner ports are clogged. Clean the ports first. If the cleaning doesn’t get rid of the orange flame, make sure your burner cap is in the correct position.
Q: Where do I find the model number on my stove? Look for the label inside the storage drawer underneath the stove, on a side panel behind the door, or under the stovetop lid (on lift-top models). The model number makes it easier to locate replacement parts online.
Q: Does a gas stove igniter wear out? Yes. Igniters generally last 5–10 years with normal usage. If yours sparks but fails to ignite the burner even after cleaning, the igniter itself might need replacing. For most stove models, this remains a do-it-yourself repair.
Q: Why does my gas stove smell like gas when I first turn it on? A very brief, faint whiff when first turning on a burner is perfectly normal — that’s just the gas arriving at the igniter before lighting. If the smell doesn’t dissipate within a few seconds after the flame is lit, turn off the stove and ventilate the room. If it continues, contact your gas company.
Q: My thermocouple is clean but the flame still goes out. What now? The thermocouple may need to be moved closer to the flame path, or it may need to be replaced. Replacement thermocouples are cheap and available from hardware stores. It’s a beginner-level repair.
To Wrap It Up — Most Gas Stove Issues Are Easy to Fix
It’s annoying to have a gas stove that won’t cooperate. But in most cases, the answer is much simpler than it appears.
Clogged ports, moisture-damaged igniters, misaligned burner caps, dirty thermocouples, and sticky knobs — these are the most common issues affecting gas stoves. And every one of them can be fixed in minutes with ordinary household tools.
The 5 gas stove repair basics covered in this guide are:
- Use a needle to clear clogged burner ports
- Dry out a clicking igniter with alcohol and heat
- Fix uneven flames by cleaning and realigning the burner cap
- Clean or reposition the thermocouple to stop the flame from going out
- Remove, clean, and lubricate stuck knobs
That’s it. No special skills needed. No expensive service calls. Just a few minutes and some attention to detail.
Take care of your stove, and your stove will take care of you — one perfectly flaming burner at a time.