

Understanding Ignition Problems in Gas Stoves
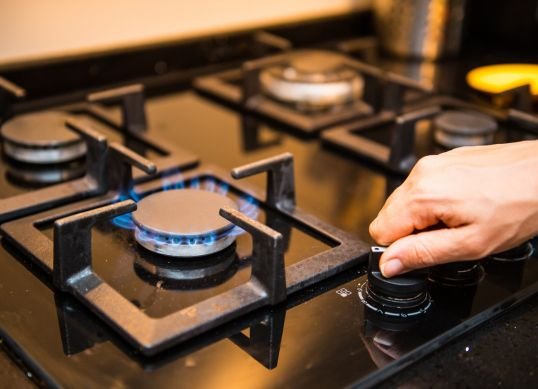
Gas stoves have been a staple in kitchens for decades, offering that quick, even heat that electric ones just can’t match. But like any appliance, they come with their quirks, and one of the most common headaches is ignition trouble. You know the drill: you turn the knob, hear that familiar clicking, but nothing happens. Or maybe the spark is there, but it’s weak and inconsistent, leaving you fumbling for matches. These issues can stem from a bunch of things—dirt buildup, faulty parts, or even something as simple as a loose connection. Before we get into the fixes, let’s talk safety because messing with gas isn’t something to take lightly.
Always start by shutting off the gas supply to your stove. There’s usually a valve behind it or at the main line. Unplug the stove if it’s got an electric igniter, which most modern ones do. And if you smell gas at any point, stop everything, open windows, and call a professional or your gas company right away. Don’t try to light anything. These repairs are basics, meant for DIY folks who are comfortable with tools, but if you’re unsure, it’s better to hire a technician. Repairing your own stove can save money—parts are often cheap, like under $20 for some—but a mistake could lead to leaks or fires. Okay, with that out of the way, let’s explore seven solid ideas to tackle those ignition woes. Each one builds on common problems I’ve seen in my own kitchen fixes and from chatting with repair buddies.
Idea 1: Start with a Thorough Cleaning of the Igniter
The igniter is that little electrode that creates the spark to light the gas. Over time, it gets gunked up with grease, food spills, and carbon residue from burning. This buildup acts like an insulator, weakening the spark or blocking it entirely. Cleaning it is often the quickest win, and it’s something you can do without any special tools beyond what’s in your cleaning cabinet.
First, make sure the stove is cool and disconnected. Remove the burner grates and caps to access the igniter—it’s usually a small ceramic piece with a metal tip near the burner. Use a soft brush, like an old toothbrush, dipped in a mix of warm water and dish soap to gently scrub away the grime. Avoid harsh chemicals or abrasives that could damage the ceramic. If it’s really stubborn, a bit of baking soda paste can help loosen things up. Let it sit for 10 minutes, then wipe clean with a damp cloth.
Why does this work? The spark needs a clear path to jump to the burner, and dirt disrupts that. In my experience, about half the time, this simple clean fixes the issue right away. But don’t stop at the igniter—check the burner ports too. Those tiny holes where gas comes out can clog, causing uneven ignition. Use a straightened paperclip or a needle to poke them clear, but be gentle to avoid widening them.
If cleaning doesn’t help, inspect for cracks in the igniter. Ceramics can fracture from heat cycles, and a damaged one won’t spark properly. Replacements are easy to find online or at hardware stores, matching your stove model. Installation is straightforward: unscrew the old one, plug in the new. Just ensure the wires are secure. This fix might take 15 minutes and cost $10-15. Remember, while cleaning, wear gloves to avoid oils from your skin interfering with the spark.
Expanding on this, think about prevention. Regular maintenance, like wiping down after each use, prevents buildup. In humid kitchens, moisture can mix with grease, making things worse. I’ve had stoves in coastal areas where salt air accelerates corrosion, so if that’s you, clean more often. Compare this to older stoves with pilot lights—they didn’t have electric igniters, so no sparking issues, but they wasted gas. Modern piezo or electronic igniters are efficient but need this TLC.
Idea 2: Verify and Adjust the Gas Supply Line
Sometimes the problem isn’t the igniter itself but the gas getting to it. A kinked line, low pressure, or even a partially closed valve can make ignition spotty. This is especially true in older homes or after moving the stove for cleaning.
Begin by checking the shut-off valve. It’s often a lever behind the stove—make sure it’s fully open, parallel to the pipe. If it’s been bumped, it might be half-closed, reducing flow. Next, inspect the flexible gas line for kinks or damage. These lines are corrugated metal or rubber, and they can bend awkwardly if the stove’s pulled out too far. Straighten any bends carefully, without forcing it, to avoid cracks.
If pressure seems low, it could be a utility issue. Call your gas provider to check the meter or lines outside. But for DIY, you can test by lighting another burner—if it works fine, the problem’s isolated. Or use a manometer, a cheap tool from hardware stores, to measure pressure at the stove inlet. Ideal is around 7-14 inches of water column for natural gas.
Adjusting might involve tightening connections. Use two wrenches—one to hold the fitting, one to turn—to avoid twisting the line. Apply pipe thread sealant if needed, but only on threads, not the flare. Leaks are dangerous, so after adjustments, mix soap and water, apply to joints, and look for bubbles when gas is on.
This idea ties into broader home maintenance. Gas lines age, and in earthquakes-prone areas, flexible lines are a must to prevent breaks. I’ve fixed stoves where the issue was a regulator valve stuck from disuse—common in vacation homes. Tapping it gently can free it, but replace if corroded. Cost for a new line? $20-50, and it’s a 30-minute job. Always test multiple times after fixing to ensure consistent ignition.
Idea 3: Reposition the Igniter for Optimal Spark Gap
The spark gap—the distance between the igniter tip and the burner—is crucial. If it’s too wide, the spark won’t jump; too narrow, it might short out. Manufacturers set it around 1/8 to 3/16 inch, but vibrations or cleaning can shift it.
To fix, remove the burner assembly. The igniter is mounted on a bracket—gently bend it to adjust the gap. Use a feeler gauge or even a business card (about 0.015 inches thick) as a spacer. Ensure the tip points directly at a burner port for best results.
Why bother? Electricity follows the path of least resistance, so a proper gap ensures the spark ignites the gas mix efficiently. In some stoves, like those with sealed burners, access is trickier—consult your manual. I’ve adjusted gaps on friends’ stoves where the problem started after a deep clean displaced things.
If bending doesn’t hold, the bracket might be worn—replace the whole igniter assembly. Parts are model-specific, so note your stove’s make and number. This fix is free if just adjusting, or low-cost otherwise. Pair it with cleaning for comprehensive results.
Historically, early gas stoves used manual lighting, avoiding these issues, but safety pushed for auto-ignition. Modern ones use high-voltage sparks, around 10,000 volts, so respect the electricity involved—always unplug first.
Idea 4: Inspect and Replace the Spark Module
The spark module is the brain behind the clicking—it’s a small box that generates the high-voltage pulses. If it’s failing, you might get no spark or intermittent ones across all burners.
Locate it usually under the cooktop or behind a panel. Unplug the stove, remove screws to access. Test by swapping wires between igniters—if the problem moves, it’s the igniter; if not, the module. Multimeters can check continuity, but for DIY, visual inspection for burnt spots or loose wires often suffices.
Replacement is plug-and-play: disconnect wires, unscrew, install new. Match the part number exactly—universal ones exist but might not fit perfectly. Cost: $30-60, time: 20-40 minutes.
This is common in older stoves where modules wear from constant use. Surge protectors help prevent electrical damage. I’ve replaced modules in apartments with shared power lines where spikes were frequent. After install, test all burners to confirm even sparking.
Idea 5: Check Wiring Connections for Loose or Damaged Wires
Wires carry the signal from the control knob to the module and igniter. Rodents, heat, or age can damage them, causing failures.
Trace wires from knobs to module. Look for frays, burns, or loose plugs. Tighten or reseat connections. If damaged, splice with wire nuts and electrical tape, but better to replace sections. Use high-temp wire if needed.
Safety note: exposed wires can short, causing shocks or fires. In my fixes, I’ve found wires melted from nearby heat—reroute them away from burners.
This idea overlaps with others; often, cleaning reveals wire issues. Cost is minimal unless replacing harnesses ($20-40).
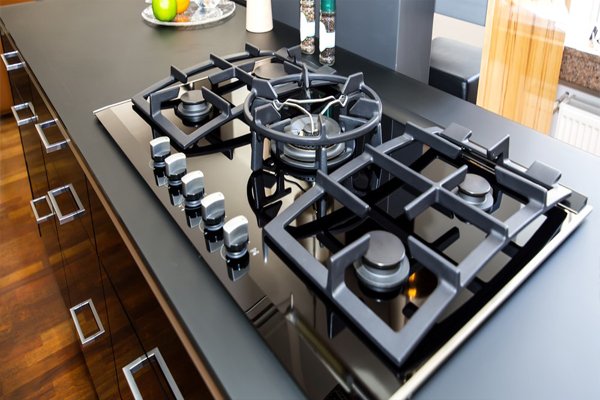
Idea 6: Clear Burner Caps and Ports of Debris
Burner caps distribute gas evenly, and if misaligned or clogged, ignition suffers. Ports block with spills.
Remove caps, soak in soapy water, scrub. Align properly on reassembly—there’s usually a notch. Clean ports as in Idea 1.
This prevents “lazy flame” where ignition is delayed. In busy kitchens, weekly checks help. Compare to commercial stoves with heavier caps—home ones are lighter, easier to displace.
Idea 7: Address Moisture and Environmental Factors
Moisture from spills or humidity can short the igniter. Dry thoroughly after cleaning. In damp areas, use dehumidifiers.
Also, check for drafts blowing out the spark. Adjust stove position or use wind shields.
This is often overlooked but key in certain climates. I’ve seen it in basements where humidity is high—silica gel packs near the stove help.
Wrapping Up: When to Call in the Pros
These seven ideas cover most basics, from cleaning to part swaps. Start simple, work up. If nothing works, or if it’s a warranty issue, pros have diagnostic tools. Regular maintenance extends stove life, saving hassle. With patience, you’ll have that reliable click-and-light back in no time.