

5 Smart Gas Stove Repair Basics Repair Hacks That Saved Me Money
I didn’t think much about my gas stove until the day it stopped working right in the middle of cooking dinner. The flame went uneven, one burner refused to light, and another made a faint clicking sound without igniting. That moment forced me into something I had always avoided: understanding how my stove actually worked.
What followed was not just a repair journey, but a practical education. Instead of immediately calling a technician every time something went wrong, I began learning simple, safe, and effective fixes. Over time, these small efforts saved me a surprising amount of money—and gave me confidence in handling basic home maintenance.
This article isn’t just a list of tips. It’s a collection of real-life lessons, small experiments, mistakes, and discoveries. If you’ve ever faced a stubborn gas stove problem, these five smart repair basics might help you fix things faster, cheaper, and with far less stress.
understanding the basics before touching anything
Before diving into repairs, I learned the hard way that rushing into fixing a gas appliance without understanding it can make things worse. A gas stove may look simple, but it combines gas flow, air mixing, ignition systems, and safety mechanisms.
The first lesson was always to turn off the gas supply before attempting any repair. This sounds obvious, but when you’re frustrated and hungry, it’s easy to overlook.
The second lesson was observation. Instead of immediately taking things apart, I started watching how the stove behaved. Was the flame weak? Was it yellow instead of blue? Did it click without lighting? Each of these signs pointed to different underlying issues.
Once I started paying attention, I realized many problems had simple causes—like dirt, moisture, or misalignment—rather than serious mechanical faults.
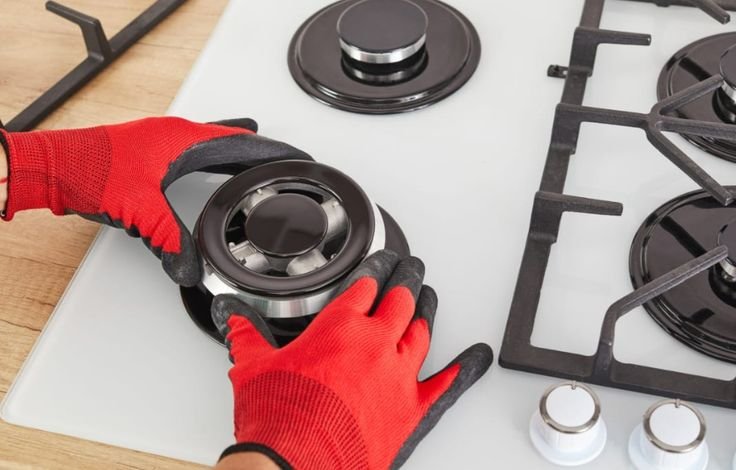
hack one: cleaning the burner ports properly changed everything
The first real breakthrough came when I learned how important burner cleanliness is. One of my burners had a weak, uneven flame. At first, I assumed something major was wrong. I even considered replacing parts.
But then I noticed tiny food particles stuck in the burner holes. These small openings, called ports, are where gas escapes and mixes with air. If even a few are blocked, the flame becomes irregular.
I removed the burner cap and used a thin pin to gently clean each hole. It took patience, but the difference was immediate. The flame returned to a steady blue ring.
Later, I made it a habit to clean burners weekly. Not a deep clean every time—just a quick wipe and inspection. This simple routine prevented many future issues.
One thing I learned was not to use anything too hard or sharp that could damage the ports. A soft brush or wooden toothpick worked well. Also, making sure the burner was completely dry before placing it back was crucial.
This single habit probably saved me from multiple unnecessary service calls.
hack two: fixing ignition problems without replacing parts
The clicking sound without ignition used to confuse me. I thought the igniter was broken. But over time, I discovered that ignition issues are often caused by moisture or dirt, not faulty components.
Once, after cleaning my stove, one burner refused to light. It kept clicking but didn’t produce a flame. I almost gave up and called for help.
Then I remembered reading that moisture can block the spark. I removed the burner cap and let everything air dry for a while. To speed things up, I gently used a dry cloth.
When I tried again, the burner lit instantly.
Another time, grease buildup around the igniter prevented proper sparking. A careful cleaning fixed the issue again.
The key insight here was that ignition systems are sensitive. They don’t always fail—they just need a clean, dry environment to function properly.
Instead of replacing parts right away, I now check for:
moisture
grease buildup
misaligned burner caps
Nine out of ten times, the fix is simple.
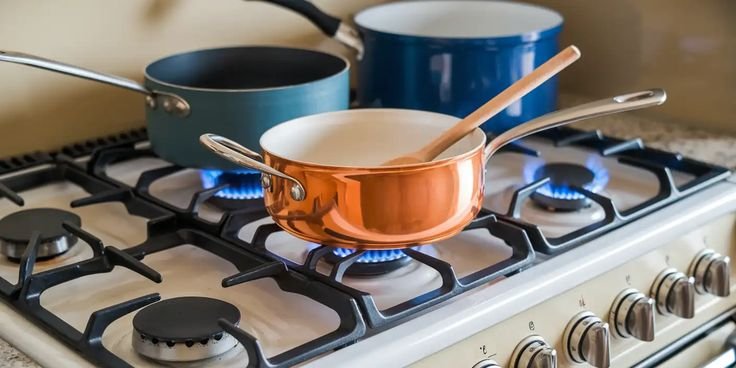
hack three: correcting flame color by adjusting air flow
One of the more surprising things I learned was about flame color. A healthy gas flame should be blue. When I saw yellow or orange flames, I initially ignored it. The stove was still working, so I didn’t think it mattered.
But over time, I realized that improper combustion not only wastes gas but can also produce soot and even harmful gases.
The solution often lies in the air-to-gas ratio. Most stoves have an adjustable air shutter near the burner tube. This controls how much air mixes with the gas before ignition.
The first time I tried adjusting it, I was nervous. But after turning off the gas and carefully accessing the burner assembly, I found the small sliding mechanism.
A slight adjustment made a visible difference. The yellow flame turned blue and steady.
This taught me that not all problems require replacement. Sometimes, a small calibration can restore proper function.
I now occasionally check the flame color as part of regular use. It’s a simple visual indicator that everything is working as it should.
hack four: fixing low flame issues without calling a technician
Low flame problems used to frustrate me the most. Turning the knob fully and still getting a weak flame felt like a serious issue.
At first, I assumed it was a gas supply problem. But then I discovered that the issue was often localized to the burner or valve.
One common cause was partial blockage in the gas line leading to the burner. Cleaning the burner and ensuring proper alignment usually solved it.
Another cause was the control knob itself. Over time, grease and dirt can accumulate inside, affecting how it regulates gas flow.
I once removed a knob and found it sticky inside. After cleaning it carefully and reinstalling it, the flame returned to normal.
There was also a time when the burner cap wasn’t sitting properly. It looked fine at a glance, but it was slightly tilted. That small misalignment disrupted gas flow and reduced the flame.
This taught me to check simple things first:
Is the burner cap seated correctly?
Are the ports clean?
Is the knob functioning smoothly?
These checks often solved what seemed like a major problem.
hack five: preventing leaks and staying safe without panic
Safety is something I took more seriously after I smelled gas one day. It wasn’t strong, but it was noticeable. That moment made me realize how important it is to handle gas appliances carefully.
The first step was not to panic. I turned off the gas supply and opened windows for ventilation.
Then I checked the connections. Over time, fittings can loosen slightly. Using soapy water, I applied it to the joints and looked for bubbles—an easy way to detect leaks.
Fortunately, the issue was a slightly loose connection. Tightening it solved the problem.
I also learned not to use matches or open flames when checking for leaks. Simple methods are safer and just as effective.
Now, I periodically check connections, especially after moving or cleaning the stove. It takes only a few minutes but adds peace of mind.
lessons that went beyond repairs
What started as a need to fix a broken burner turned into a broader lesson about self-reliance. I realized that many household problems are not as complicated as they seem.
The key is patience, observation, and a willingness to learn. Instead of reacting with frustration, I began approaching problems with curiosity.
Another important lesson was knowing my limits. While I became comfortable with basic repairs, I also recognized when a problem required professional help. Complex gas line issues or internal component failures are not worth risking safety.
Balancing confidence with caution made all the difference.
small habits that make a big difference
Over time, I developed a few simple habits that kept my stove in good condition:
wiping spills immediately
keeping burners dry
checking flame color regularly
cleaning burner ports weekly
ensuring proper alignment after cleaning
These habits didn’t take much effort, but they prevented most common issues.
I also kept a small cleaning kit nearby—just a brush, cloth, and a few basic tools. Having everything ready made it easier to maintain consistency.
the financial impact of doing it yourself
Before learning these basics, I used to call a technician for even minor issues. Each visit cost money, and sometimes the fix was something I could have done myself in minutes.
By handling simple repairs on my own, I saved not only service fees but also time. There was no waiting for appointments or dealing with repeated visits.
More importantly, I gained confidence. Instead of feeling helpless when something broke, I felt capable of handling it.
That confidence extended to other areas of home maintenance as well.
when to stop and call a professional
Despite all these hacks, there are situations where professional help is necessary. Recognizing these situations is part of being responsible.
If there is a strong gas smell that doesn’t go away
if ignition systems fail completely despite cleaning
if there are visible damages to gas lines or valves
if repairs require disassembling internal components
In such cases, it’s better to step back and seek expert assistance.
Trying to fix everything on your own can sometimes create bigger problems.
a practical mindset toward everyday problems
What I gained from this experience was more than just repair skills. It was a shift in mindset.
Instead of seeing problems as obstacles, I began seeing them as opportunities to learn. Each issue became a small puzzle to solve.
This mindset reduced stress and made everyday challenges feel manageable.
Even if something didn’t work on the first try, I learned to stay patient and try again.
frequently asked questions
- why is my gas stove flame yellow instead of blue
A yellow flame usually means incomplete combustion, often caused by improper air-to-gas ratio or dirty burners. Cleaning the burner and adjusting airflow typically solves the issue. - what should I do if my burner clicks but doesn’t light
First, check for moisture or grease around the igniter. Dry and clean the area thoroughly. Also, ensure the burner cap is properly aligned. - how often should I clean my gas stove burners
Light cleaning can be done weekly, while a deeper cleaning once a month helps maintain proper performance and prevent buildup. - is it safe to fix a gas stove by myself
Basic maintenance like cleaning and minor adjustments is generally safe if you turn off the gas supply and follow precautions. For complex issues, it’s best to call a professional. - why is my gas stove flame too low even on high setting
This could be due to blocked burner ports, misaligned caps, or issues with the control knob. Cleaning and checking these parts usually helps. - how can I check for gas leaks at home
You can apply soapy water to connections and look for bubbles. If bubbles appear, there may be a leak. Always avoid using open flames for testing.
final thoughts
Looking back, I’m glad my gas stove gave me trouble. It forced me to learn something practical that continues to benefit me.
These five repair basics are not complicated, but they are powerful. They turn small frustrations into manageable tasks and help avoid unnecessary expenses.
You don’t need to be an expert to take care of your home. Sometimes, all it takes is a little patience, a bit of curiosity, and the willingness to try.