

4 Powerful Gas Stove Installation & Setup Tips for Beginners
There’s something quietly satisfying about setting up a gas stove correctly for the first time. It’s not just about getting a flame to light — it’s about safety, efficiency, and building a small but important skill that makes your kitchen feel truly yours. Many beginners assume gas stove installation is complicated or risky, but the truth sits somewhere in the middle: it’s manageable if you respect the process.
This guide doesn’t just walk you through steps. It gives you awareness — the kind that prevents mistakes before they happen. Because when it comes to gas appliances, confidence should always come from understanding, not guesswork.
- Understand your setup before touching anything
Before you even think about connecting pipes or turning knobs, take a pause and look at what you actually have in front of you. Most installation problems don’t come from technical difficulty — they come from assumptions.
Start by identifying your gas source. Is it a cylinder (LPG) or a piped gas system? Each has subtle differences in connection methods, pressure expectations, and safety checks. A beginner often overlooks this and treats every stove setup the same way.
Next, inspect the stove itself. Look at the inlet nozzle where the gas will enter. Check if it already has a fitting or if you need to attach one. Many modern stoves come pre-fitted, but older or budget models might not. Also, confirm whether your stove is compatible with your gas type. LPG and natural gas appliances are not always interchangeable without adjustments.
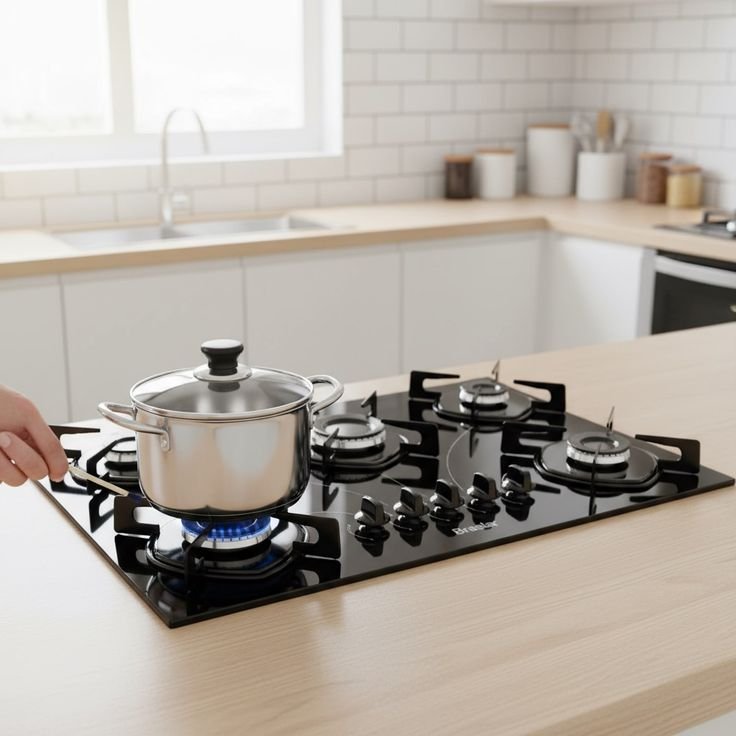
Then, focus on the surroundings. Where will the stove sit? A stable, level surface is non-negotiable. Uneven placement doesn’t just look off — it can affect flame distribution and even lead to tipping hazards. Ensure there is proper ventilation. Gas needs oxygen to burn cleanly, and your kitchen needs airflow to prevent buildup of fumes.
There’s also the matter of clearance. Beginners often push the stove too close to walls or cabinets. Leave enough space around it, especially behind, to prevent heat damage and allow safe pipe routing. If the gas pipe bends too sharply because of tight placement, it weakens over time.
A useful habit here is to do a “dry run.” Place everything without connecting it. Visualize where the pipe will go, where the regulator will sit, and how accessible the control points are. This simple mental rehearsal can eliminate half the errors people usually make.
- Use the right connections — and respect their importance
Connections are where safety lives or dies. It’s tempting to think a pipe is just a pipe, but in gas installation, quality matters more than convenience.
Start with the hose. Use a certified gas hose — not a random rubber tube. It should be labeled for gas use, with proper thickness and heat resistance. Cheap hoses crack, leak, and degrade faster than you expect. That’s not a risk worth taking.
Measure the distance between the gas source and the stove. Choose a hose that fits comfortably without stretching or excessive slack. A stretched hose puts stress on the connectors, while too much slack increases the chance of accidental bending or contact with hot surfaces.
Now, the regulator. This small device controls gas pressure from the cylinder. Make sure it’s compatible with your cylinder type. When attaching it, you should feel a firm lock — not a loose fit. If it feels uncertain, stop and recheck. Gas leaks often originate here.
When connecting the hose to the stove nozzle and regulator, push it in fully. Then secure it with clamps if required. Some setups rely on tight-fitting hoses, but clamps add an extra layer of security. Think of them as insurance.
Avoid using excessive force. If something doesn’t fit easily, it probably isn’t the right size. Forcing connections damages fittings and creates hidden weaknesses.
One overlooked detail is the orientation of the hose. It should follow a natural curve, not a twisted path. Twists create internal stress, which can eventually lead to cracks.
Also, keep the hose away from heat sources. It shouldn’t touch the back of the stove where heat accumulates. Even a heat-resistant hose has limits.
If you’re working with a piped gas system, there may be metal connectors involved. These require tighter sealing, often using thread seal tape. Apply it correctly — wrap in the direction of the thread so it doesn’t unravel when tightened.
- Check for leaks like your safety depends on it — because it does
This step separates a careful installer from a careless one. And it’s not optional.
Once everything is connected, do not rush to light the stove. First, perform a leak test. It’s simple and doesn’t require special tools.
Mix a small amount of dish soap with water and apply it to all connection points — the regulator, hose ends, and stove inlet. Then slowly turn on the gas supply without lighting the burner.
Watch closely. If bubbles form, there’s a leak. Even tiny bubbles matter. Turn off the gas immediately and fix the connection before proceeding.
Do not ignore a minor leak thinking it will “settle.” Gas leaks don’t fix themselves — they grow.
Your nose is another tool. LPG has a distinct smell added for detection. If you sense it at any point, don’t take chances. Ventilate the area and recheck everything.
A common beginner mistake is testing leaks with a flame. This is dangerous and unnecessary. Soap solution works perfectly and keeps you safe.
After confirming there are no leaks, wipe off the soap solution and ensure everything is dry. Moisture sitting on metal parts can lead to corrosion over time.
Even after initial installation, make leak testing a habit. Check periodically, especially if you move the stove or adjust the hose.
- Learn flame behavior — it tells you everything
Once your stove is connected and safe, the next step is understanding how it behaves. This is where many beginners stop paying attention, but it’s actually where you gain long-term confidence.
Light the burner and observe the flame. A healthy flame is blue and steady. It indicates proper gas flow and efficient combustion.
If the flame is yellow or orange, something is off. It could mean incomplete combustion, often caused by blocked burner holes or incorrect air-gas mixture. Over time, this wastes fuel and produces soot.
Listen to the sound as well. A gentle, consistent hiss is normal. Loud or irregular noises might indicate pressure issues or improper connections.
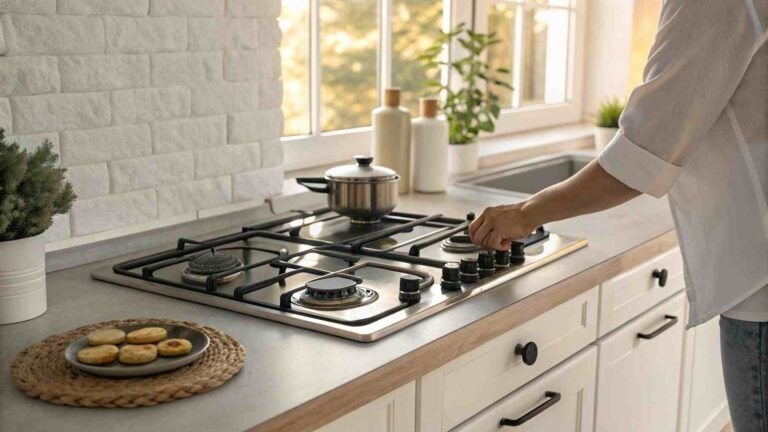
Try adjusting the flame using the control knob. It should respond smoothly. If it flickers or goes out easily, there might be airflow problems or misalignment in the burner assembly.
Remove the burner cap and place it back correctly if needed. Sometimes during installation, parts don’t sit perfectly, affecting performance.
Another detail is ignition. If your stove has auto-ignition, test it multiple times. It should spark reliably. If it struggles, check battery or ignition alignment.
Pay attention to how long it takes for the flame to stabilize after turning on. Delays can hint at air trapped in the line, which usually clears after a few uses.
Also, observe how the stove handles cookware. Flames should stay within the base of the pan. If they spread too wide, it’s inefficient and potentially unsafe.
Over time, these small observations help you detect issues early. Instead of reacting to problems, you start preventing them.
Practical insights that beginners rarely hear
Installation guides often focus on steps but ignore the mindset. Here are a few practical insights that come from real-world experience.
Don’t install in a rush. Most mistakes happen when someone is trying to “just get it done.” Take your time.
Keep a habit of turning off the gas at the source when not in use for long periods. It adds a layer of safety.
Clean the burner regularly. Dust and food particles clog holes and affect flame quality.
Avoid placing flammable items near the stove. It sounds obvious, but cluttered kitchens often ignore this.
If something feels off, trust that instinct. Recheck rather than ignore.
When to call a professional
There’s no prize for doing everything yourself. If you encounter unusual fittings, damaged parts, or persistent leaks, it’s better to call a technician.
Similarly, if your kitchen setup requires modifications — like drilling, rerouting pipes, or installing built-in stoves — professional help is the smarter route.
Think of it this way: basic installation is about connecting safely. Anything beyond that moves into technical territory.
Building confidence over time
Your first installation might feel uncertain, but it won’t stay that way. Each time you check connections, observe flames, and maintain your setup, you build familiarity.
Soon, you’ll stop second-guessing every step. You’ll know what a proper connection feels like, what a clean flame looks like, and when something needs attention.
That’s the real goal — not just installing a gas stove, but understanding it.
FAQs
- Is it safe for beginners to install a gas stove on their own?
Yes, it can be safe if you follow proper steps, use the right materials, and perform leak checks. However, if anything feels unclear or complex, calling a professional is the safer choice. - How often should I check for gas leaks after installation?
It’s a good practice to check once every few weeks, or immediately after moving or adjusting the stove or hose. - What should I do if I smell gas in my kitchen?
Turn off the gas supply immediately, open windows for ventilation, avoid using electrical switches, and inspect connections. If the smell persists, contact a professional. - Why is my gas stove flame yellow instead of blue?
A yellow flame usually indicates incomplete combustion, often caused by clogged burners or improper air-gas mixture. Cleaning the burner usually helps. - Can I use any rubber pipe for gas stove connection?
No, always use a certified gas hose designed for high pressure and heat resistance. Regular rubber pipes are unsafe for gas use. - How long does a gas hose typically last?
Most gas hoses last 2–5 years depending on quality and usage. Regular inspection is important, and replacement should be done at the first sign of wear or cracks.
A well-installed gas stove doesn’t demand attention — it quietly does its job. But getting to that point requires care, patience, and a willingness to understand the basics. Once you’ve done it right, every meal you cook carries a bit of that confidence with it.