

Let me be honest with you — I ignored my gas stove for almost two years. Wiped it down occasionally, sure, but actual maintenance? Never crossed my mind. Then one morning, my burner refused to light, and I heard that dreaded clicking sound that just kept going… and going… and going. The technician who came over took one look and said, “Brother, when did you last clean the igniter?” I had no answer.
That one expensive service call taught me more about gas stove maintenance than I’d learned in years of cooking. And the frustrating part? Most of the damage was completely preventable.
So if you’re someone who uses their stove daily and assumes it’ll keep working forever without much attention — this one’s for you.
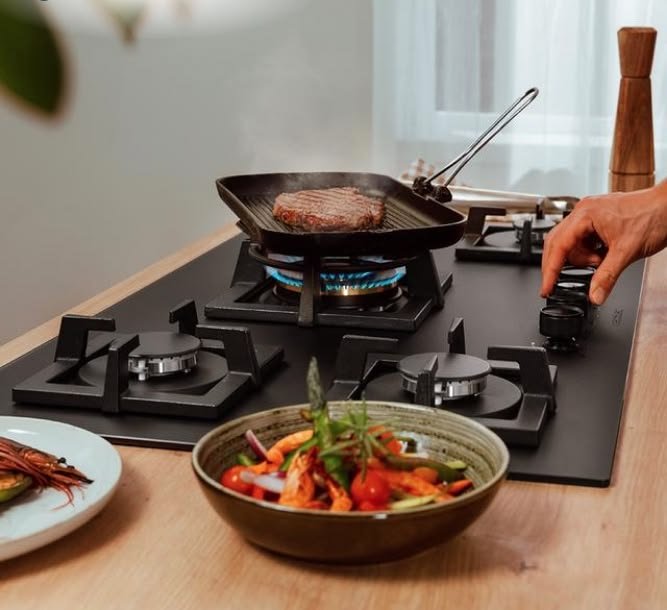
1. Ignoring Burner Cap Alignment After Cleaning
This is probably the most common mistake people make right after doing something right — cleaning their stove. You wash the burner caps, let them dry, slap them back on, and wonder why the flame looks uneven or the igniter keeps clicking.
The burner cap has to sit perfectly flat and centered. Even a slight tilt will mess up the gas flow and cause uneven flames or ignition failure.
What to do instead:
- After washing, let the caps air dry completely (or pat dry with a cloth)
- Place them back carefully, pressing gently until they sit flush
- Do a visual check — the cap should look level from all sides
- Test with a low flame first before cranking it up
I started keeping a small flashlight in my kitchen drawer just to check alignment. Sounds excessive, maybe. But it’s saved me multiple “why won’t this burner light” moments.
2. Using the Wrong Cleaning Products
Not everything that cleans your countertop is safe for your stove. A lot of people (myself included, initially) grab whatever multipurpose spray is nearby and go to town on the burner grates and surface.
Harsh chemicals can corrode metal components over time, damage the finish, and even leave residue that affects flame quality. And bleach-based cleaners near gas components? Definitely not something you want to experiment with.
Safer alternatives:
| Surface | Recommended Cleaner |
|---|---|
| Grates (cast iron) | Warm soapy water, baking soda paste |
| Burner caps | Mild dish soap, soft brush |
| Stove surface | White vinegar + water solution |
| Igniter tips | Dry toothbrush only (no liquid) |
The igniter tip is the one place you never want to spray liquid. It’s a small ceramic piece, and moisture is its enemy. A dry toothbrush to knock off debris is all it needs.
3. Forgetting to Clean the Burner Ports
Those tiny holes around the edge of your burner? They’re called burner ports, and they’re responsible for distributing the gas evenly for a clean flame. When they get clogged with grease or food residue, your flame starts looking like a mess — uneven, orange, or only burning on one side.
I didn’t even know these holes existed until I started troubleshooting a weak flame problem. Turns out three of my ports were completely blocked.
How to clean them properly:
- Make sure the burner is completely cool and gas is off
- Remove the burner cap and head
- Use a toothpick or a thin wire (not a toothbrush, which can push debris further in)
- Gently clear each port hole
- Blow lightly to dislodge any remaining debris
- Reassemble and test the flame
You’re looking for a nice, even blue flame all the way around. If you see yellow or orange tips regularly, the ports need attention.
If you’re dealing with a stubbornly weak flame even after cleaning, check out these 8 Essential Gas Stove Repair Basics Steps to Fix Weak Flame for a deeper breakdown.
4. Never Checking for Gas Leaks at Home
This one isn’t about performance — it’s about safety. And yet so many people never do a simple leak check unless something smells really off.
Small gas leaks can go undetected for weeks. You might chalk up a faint smell to “the stove being old” or “something nearby.” That’s dangerous thinking.
A simple DIY leak check:
- Mix dish soap with water (make it bubbly)
- Apply around gas connections, valves, and hose joints with a brush or cloth
- Turn on the gas (don’t light it)
- Watch for bubbles — any bubbling means gas is escaping
If you see bubbles, turn off the gas immediately, open windows, and call a certified technician. Don’t try to fix gas line connections yourself unless you’re trained.
I do this check every 3 months now. Takes about 5 minutes and gives real peace of mind.
5. Letting Spills Sit and Harden
We’ve all done it — something boils over, you make a mental note to clean it later, and then “later” turns into three days. By then, that sugary sauce or starchy water has basically cemented itself to the grate or the area around the burner.
Hardened spills are a nightmare to remove without scrubbing aggressively, and aggressive scrubbing damages surfaces. They also attract pests and can affect burner performance if they reach the ports.
The golden rule: clean spills within 30 minutes of cooking.
Once the stove has cooled down enough to touch safely, wipe it down. It takes 2 minutes versus 20 minutes of scrubbing the next day.
For hardened spills that are already there:
- Place a damp cloth soaked in warm soapy water over the spot
- Let it sit for 10–15 minutes to soften
- Wipe away with a non-abrasive cloth or sponge
- For stubborn spots, use a baking soda paste (mix with just enough water to make a thick paste)
- Let it sit for 5 minutes, then scrub gently
6. Overlooking the Igniter Maintenance
The igniter is that small ceramic piece with a metal tip that sparks when you turn the knob. It’s one of the most sensitive parts of your stove and also one of the most neglected.
People either ignore it completely or make the mistake of cleaning it with water or cleaning spray, which causes corrosion and moisture buildup — leading to that annoying continuous clicking problem.
What actually works:
- Use a dry toothbrush to gently brush away residue around the igniter
- Never use water, spray cleaners, or metal tools near it
- If the ceramic looks cracked, it needs replacement — that’s not a DIY fix
- Let the stove sit for at least an hour after any cleaning before trying to ignite
If your igniter keeps clicking on its own even when you’re not using the stove, moisture is usually the culprit. Leave the stove uncovered and let it air out — sometimes it resolves on its own after a few hours.
For more detailed help with igniter issues, these 7 Powerful Gas Stove Repair Basics Ideas to Fix Ignition Problems are worth bookmarking.
7. Skipping Regular Deep Cleans
Wiping your stove daily is good. But it’s not the same as a proper deep clean, which most people skip entirely until something goes wrong.
A deep clean involves removing all removable parts — grates, burner caps, burner heads — soaking them, cleaning underneath everything, and reassembling. It takes about 45 minutes to an hour, but should realistically happen once a month if you cook regularly.
Monthly Deep Clean Checklist:
| Component | Action |
|---|---|
| Grates | Soak in hot soapy water for 20 min, scrub, dry |
| Burner caps | Wash with mild soap, rinse, dry completely |
| Burner heads | Clean ports with toothpick, rinse gently |
| Stove surface | Vinegar + water wipe down |
| Knobs | Remove and wash separately if possible |
| Under grates | Wipe with damp cloth |
The area under the grates collects an alarming amount of grease and crumbs over time. I once found a solid layer of burnt grease under my grates that had actually started affecting the gas flow to the front burners.
8. Using Oversized Pots That Block Airflow
This one surprised me when I first heard it. Using a pot that’s too large for your burner doesn’t just look wrong — it can actually affect how the burner performs and over time, create heat stress on components that weren’t designed to handle it.
Large pots trap heat, can warp grates if used constantly on an undersized burner, and affect combustion because they restrict air circulation around the flame.
General size matching guide:
| Burner Size | Ideal Cookware |
|---|---|
| Small (1–1.5 kW) | Small saucepans, milk pots |
| Medium (2–2.5 kW) | Standard pots, frying pans |
| Large/Wok burner (3+ kW) | Woks, large stockpots, pressure cookers |
Match your cookware to your burner. It’s not just about efficiency — it’s about protecting the stove long-term.
9. Delaying Repairs Because “It Still Works”
This is probably the most expensive mistake on this list, and I’ve been guilty of it myself.
One of my burners was producing a slightly yellow, uneven flame for months. The stove still worked, food still cooked, so I kept pushing the repair to “next weekend.” By the time I actually dealt with it, the burner head had corroded and needed replacement — something that would have been a simple cleaning job if I’d addressed it early.
Small problems in gas stoves almost always get worse. A slightly clogged port becomes a completely blocked one. A minor igniter issue becomes a non-starting burner. A small gas connection problem can become a safety hazard.
Warning signs that need immediate attention:
- Yellow or orange flame (should always be blue)
- Flame that goes out on its own
- Continuous clicking when the stove isn’t in use
- Gas smell that doesn’t go away after ignition
- Burner that takes multiple attempts to light
- Hissing sound from any part of the stove
If you notice any of these, don’t wait. Some are simple fixes you can handle yourself with the right guidance — others need a technician. Knowing the difference is the key.
For common burner issues that have fast solutions, these 9 Fast Gas Stove Repair Basics Solutions for Common Burner Problems cover exactly what to look for.
A Few Final Thoughts
Gas stoves are built to last — most quality stoves can run for 15 to 20 years with proper care. But “proper care” doesn’t mean spending hours every week on maintenance. It means not making the avoidable mistakes that silently wear things down.
The biggest shift for me was realizing that most stove problems don’t show up suddenly. They build slowly from small things: a spill left too long, a burner cap that wasn’t seated right, a cleaning product that wasn’t meant for that surface. Once you start paying attention to those small things, you stop having big, expensive problems.
Keep your burner ports clear. Match your pots to your burners. Clean spills when they happen. And check in on your stove the way you’d check on anything you rely on daily.
That’s really all it takes.
Want to learn more about keeping your stove in top shape? Check out this helpful guide: 10 Proven Gas Stove Repair Basics Fixes That Actually Work