

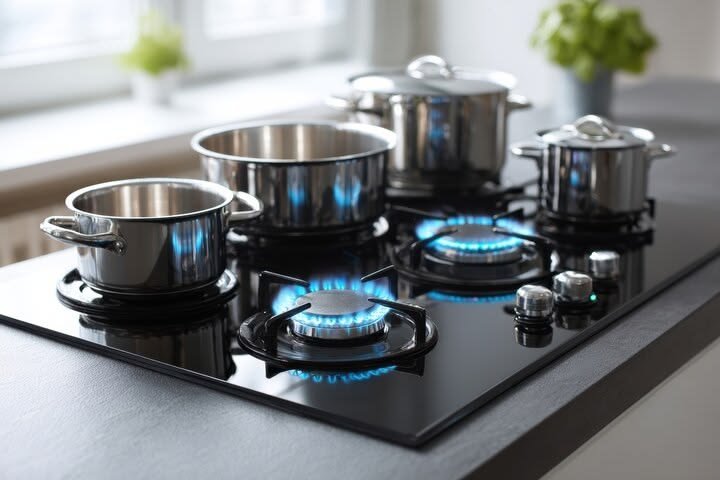
Okay, let me be honest with you. Three months ago, my gas stove was a complete mess. The burners were clicking non-stop even when nothing was on. One flame was so weak it took 8 minutes to boil water. And every time I turned on the stove, I held my breath hoping it would actually light.
I kept putting off calling a technician because — well, they’re expensive. The last time someone came out to look at my washing machine, I paid more for the “diagnosis fee” than the actual repair. So I thought, let me just try to figure this out myself for 30 days. Document everything. See what happens.
What followed was honestly one of the most satisfying (and money-saving) experiments I’ve done as a homeowner. Here’s the full breakdown of my 30-day gas stove maintenance routine — what I did, what worked, what flopped, and how much I think I saved by the end of it.
2. Why I Even Started Tracking This
It started when my cousin visited and watched me struggle to get the back-left burner going. She laughed and said, “Bhai, my stove does the same thing and my repairman charges me every three months.” That got me thinking — are we all just paying for problems that regular maintenance could prevent?
I started researching. Found out that most common gas stove problems — weak flames, clicking igniters, uneven heat — are almost always caused by one of three things: dirty burners, moisture, or misaligned parts. None of those require a technician. All of them require consistency.
So I made a simple 30-day plan. Nothing complicated. No fancy tools. Just a schedule and some basic supplies.
3. What You’ll Need Before You Start
You don’t need much. Here’s what I kept on my kitchen counter throughout the month:
| Item | Purpose |
|---|---|
| Soft-bristle toothbrush (old one) | Scrubbing burner ports |
| Dish soap + warm water | General cleaning |
| White vinegar | Breaking down grease |
| Toothpicks or thin wire | Unclogging burner holes |
| Dry microfiber cloth | Drying after cleaning |
| Baking soda | Stubborn stain paste |
| Flashlight (phone torch works) | Inspecting burner ports closely |
That’s it. No special gas stove cleaning kit. No expensive products. Total cost? Maybe Rs. 150–200 if you don’t already have these at home.

4. Week 1 — The Deep Diagnosis (Days 1–7)
Before I could maintain anything, I needed to know what I was dealing with. Week one was all about observing and doing one proper deep clean.
Day 1–2: Observation mode
I paid attention to things I normally ignore. Which burners light instantly? Which ones take multiple clicks? Is the flame blue and even, or is it orange and flickering? I made notes on my phone. Sounds extra, I know — but it helped me see patterns.
The back-left burner? Consistently weak flame. Front-right? Fine. Middle burner was clicking on its own sometimes even 10 minutes after use — which, as I later learned, means moisture is trapped in the igniter area.
Day 3–5: The first proper deep clean
I turned off the gas supply first. Always. Then I removed everything — grates, burner caps, burner heads. Laid them all in the sink with warm soapy water to soak for about 20 minutes.
While they soaked, I cleaned the stovetop surface with a vinegar-water mix. The amount of gunk that came off was embarrassing honestly. Years of splatter and grease that I’d been “wiping” but not actually cleaning.
For the burner ports (those small holes around the burner head where gas comes out), I used a toothpick to clear each one. This was the tedious part. But also the most satisfying — you could actually see some of them were partially blocked.
If you want a more detailed breakdown of this process, 7 Powerful Gas Stove Repair Basics Ideas to Fix Ignition Problems covers the ignition side of things really well.
Day 6–7: Drying and reassembly
This part I got wrong the first time. I reassembled everything while the burner caps were still slightly damp. The stove started clicking randomly that evening. Lesson learned — dry everything completely. I left the parts on a towel overnight and reassembled the next morning. No more random clicking.
5. Week 2 — Building the Daily Habit (Days 8–14)
After the deep clean, the stove already looked and worked better. But I knew I’d undo all that work without a daily habit. Week two was about figuring out what’s realistic to do every single day without it feeling like a chore.
What I settled on (takes about 4–5 minutes):
- After cooking, wipe down the stovetop while it’s still slightly warm (not hot — warm). Grease comes off so much easier this way.
- If something spilled inside a burner cap, rinse it quickly under tap water and let it air dry before putting it back.
- Check that all burner caps are sitting flat and properly centered after cleaning or moving them.
That third point — burner cap alignment — is something I completely ignored before. When a cap is even slightly off-center, the flame goes uneven. One side burns high, the other barely catches. I had blamed this on “gas pressure issues” for months. Nope. Just a slightly tilted cap.
The mistake I made in week 2:
I got a little overconfident and used a steel wool scrubber on the burner grates to get some stubborn stains off. Big mistake. Scratched the coating and now those spots rust faster. Stick to soft brushes and soaking. Patience over force.
6. Week 3 — Troubleshooting the Stubborn Problems (Days 15–21)
By now the routine was feeling natural. But I still had two lingering issues — that weak back-left burner and occasional clicking from the front igniter.
Fixing the weak flame:
The burner ports on the back-left were still partially clogged even after the week-one cleaning. I did a more thorough job this time — soaked the burner head in a vinegar-water mix for a full hour, then used a thin wire (from a twist tie) to poke through each port individually while holding it up to the light.
The difference was immediate. That burner went from weak-and-orange to blue-and-strong within one use.
For anyone dealing with similar issues, 8 Essential Gas Stove Repair Basics Steps to Fix Weak Flame walks through exactly this kind of fix in detail.
Fixing the clicking igniter:
After some research, I found out the clicking usually means moisture around the igniter electrode. I used a dry cloth to carefully wipe around the igniter (without pressing too hard), then aimed a hairdryer on low heat at the area for about 60 seconds. Left the stove off for a few hours.
It worked. No more phantom clicking.
Day 18 — Unexpected discovery:
While checking under the grates one day, I noticed the rubber seal around one burner base had small cracks. Not dangerous, but worth noting. I mentioned it to a technician friend and he said it can affect gas flow consistency over time. Made a note to replace it eventually. The point is — regular inspection catches these things before they become actual problems.
7. Week 4 — The Consistency Payoff (Days 22–30)
By week four, honestly, the maintenance was almost automatic. The daily wipe-down took 2 minutes. The weekly burner rinse took maybe 10. I did one more full deep clean at the end of the month, and it was significantly easier than the first one — because there was barely any buildup.
Here’s the comparison that really stood out:
| Issue | Week 1 Status | Week 4 Status |
|---|---|---|
| Back-left burner flame | Weak, orange-ish | Strong, blue |
| Igniter clicking | Random clicking even when off | Clean ignition, no phantom clicking |
| Stovetop appearance | Sticky, stained | Clean, near-original |
| Time to boil 1L water | ~8 minutes | ~5.5 minutes |
| Gas smell after lighting | Slight delay sometimes | Immediate clean ignition |
That “time to boil” difference? That’s actual gas savings. When your burner is running inefficiently — clogged ports, uneven flame — it uses more gas to do the same job. Multiply that over weeks and months, and it adds up.
I also avoided what would have been a technician call. Based on what he quoted my cousin recently for similar symptoms, I estimate I saved somewhere between Rs. 1,500 and Rs. 3,000. Probably more if you count the efficiency gains on the gas bill.
8. The Monthly Maintenance Schedule I Now Follow
After 30 days of experimenting, I landed on this simple schedule. Sharing it here because it’s genuinely sustainable — not one of those routines that sounds great but falls apart in week two.
Daily (2–3 minutes):
- Wipe stovetop while warm after cooking
- Check burner cap alignment if you moved anything
Weekly (10–15 minutes):
- Remove burner caps and rinse under running water
- Quick scrub of grates with soft brush and soapy water
- Wipe igniter tips with a dry cloth
- Check for any food debris in burner ports
Monthly (30–40 minutes):
- Full deep clean as described in Week 1
- Inspect rubber seals and connections visually
- Check that all gas knobs turn smoothly without resistance
- Do the “flame check” — light all burners and observe colour and evenness
If you want more maintenance habits that actually translate to long-term savings, 10 Smart Gas Stove Repair Basics Maintenance Hacks That Save Gas is worth bookmarking.
9. Common Mistakes I See People Make (And Made Myself)
Cleaning with the gas still connected. Always, always shut off the gas supply before any cleaning that involves removing burner parts. It takes 10 seconds and it’s not optional.
Putting wet parts back immediately. Moisture in the igniter area causes that annoying clicking and can lead to ignition failure. Dry completely before reassembling.
Ignoring uneven flames. Most people assume it’s a gas pressure issue and call a technician. Nine times out of ten, it’s a clogged port or misaligned cap. Check those first.
Using harsh chemicals on burner parts. Strong oven cleaners can corrode certain metals and degrade seals. Vinegar, dish soap, and baking soda handle 95% of what you’ll encounter.
Only cleaning the visible surface. The stovetop top looks clean. Under the grates? A different story. The gunk builds up underneath and eventually affects burner performance.
10. Is It Worth Doing This Yourself?
Honestly, yes — for most things. The stuff I’ve described in this article covers probably 80% of common gas stove problems. Clogged burners, weak flames, clicking igniters, uneven heat — all of this is DIY territory if you’re willing to spend a little time.
The 20% you should leave to a professional? Anything involving the gas line itself, the regulator, the internal valve mechanisms, or if you smell gas and can’t locate the source. Don’t mess with those. But routine cleaning and maintenance? Completely manageable.
After 30 days, my stove works better than it has in probably two years. My kitchen smells cleaner. My gas bill is noticeably lower. And I have zero anxiety about the stove not lighting in the morning.
If you want to start somewhere simple before building up to a full routine, this guide on 9 Easy Gas Stove Repair Basics Troubleshooting Steps Anyone Can Try is a great starting point — especially if you’re nervous about doing anything wrong.
Start with the daily wipe-down. Add the weekly rinse. Then build from there. You don’t need to overhaul everything on day one. Consistency beats intensity every time with appliance maintenance.
Your stove will thank you. And so will your wallet.
Also worth reading: 11 Easy Gas Stove Repair Basics Cleaning Habits That Saved My Stove — some of these habits overlap with my routine, and a few I added to my weekly checklist after reading through them.