

I’ll be honest — there was a time when I’d just walk into the kitchen, twist the knob, and start cooking without a second thought. Gas stove? Always worked. Why bother checking anything?
Then one morning I noticed a faint smell near the stove. Not super strong, just… off. I almost ignored it. Almost.
Turns out, the rubber hose connecting my gas line had a tiny crack in it. Nothing dramatic, no explosion, thank God — but the gas repairman told me it had been leaking slowly for probably weeks. That was the wake-up call I needed.
Now I do a quick safety check before cooking every single day. It takes less than two minutes total, and it’s saved me from a few nasty situations since then. I’m going to share exactly what I check — in plain language, no technical jargon — so you can do the same.
1. Smell the Air Around the Stove First
Before you touch anything, just stand near the stove for a few seconds and take a normal breath. Not a dramatic sniff, just a casual inhale.
Natural gas itself is odorless, but gas companies add a chemical called mercaptan that gives it that distinctive “rotten egg” or sulfur smell. It’s unpleasant on purpose — so you notice it immediately.
What I actually do:
I walk into the kitchen, set down my coffee, and just… pause. If something smells off, I don’t light anything. I open windows, get everyone out, and call the gas company.
Most mornings? Nothing. And that nothing is actually really reassuring.
What to watch for:
- A faint eggy or sulfur smell near the stove or behind it
- The smell getting stronger when you get closer to the gas line connection
- Any smell that wasn’t there yesterday
If you do smell gas, don’t flip any light switches, don’t use your phone inside the kitchen, and don’t try to find the leak yourself. Just get out and call your gas utility company.
One mistake I made early on: I once confused the smell of old food/grease buildup with a gas smell and panicked unnecessarily. After cleaning my stove thoroughly, the smell disappeared. So it’s worth knowing the difference — gas smell is sharp and chemical-ish, while food residue smells more like burnt grease or staleness.
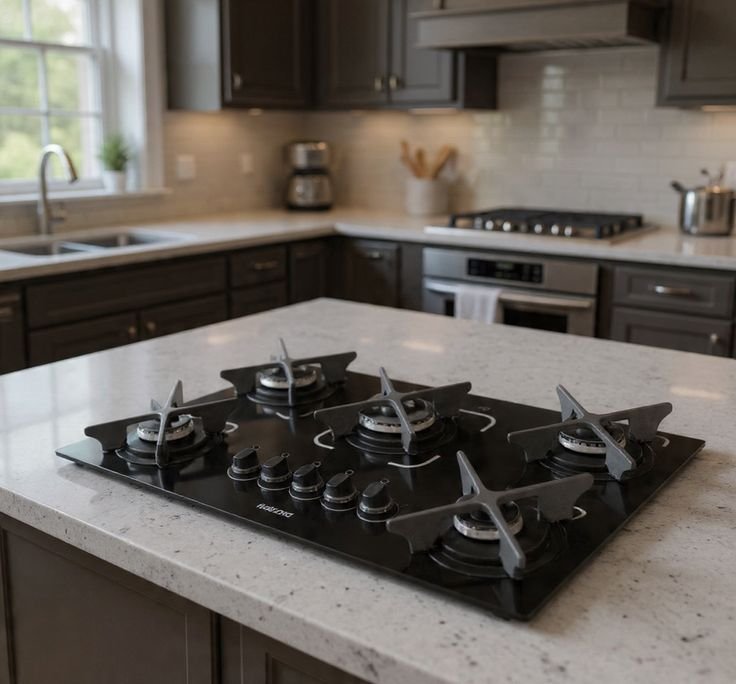
2. Check the Burner Caps and Heads Are Properly Seated
This one sounds too simple to matter, but you’d be surprised how often this causes ignition problems or uneven flames.
After washing your stove or even after a big cooking session, the burner caps (those little round metal discs sitting on top of each burner) can shift slightly out of place. When they’re not sitting flat and centered, the gas doesn’t distribute evenly through the slots.
What happens when they’re misaligned:
- You get an uneven or lopsided flame
- The igniter keeps clicking but the burner won’t light
- One side of the flame is much weaker than the other
- Sometimes the burner lights but then goes out immediately
I learned this after spending 20 minutes thinking my igniter was broken. I called a repair guy. He came, looked at it for 10 seconds, nudged the burner cap back into place, and it worked perfectly. I felt ridiculous — but also genuinely didn’t know that was a thing.
How to check it properly:
- Make sure all burners are completely cool before touching anything
- Lift each burner cap off and put it back down, making sure it sits flush and level
- Look at the slots or holes around the burner head — they should be clear, not clogged
- If you see clogged slots (from food or grease), use a straightened paper clip or a thin needle to gently clear them out
Don’t use toothpicks — they can break off inside the slot and make things worse. I learned that one the hard way too.
For more detailed advice on keeping your burners in good shape, check out these gas stove repair basics cleaning habits that saved my stove — seriously useful for anyone who cooks regularly.
3. Test the Igniter Before You Actually Need It
Here’s something most people don’t think about: test your igniter before you start cooking, not in the middle of it.
I can’t tell you how many times I’ve had something on the stove — a pot of water that’s been heating on one burner — and then gone to light a second burner only to find the igniter won’t click. Now I’m stuck with one hand holding raw chicken and the other frantically pressing a clicker that’s going nowhere.
A quick igniter check:
Turn the knob to the “light” position (without releasing gas fully) and listen. You should hear a clear clicking sound. If you hear clicking but no spark, the igniter tip might be dirty or wet.
Common reasons igniters fail or struggle:
| Reason | What It Looks Like | Quick Fix |
|---|---|---|
| Moisture buildup | Rapid clicking, no spark | Let it dry completely |
| Food debris on tip | Weak or no spark | Clean with dry toothbrush |
| Misaligned cap | Clicking but flame is lopsided | Re-seat burner cap |
| Worn igniter tip | No clicking at all | May need replacement |
The easiest fix for a struggling igniter? Let it dry. After washing the stovetop or after cooking something steamy, the igniter ports can get damp. I leave the burners off for 15-20 minutes, or sometimes turn on the kitchen exhaust fan for a bit. Usually that’s all it takes.
If the igniter completely refuses to work, I keep a long-reach lighter (like a BBQ lighter) in the kitchen drawer as a backup. You can still manually light a gas burner — just hold the flame near the burner and then slowly turn on the gas. Do it carefully and it works perfectly.
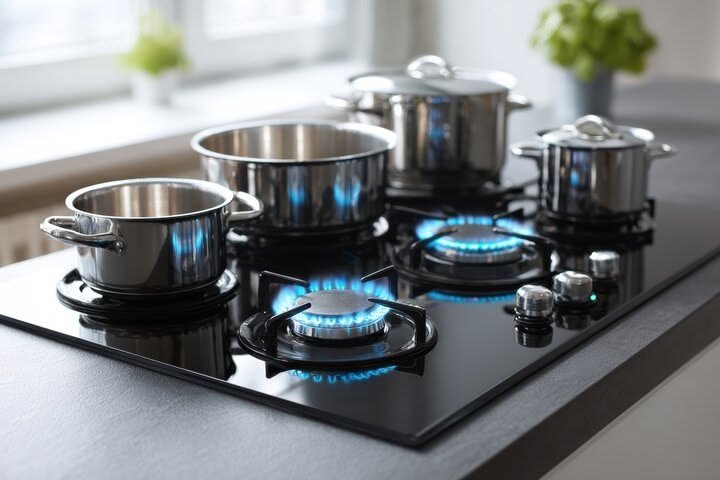
4. Look at the Flame Color When You First Light It
A healthy gas flame is blue. Not orange, not yellow, not red — blue. With maybe just a tiny hint of yellow at the very tip. That’s normal and expected.
What’s not normal is a flame that’s mostly orange or yellow, or one that’s flickering wildly when there’s no breeze.
Why flame color matters:
A blue flame means the gas is burning efficiently and completely. An orange or yellow flame means incomplete combustion — which can produce carbon monoxide. That’s the colorless, odorless gas that’s genuinely dangerous because you can’t detect it without a monitor.
What I check when I first light each burner:
- Does the flame appear immediately and evenly all around the burner ring?
- Is it mostly blue?
- Does it settle into a steady flame within a few seconds?
If the flame is yellow or orange and it stays that way after a minute, that’s a sign something’s off — either the burner needs cleaning, the air-to-gas ratio is wrong, or there’s a bigger issue worth getting checked out.
Here’s a helpful reference for what different flame appearances mean:
| Flame Color | What It Means | Action Needed |
|---|---|---|
| Blue (steady) | Normal, efficient combustion | None — you’re good |
| Blue with small yellow tips | Mostly normal | Monitor it |
| Large yellow/orange flame | Incomplete combustion | Clean burner, check air holes |
| Red or purple flame | Contaminants in gas line | Call gas company |
| Flickering wildly | Drafts or blocked burner ports | Investigate and clean |
One time my flame was consistently orange for about three days. I cleaned the burner heads thoroughly — there was a surprising amount of grease buildup in the tiny holes — and it went back to blue immediately. Sometimes the fix really is that simple.
You can read more about this in detail at 8 essential gas stove repair basics steps to fix weak flame if you’re dealing with flame issues already.
5. Make Sure the Area Around the Stove Is Clear
This last one isn’t mechanical at all — it’s just common sense, but I include it in my daily check because I’ve slipped on it more times than I’d like to admit.
Before I light any burner, I do a quick 10-second scan of the stove and surrounding counter space.
What I look for:
- Dish towels or cloths hanging too close to burners (these catch fire faster than you’d think)
- Plastic bags or packaging left on or near the stove
- Paper (grocery lists, mail, napkins) within reach of a flame
- Kids’ things — small toys, school papers — on the counter near the stove
- Curtains or anything hanging above or near the cooktop
Sounds overly cautious? Maybe. But a dish towel catching fire is one of the most common kitchen accidents out there. It happens in seconds and it’s completely preventable.
I keep a simple rule: nothing flammable within 18 inches of any active burner. That includes oven mitts that I’ve left sitting too close — even those can get singed if they’re right at the edge.
Bonus tip: If you have a carbon monoxide detector, check that it’s working before you start cooking too. A quick press of the test button on the device takes literally two seconds. Carbon monoxide is especially dangerous with gas appliances, and most people don’t think about it until it’s too late.
If you don’t have a CO detector in your kitchen or near it, I’d strongly recommend getting one. Basic ones run about $20-30 and they’re absolutely worth it. Kidde and First Alert both make reliable budget-friendly options that you can find at any hardware store.
The Mistakes I See People Make Most Often
There are a few really common slip-ups I want to flag because I’ve made most of them myself:
Skipping the smell check because “the stove is fine.” Gas leaks don’t always announce themselves dramatically. A slow leak can go unnoticed for ages until it’s a real problem.
Not cleaning the burner ports regularly. This is the number one cause of ignition problems and weak flames. A monthly clean (even just a quick one) makes a massive difference. Take a look at these 5 powerful gas stove repair basics cleaning tricks that improved flame for a practical cleaning routine.
Assuming an orange flame is “just how this stove works.” A consistently orange flame is a warning sign, not a personality quirk of your stove.
Using water to clean igniters. Water and electrical components don’t mix well. Use a dry brush or cloth, and if you do get moisture in there, give it time to fully dry before trying to light the burner.
Ignoring a clicking igniter that won’t stop clicking on its own. If your stove keeps clicking after it’s lit or even when no burner is on, that’s usually moisture or debris in the igniter switch. It’s annoying but also easy to fix — and you shouldn’t just ignore it and cook over the noise.
How Long Does All This Actually Take?
I want to be real with you here. The first week I started doing these checks, it felt like a chore. It took maybe 3-4 minutes because I was being deliberate and learning what to look for.
Now? It takes under 90 seconds. Most of it is just habit — I smell the air while I’m walking in, I glance at the burner caps while I’m setting up my pan, I check the flame color when I light it. It’s not a formal inspection, it’s just… awareness.
And that awareness has genuinely saved me from at least two situations that could have been much worse. One gas smell I caught early. One igniter issue I noticed before it became a problem in the middle of cooking dinner for guests.
Your gas stove is reliable — but it’s working with gas, which demands a basic level of respect and attention. These five checks give you that without turning cooking into a production.
Related Reading: If you’re ever dealing with an igniter that keeps clicking but won’t light, this article on 7 powerful gas stove repair basics ideas to fix ignition problems walks you through it step by step — really handy to have bookmarked.