

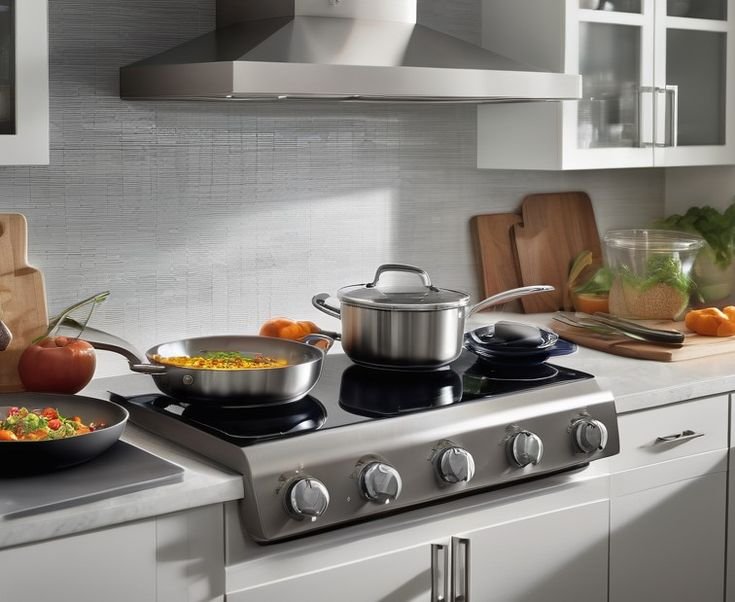
So there I was, 7 PM on a Tuesday, halfway through making dinner, and my burner just… stopped lighting. Not a dramatic explosion or anything — it just clicked and clicked like it forgot what its job was. The smell of gas was faint, the flame wasn’t catching, and I had a pot of uncooked pasta staring back at me.
I’d heard about various tricks over the years but never really paid attention. That night, I decided to try every hack I could find — some from forums, some from YouTube rabbit holes, some from a neighbor who apparently fixed his own stove three times. Here’s my honest rundown of what I tried, what flopped, and what genuinely saved my stove (and dinner).
1. Cleaning the Burner Cap First — The “Obvious” Fix Nobody Does
Okay, I’ll admit it. My first reaction was to mess with wires and igniters. Classic mistake.
A friend had told me months ago: “Before you do anything fancy, just clean the burner cap.” I nodded and ignored him. Then I actually did it — and it worked better than I expected.
Food debris, grease, and dried-up liquids block the tiny gas ports on the burner cap. When those ports are clogged, gas can’t flow evenly, and the igniter can’t catch a consistent flame.
What I did:
- Removed the burner grate and lifted off the burner cap (it just sits on top, no tools needed)
- Soaked it in warm soapy water for about 15 minutes
- Used an old toothbrush to scrub around the ports
- For the blocked holes specifically, I used a toothpick — not a metal pin, because that can enlarge the ports and cause uneven flame later
- Dried everything completely before putting it back
The difference was immediate. The flame went from a weak, sputtering mess to a clean, even blue ring.
Verdict: ✅ Worked. Highly recommend starting here.
If you want to go deeper on this habit, check out 11 Easy Gas Stove Repair Basics Cleaning Habits That Saved My Stove — it goes into detail about the exact cleaning routine that can add years to your stove’s life.
2. Drying Out the Igniter After a Spill — The Underrated Trick
Here’s something I never connected before: a wet igniter won’t spark properly. Or it’ll spark constantly and randomly — that annoying clicking sound your stove makes even when you haven’t touched it? Yep. Moisture.
I’d spilled a bit of water near one burner earlier that day (filling a pot carelessly). By evening, that burner was clicking non-stop and refusing to light properly.
The fix:
- Turn off all burners and make sure there’s no gas smell
- Remove the burner cap and the igniter cover if your model has one
- Use a dry cloth to wipe around the igniter
- Here’s the key step — use a hair dryer on low heat, held about 6 inches away, for 2-3 minutes
- Let everything air dry for another 10 minutes before testing
I felt a little silly pointing a hair dryer at my stove, but it stopped the random clicking immediately and the burner lit on the first try afterward.
Verdict: ✅ Worked. Especially useful after boil-overs or spills.
3. Adjusting the Burner Cap Alignment — Sounds Too Simple, But Hear Me Out
This one took me the longest to figure out because it looked fine visually. The burner cap was sitting there, I didn’t think anything was off.
But apparently, if the cap is even slightly misaligned — like a millimeter off-center — it throws off the gas distribution. The flame will be uneven, yellow instead of blue, or just won’t light at all on one side.
What I did:
- Removed the cap completely
- Cleaned under it (there was debris I hadn’t noticed)
- Placed it back carefully, making sure the notch or slot on the cap aligned with the corresponding mark on the burner base
- Pressed it gently until it sat flat
Tested it — clean, even flame on all sides.
This is one of those things that sounds too basic to matter, but stove manufacturers actually design those alignment marks for a reason. For a deeper look at ignition-related fixes, 7 Powerful Gas Stove Repair Basics Ideas to Fix Ignition Problems walks through some less obvious causes people miss.
Verdict: ✅ Worked. Takes 30 seconds and is always worth checking.
4. Checking and Cleaning the Igniter Electrode — The Slightly More Technical One
When the basics didn’t solve everything, I moved on to actually looking at the igniter electrode. This is the small ceramic piece (usually white or off-white) with a metal tip that you can see near the burner.
Over time, grease and carbon build up on that tip and weakens or blocks the spark.
What I did:
- Made sure everything was off and cooled down
- Located the electrode — it’s the small ceramic nub sitting just beside the burner head
- Used a dry toothbrush first, then slightly damp cotton swab to gently clean the ceramic and the metal tip
- Did NOT use water directly, and avoided anything abrasive that could scratch the ceramic
- Let it dry fully before testing
I noticed the spark was visibly stronger after this — more of a sharp blue snap instead of a weak orange flicker.
One mistake I made early on: I used a wet cloth and didn’t let it dry properly. The igniter clicked but wouldn’t spark for another 20 minutes. Patience is key here.
Verdict: ✅ Worked. Especially if your stove is clicking weakly or inconsistently.
5. Checking the Gas Supply and Valve — The One I Should Have Done Earlier
Embarrassing confession: I spent 40 minutes troubleshooting the burner on hack #4 before realizing the gas valve behind the stove had been partially closed. My partner had moved the stove to clean behind it a few days earlier and hadn’t fully reopened the valve.
Low gas pressure creates weak, uneven, or non-starting flames that look exactly like igniter or burner problems.
Quick checklist for this:
| What to Check | How to Check It | What You’re Looking For |
|---|---|---|
| Main gas valve (behind stove) | Look for the lever/knob — parallel to pipe = open | Should be fully open |
| Individual burner valve | Turn knob fully to “light” position | Smooth turn, no resistance |
| Other gas appliances in home | Check if water heater or another burner lights | Rules out supply issue |
| Smell of gas | Sniff near connections | Any smell = stop and call a professional |
After fully opening the valve, two burners that had been “broken” for days suddenly worked perfectly.
Verdict: ✅ Worked. Always check the simple stuff before going deeper.
6. Using a Multimeter to Test the Igniter Switch — The Hack That Didn’t Work for Me
I’ll be honest — I saw this suggested on a few forums and thought I’d try it. The idea is to use a multimeter to test whether the igniter switch is sending a signal when you turn the knob.
I own a basic AstroAI multimeter (grabbed it from Amazon for around $15 a while back). It’s great for basic electrical checks around the house.
What I tried:
- Set the multimeter to continuity mode
- Located the wires behind the control panel (after pulling the stove slightly away from the wall and removing the back panel — this varies by model)
- Tested the switch terminals while pressing and releasing
The result? My switch tested fine. So this didn’t solve my problem — but it did eliminate one variable, which has its own value.
Where this hack is genuinely useful: if your stove clicks non-stop without being touched, or doesn’t click at all when you turn the knob, a faulty igniter switch is a real possibility. In that case, this test can save you from buying parts you don’t need.
Verdict: ⚠️ Didn’t solve my issue, but useful for diagnosis. Requires basic comfort with electronics.

7. Resetting the Stove by Cutting Power — The One That Surprised Me Most
I saved this for last because I genuinely thought it was nonsense when I first heard it. “Turn it off and on again” — for a gas stove? Really?
But modern gas stoves aren’t purely mechanical. They have electronic control boards, especially if yours has digital displays, auto-ignition, or child lock features. These boards can glitch.
What I did:
- Turned off all burners
- Unplugged the stove from the wall outlet (or switched off the dedicated circuit breaker if it’s hardwired)
- Waited a full 5 minutes — not 30 seconds, a full 5 minutes
- Plugged it back in and tested
Two things happened: one burner that had been clicking randomly stopped doing that entirely. And the igniter on another burner that had been sluggish suddenly became responsive again.
I later found out this is actually a documented fix for several stove brands — the control board gets into a loop state and a hard reset clears it.
Verdict: ✅ Worked — and I genuinely didn’t expect it to.
For more troubleshooting approaches like this one, 9 Easy Gas Stove Repair Basics Troubleshooting Steps Anyone Can Try covers a range of fixes that don’t require any professional tools.
Quick Comparison: All 7 Hacks at a Glance
| Hack | Difficulty | Time Needed | Did It Work? |
|---|---|---|---|
| 1. Clean burner cap | Easy | 20 minutes | ✅ Yes |
| 2. Dry out igniter | Easy | 15 minutes | ✅ Yes |
| 3. Realign burner cap | Easy | 2 minutes | ✅ Yes |
| 4. Clean igniter electrode | Medium | 15 minutes | ✅ Yes |
| 5. Check gas valve | Easy | 5 minutes | ✅ Yes |
| 6. Multimeter test | Medium-Hard | 30 minutes | ⚠️ Diagnostic only |
| 7. Power reset | Easy | 5 minutes | ✅ Yes |
Common Mistakes I Made (So You Don’t Have To)
Using metal to clean the burner ports. Toothpicks only. A needle or pin will widen the holes and you’ll have uneven flame permanently.
Not drying things fully. Whether it’s the burner cap, the electrode, or anything near the igniter — moisture is the enemy. Give it time.
Skipping the gas valve check. I spent 40 minutes troubleshooting something that was a 5-second fix. Check the valve first.
Reassembling while still wet. After soaking the burner cap, I once put it back before it was fully dry. The stove smelled odd and the flame was inconsistent for the first few minutes. Always dry completely.
Assuming it’s a big problem. 90% of the time, gas stove ignition issues come down to debris, moisture, or misalignment. Before calling a technician, work through the basics.
When to Actually Call a Professional
There’s a line between DIY-friendly fixes and things that genuinely need a trained technician. Here’s where I’d draw it:
- You smell gas and can’t identify where it’s coming from — leave the house and call your gas company immediately
- The igniter sparks but there’s no gas smell at all, even with the knob fully turned — could be a gas line or valve issue deeper in the stove
- You see burn marks, melted wires, or scorch marks near the control panel
- The stove has been dropping pressure on multiple burners consistently — this can indicate a regulator issue
- Any repair that requires touching the gas line itself
Some of those safety checks are covered well in 6 Essential Gas Stove Repair Basics Safety Ideas That Prevent Accidents — worth reading before you start any repair.
What I Actually Keep On Hand Now
After going through all of this, I put together a small “stove maintenance kit” that lives in my kitchen drawer:
- Old toothbrush (dedicated to stove cleaning)
- Toothpicks (for clearing burner ports)
- Microfiber cloths (lint-free drying)
- Small flashlight (for seeing under the burner head clearly)
- Basic multimeter (AstroAI or any budget option)
- Can of compressed air (optional but great for blowing out debris without touching anything)
None of this costs more than $20 total if you don’t already have it.
The Honest Takeaway
Out of 7 hacks, 6 genuinely worked — and the one that didn’t (the multimeter test) was still useful as a diagnostic step. The biggest lesson I walked away with is that most gas stove problems are embarrassingly simple to fix once you stop assuming they’re complicated.
Start with the basics: clean the cap, check alignment, dry out moisture, verify the gas valve. That alone will solve the problem 80% of the time. The more technical stuff — electrode cleaning, power resets, switch testing — is for when the obvious stuff doesn’t cut it.
The stove that “broke” on me that Tuesday evening? Fixed by 8 PM. Pasta was slightly overcooked, but honestly, that was my fault for waiting as long as I did before actually trying to fix it.
Also worth reading: 10 Proven Gas Stove Repair Basics Fixes That Actually Work — covers some additional fixes that go a step beyond what I tested here, including solutions for burners that light but won’t stay on.