

10 Smart Gas Stove Repair Basics Troubleshooting Tips for Beginners
There’s something quietly satisfying about fixing a gas stove with your own hands. It’s not just about saving money—though that’s certainly a perk—but about understanding how everyday things work. A gas stove is one of those appliances we use almost without thinking. Turn the knob, strike the flame, cook the meal. Simple. Until it’s not.
When the burner refuses to light or the flame turns weak and uneven, frustration kicks in quickly. Many beginners assume such issues require a professional technician, but in reality, a large number of common gas stove problems are surprisingly manageable with a bit of patience and the right knowledge.
This guide isn’t just a list of instructions. It’s a practical walkthrough—rooted in real-world scenarios—that will help you understand, diagnose, and fix basic gas stove issues without feeling overwhelmed.
understanding how your gas stove works before touching anything
Before you even think about repairs, it’s important to understand what you’re dealing with. A typical gas stove consists of a few essential components: the gas supply line, control valves, burners, igniters (in modern stoves), and sometimes a thermocouple or safety device.
Gas flows through the supply line, passes through the valve controlled by your knob, and reaches the burner where it mixes with air and ignites. When everything is clean and functioning, you get a steady blue flame. When something is off—blocked ports, faulty igniter, or inconsistent gas flow—you’ll notice problems.
The key here is not to rush into fixing things blindly. Observe first. Listen. Smell. Pay attention to what changed before the issue started.
tip 1: always start with safety before troubleshooting
This may sound obvious, but it’s often ignored. Gas appliances are not something to take lightly.
Before inspecting your stove:
Turn off the gas supply completely.
Open windows for ventilation.
Avoid using matches or lighters during inspection.
If you smell strong gas, step away immediately and let it dissipate.
Beginners sometimes make the mistake of “just checking quickly” while the gas is still on. That’s risky. Build the habit of safety first—it will save you from serious trouble.

tip 2: check if the burner is simply dirty
One of the most common causes of stove malfunction is also the easiest to fix: dirt.
Food spills, oil splashes, and dust can clog the tiny holes (ports) around the burner. When these are blocked, gas cannot flow evenly, resulting in weak or uneven flames.
Here’s what to do:
Remove the burner cap and head.
Inspect the holes closely.
Use a thin pin or needle to clear any blockage.
Wash the burner with warm soapy water and let it dry completely before placing it back.
You’d be surprised how often this simple cleaning restores the stove to perfect working condition.
tip 3: observe the flame color for clues
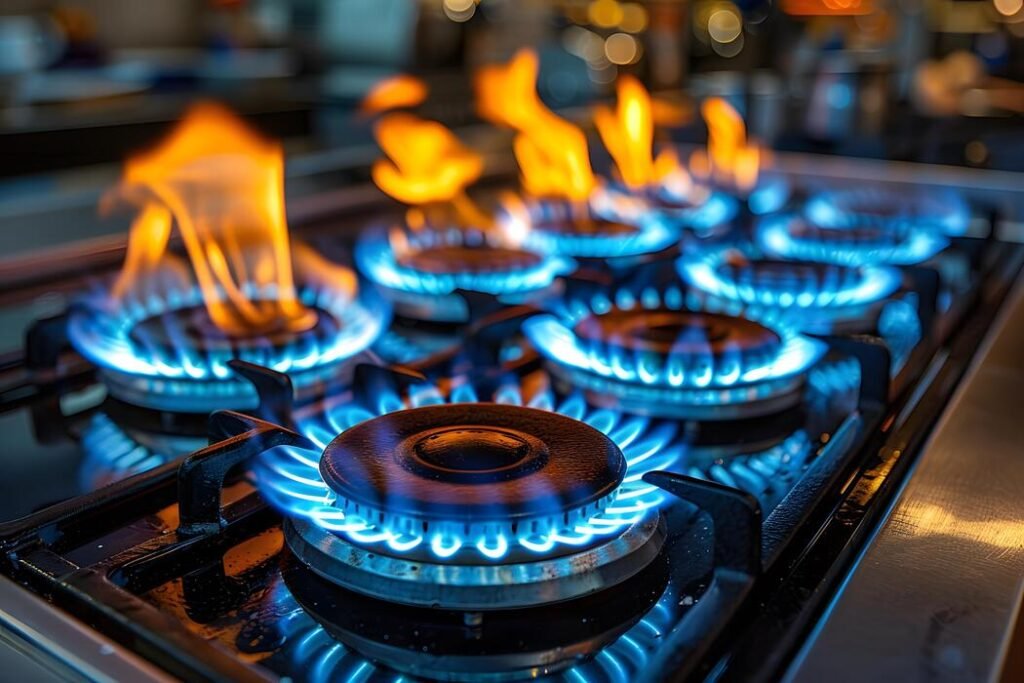
Your stove flame tells a story if you know how to read it.
A healthy flame is blue with a slight inner cone. If you notice yellow or orange flames, it usually means incomplete combustion. This could be due to clogged burners or improper air-gas mixture.
A flickering flame might indicate inconsistent gas pressure or airflow issues.
Don’t ignore these visual signals. They are early warnings that something needs attention.
tip 4: make sure the burner parts are aligned properly
After cleaning, many beginners unknowingly create a new problem: misalignment.
Burner caps and heads must sit correctly in their designated positions. Even a slight shift can disrupt gas flow and ignition.
If your burner clicks but doesn’t light, or lights unevenly, double-check the placement. Remove and reposition carefully until it sits snugly.
This is a small detail, but it makes a big difference.
tip 5: inspect the igniter for spark issues
Modern gas stoves rely on an electric igniter to produce a spark. When this fails, the burner won’t light even if gas is flowing.
Common signs of igniter issues:
No clicking sound when turning the knob.
Weak or inconsistent sparks.
Delayed ignition.
To troubleshoot:
Clean the igniter tip gently with a dry cloth.
Ensure it’s not wet (moisture can prevent sparking).
Check for visible damage.
If the igniter is completely dead, replacement might be necessary—but cleaning solves the problem in many cases.
tip 6: test the gas supply before assuming a bigger problem
Sometimes the issue isn’t the stove at all—it’s the gas supply.
Check if other burners are working.
If all burners fail, the gas cylinder might be empty or the supply line could be blocked.
In regions where LPG cylinders are used, it’s common to run out of gas unexpectedly. Before disassembling your stove, confirm that gas is actually reaching it.
It’s a simple step that beginners often overlook.
tip 7: listen carefully for unusual sounds
Your stove doesn’t just show problems—it also “sounds” them.
A hissing sound might indicate a gas leak.
A popping sound during ignition could mean delayed gas buildup.
A weak clicking noise may point to an igniter issue.
Instead of ignoring these sounds, treat them as clues. Over time, you’ll develop an instinct for what’s normal and what isn’t.
tip 8: check the regulator and hose connections
If you’re using a gas cylinder, the regulator and hose are critical components.
Inspect the hose for cracks, bends, or leaks.
Ensure the regulator is firmly attached.
Apply a soap-water solution to connections—bubbles indicate leaks.
This step is especially important because leaks are not always obvious. A minor leak can lead to bigger issues if left unattended.
tip 9: deal with low flame problems effectively
Low flame is a common complaint among beginners.
Possible causes include:
Clogged burner ports
Faulty regulator
Low gas pressure
Start with cleaning the burner. If the problem persists, check the regulator. In some cases, replacing the regulator restores proper pressure.
Avoid adjusting internal valves unless you’re confident—those are better left to professionals.
tip 10: know when to stop and call a professional
This might be the most important tip of all.
Not every problem should be fixed by a beginner. If you encounter:
Persistent gas smell
Internal valve issues
Broken components
Electrical faults in advanced stoves
It’s time to step back.
Trying to fix complex issues without proper tools or knowledge can make things worse. A smart beginner knows their limits.
real-life troubleshooting scenario: putting it all together
Imagine this situation: you turn the knob, hear clicking, but the burner doesn’t light. After a few seconds, it suddenly ignites with a small “pop.”
What’s happening here?
Step 1: Check for dirt blocking the burner—clean it.
Step 2: Ensure the burner cap is aligned properly.
Step 3: Inspect the igniter—clean and dry it.
Step 4: Try again.
In most cases, this sequence solves the problem. It’s not magic—it’s method.
the beginner’s mindset: patience over panic
One of the biggest mistakes beginners make is rushing.
Gas stove troubleshooting is not about speed—it’s about observation and logic. Take your time. Break the problem into smaller parts. Test one thing at a time.
You’ll not only fix the issue but also learn something valuable along the way.
common mistakes beginners should avoid
Even with the best intentions, beginners often make avoidable errors:
Using excessive force while removing parts
Reassembling components incorrectly
Ignoring safety precautions
Overlooking simple issues like dirt or empty gas
Awareness of these mistakes helps you stay on the right track.
tools you actually need (and nothing more)
You don’t need a full toolbox to fix basic stove issues. A few simple items are enough:
A soft cloth
A thin pin or needle
Mild detergent
A small brush
Soap solution for leak detection
Keep it simple. Overcomplicating things only creates confusion.
maintenance habits that prevent future problems
Prevention is better than repair. A few regular habits can keep your stove running smoothly:
Clean burners weekly
Wipe spills immediately
Check hose and regulator monthly
Avoid letting water enter ignition areas
Consistency matters more than effort. Small actions today prevent bigger issues tomorrow.
why learning basic repair skills matters
There’s a certain confidence that comes from fixing something yourself. It changes how you see everyday appliances. Instead of being dependent, you become capable.
Gas stove repair is a great starting point because it combines mechanical understanding with practical problem-solving.
And once you master the basics, you’ll approach other household issues with the same confidence.
faqs
- why is my gas stove clicking but not lighting?
This usually happens due to a dirty burner, misaligned cap, or moisture around the igniter. Cleaning and proper alignment often solve the issue.
- is it safe to clean a gas stove burner with water?
Yes, but make sure the burner is completely dry before reinstalling. Moisture can interfere with ignition.
- what does a yellow flame mean on a gas stove?
A yellow flame indicates incomplete combustion, often caused by clogged burner ports or improper air-gas mixture.
- how can i detect a gas leak at home?
You can apply a soap-water solution to connections. If bubbles form, there’s a leak. Avoid using flames for testing.
- when should i call a professional for gas stove repair?
If you notice a persistent gas smell, damaged parts, or internal issues, it’s best to call a professional instead of attempting a repair.
- can a faulty regulator cause low flame?
Yes, a malfunctioning regulator can reduce gas pressure, resulting in a weak flame. Replacing it often fixes the problem.
closing thoughts
Fixing a gas stove isn’t about becoming an expert overnight. It’s about building awareness, developing patience, and learning to trust your observations.
Every issue you solve adds to your experience. Every mistake teaches you something new.
Start small. Stay safe. And remember—most problems are simpler than they seem once you understand the basics.