

When my cousin moved into her first apartment, she called me in a panic three days after getting her new gas stove installed. The burners were clicking nonstop, one flame was so weak it couldn’t boil water in under 20 minutes, and she was convinced the whole thing was defective. Spoiler: it wasn’t. Every single issue traced back to how the stove was set up in the first place.
I’ve seen this happen more times than I can count — with family, friends, neighbors. A brand-new stove, perfectly good, made miserable by a handful of setup mistakes that nobody warns you about. The instruction manual doesn’t cover the real-world stuff. And by the time you realize something’s off, you’ve already been living with the inconvenience for weeks.
So let’s fix that. Here are five setup mistakes people make with gas stoves — and how to get it right from day one.
1. Not Leveling the Stove Properly Before Anything Else
This one sounds almost too basic to mention, but it causes so many problems down the line that I’d feel wrong skipping it.
When a gas stove isn’t level, everything suffers. Pots tilt. Oil pools to one side of the pan. Liquids simmer unevenly. And honestly, it just feels off every time you cook — that subtle annoyance you can’t quite pinpoint.
Most people slide the stove into place, push it against the wall, and call it done. But floors aren’t always perfectly even, especially in older homes or apartments. Even a few millimeters of tilt can throw things off.
What to actually do:
- Place a bubble level (the kind you’d use for hanging a picture frame) on the center of the stovetop — front to back, then side to side.
- Most gas stoves have adjustable legs at each corner. Twist them up or down until the bubble sits dead center.
- Give the stove a gentle push from different angles to make sure it doesn’t rock.
It takes maybe 10 minutes. And it’s the kind of thing that makes every single meal you cook after that just a little bit better. Don’t skip it.
2. Ignoring the Burner Cap Placement After Unpacking
This is exactly what happened to my cousin. And it’s probably the most common gas stove setup mistake I’ve come across.
When a new stove arrives, the burner caps — those flat, disc-shaped pieces that sit on top of the burner base — sometimes shift during shipping. Or you take everything out of the packaging, set them aside, and put them back without really paying attention to alignment.
A burner cap that’s even slightly off-center will cause the flame to burn unevenly, click constantly even after lighting, or in some cases not light at all. It looks fine at a glance, but it’s sitting just a millimeter or two crooked.
How to check:
- Turn off all burners and let everything cool completely.
- Lift each burner cap off and then place it back down, making sure it sits flat and centered over the burner base.
- Gently wiggle it — it should feel secure, not loose or wobbly.
- Look at the flame opening slots on the burner base and make sure the cap isn’t blocking them.
Some stoves have specific caps for specific burners (the large one isn’t interchangeable with the small one). Check your manual to confirm which cap goes where. Once everything is properly seated, you’ll often find that clicking and uneven flame issues just disappear.
If you want to go deeper on ignition problems specifically, this breakdown of 7 Powerful Gas Stove Repair Basics Ideas to Fix Ignition Problems covers a lot of ground in a really practical way.
3. Skipping the Gas Line Pressure Check (And Not Testing All Burners Together)
Here’s one that most people don’t even know they should be doing.
After installation, a lot of people test one burner, see a flame, and assume everything is fine. But gas pressure issues often only show up when multiple burners are running at the same time — or when a burner is turned to its lowest setting.
Low gas pressure means weak flames. And weak flames mean your food takes twice as long to cook, your wok never gets hot enough, and you find yourself wondering if something’s wrong with your cooking or your stove.
| Symptom | Possible Cause | What to Check |
|---|---|---|
| Flame is orange/yellow instead of blue | Low gas pressure or dirty burner | Pressure regulator, burner ports |
| Flame dies when turned low | Pressure too low for low setting | Regulator adjustment or line issue |
| One burner much weaker than others | Partial blockage or uneven pressure | That specific burner’s ports |
| All burners weaker when multiple are on | Insufficient gas supply pressure | Main supply line or regulator |
What you should do right after setup:
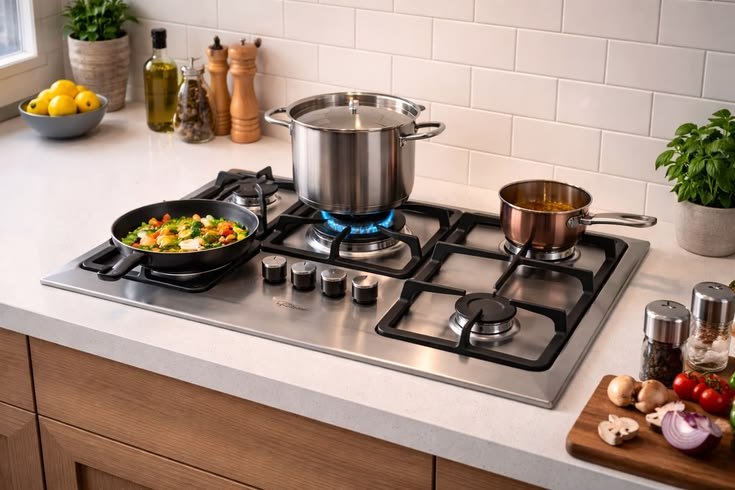
- Light all four burners simultaneously and observe each flame.
- Turn one burner to the lowest setting while others are on high — does the flame stay stable or sputter?
- All flames should be consistently blue with a small inner cone. Any yellow tipping or orange color is a flag.
If things look off, don’t try to adjust the gas pressure yourself — that’s a job for a licensed technician or your gas supplier. But at least you’ll know to make the call before weeks go by with an underperforming stove.
For more on diagnosing weak flame issues, these 8 essential steps to fix weak flame walk through it in a way that’s genuinely easy to follow.
4. Placing the Stove Too Close to the Wall or Cabinets
I get why people do this. You want to maximize kitchen space, keep things tidy, push everything flush against the wall. It looks clean. It feels organized.
But there’s a real clearance requirement for gas stoves — and it’s not just a suggestion buried in the manual to cover liability. It’s a genuine safety and performance issue.
Why clearance matters:
When a gas stove sits too close to the wall or adjacent cabinets, a few things happen:
- Heat buildup — The area behind and beside the stove traps heat. Over time, this can damage cabinets, discolor walls, and in worst cases create a fire hazard.
- Ventilation problems — Gas combustion needs airflow. A cramped setup can affect how cleanly the burners burn.
- Grease accumulation — Without proper clearance, cleaning becomes nearly impossible. Grease builds up in tight corners, and that’s both a hygiene issue and a fire risk.
General clearance guidelines (always verify with your specific model’s manual):
| Area | Recommended Clearance |
|---|---|
| Back of stove to wall | At least 2–3 inches (some models require more) |
| Side of stove to cabinet | Minimum 6–12 inches |
| Overhead to bottom of cabinets | At least 30 inches (unprotected) or 24 inches (with a range hood) |
| Side to curtains or flammable materials | Minimum 12 inches |
If you’re in a small kitchen and these clearances feel impossible, that’s a conversation to have before setup — not after you’ve already pushed the stove into a tight corner and connected the gas line.
5. Not Doing a Proper Leak Check After Connecting the Gas Line
This is the one that makes me most uncomfortable to talk about, because the consequences of skipping it are genuinely serious. And yet, it’s the step most people either rush through or skip entirely because they’re excited to start cooking.
A gas leak doesn’t always smell overwhelmingly of gas. A small leak at a fitting can be subtle — you might catch a faint whiff occasionally and dismiss it, or not notice at all until it builds up. That’s not a situation you want to be in.
The right way to check for leaks after installation:
- Use the soapy water method: Mix dish soap with water and apply it to every connection point on the gas line — the valve, the connector, the regulator fitting. Turn the gas on (don’t light anything). Watch for bubbles forming. Any bubbles at all means there’s a leak.
- Use a gas leak detector: These are inexpensive devices (under $20–$30 at most hardware stores) that beep when they detect gas. Run it along every joint and connection.
- Do it with a window open and no open flames nearby. This sounds obvious but is worth saying.
- Check again after 24 hours. Some very slow leaks take a little time to show up with the soapy water test.
If you find any leak — any at all — turn the gas off at the main valve, open windows, and call a professional before using the stove. No meal is worth rushing past this step.
It’s also a good habit to do periodic checks every few months, especially if you’ve moved the stove for cleaning or maintenance. These 6 essential safety ideas that prevent accidents are worth bookmarking for exactly that reason.
A Quick Setup Checklist Before Your First Cook
Since we’ve covered the big five, here’s a summary checklist you can actually use when setting up a gas stove — new or reinstalled after a move:
| Step | Done? |
|---|---|
| Stove leveled (bubble level on stovetop) | ☐ |
| All burner caps properly seated and aligned | ☐ |
| All burners tested individually and together | ☐ |
| Flame color checked (should be blue, not orange/yellow) | ☐ |
| Proper clearance from walls and cabinets confirmed | ☐ |
| Gas line connections checked with soapy water or detector | ☐ |
| Range hood or ventilation confirmed working | ☐ |
| Manual read for model-specific requirements | ☐ |
Print this out. Stick it somewhere. Future you will thank present you.
One More Thing Worth Mentioning
Even after a perfect setup, a gas stove needs a bit of attention to keep performing well. The first few weeks are actually a great time to notice anything unusual — smells, sounds, flame behavior — while your memory of what “normal” looks like is fresh.
If a burner starts clicking randomly on its own, or a flame keeps going out at low heat, or you notice the igniter sparking when it shouldn’t — those are early signals worth catching before they turn into bigger problems. These 9 easy troubleshooting steps anyone can try are a solid starting point for working through early issues yourself before calling in a technician.
The goal isn’t to become a repair expert. It’s just to know your stove well enough that you catch problems early and don’t end up like my cousin — three days into a new kitchen, convinced her brand-new stove was broken when really it just needed a 30-second adjustment.
Set it up right the first time. Check the things that are easy to check. And then go cook something good.