

6 fast gas stove repair basics installation steps that work
A gas stove is one of those everyday appliances you rarely think about—until it stops working properly. When that happens, cooking becomes inconvenient, frustrating, and sometimes even unsafe. Many people assume that fixing or installing a gas stove is a job only for professionals, but the truth is that understanding a few core principles can make a big difference. With the right approach, you can diagnose issues faster, install components correctly, and avoid common mistakes that lead to bigger problems.
This guide walks through six practical and efficient steps that actually work in real-life situations. It goes beyond surface-level advice and dives into the reasoning behind each step, helping you not only follow instructions but also understand them. Along the way, you’ll find practical examples, small checklists, and real-world insights that make the process feel less technical and more manageable.
understanding the foundation before starting
Before touching any part of a gas stove, it’s important to understand how it functions. A typical gas stove relies on a few key elements: a gas supply line, control valves, burners, ignition systems, and proper ventilation. If any one of these components is misaligned or malfunctioning, the entire system can behave unpredictably.
Think of it like a chain. Each link must be intact for the stove to work safely. Many installation and repair issues happen because people rush straight into fixing without understanding how these parts interact.
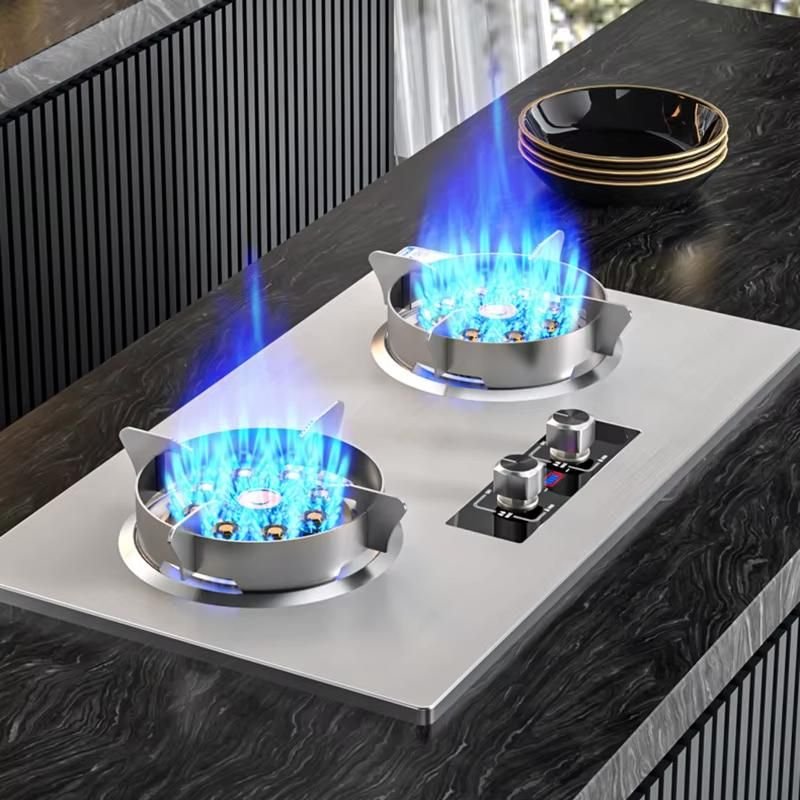
Take a moment to observe your stove. Notice how the gas flows, how the ignition sparks, and how the flame behaves. A steady blue flame usually indicates proper combustion, while a yellow or flickering flame can signal incomplete burning or blockage.
step 1: ensuring safety before anything else
Speed should never come at the cost of safety. The fastest successful repairs always begin with proper precautions. Before doing anything, turn off the gas supply completely. This might sound obvious, but it’s often skipped in a rush.
Open windows or ensure proper ventilation in the area. Gas buildup can be dangerous even in small amounts. If you ever smell a strong gas odor, stop immediately and do not proceed until the source is identified and resolved.
It’s also wise to disconnect the stove from any electrical source if it has an electric ignition system. This prevents accidental sparks during the process.
A simple safety checklist:
- Gas supply turned off
- Area well ventilated
- No open flames nearby
- Electrical connection unplugged
Taking these steps only takes a minute, but it can prevent serious accidents.
step 2: inspecting the installation area
A lot of problems originate not from the stove itself but from where it’s placed. An uneven surface, poor ventilation, or incorrect spacing can lead to performance issues.
Check if the stove is sitting level. Even a slight tilt can cause uneven flames or inefficient cooking. Use a basic leveling tool if available, or simply observe if cookware slides to one side.
Look at the gas connection point. Is the hose properly aligned? Is it bent or under tension? A stressed gas line can develop leaks over time.
Also, ensure there’s enough space around the stove. Crowded installations can trap heat and affect both performance and safety.
A quick habit that professionals use is stepping back and visually scanning the entire setup before touching anything. This often reveals issues that aren’t obvious up close.
step 3: checking and securing gas connections
This is one of the most critical steps in both repair and installation. The gas connection must be tight, secure, and leak-free.
Start by examining the hose or pipe connecting the stove to the gas source. Look for cracks, wear, or loose fittings. Even a small imperfection can lead to leakage.
When reconnecting, avoid over-tightening. Many people assume tighter is better, but excessive force can damage threads or seals. Aim for a firm, snug fit.
A simple way to check for leaks is using a soap solution. Apply it to the connection and watch for bubbles when the gas is turned on briefly. If bubbles form, there’s a leak that needs fixing.
This step is often rushed, but taking an extra minute here can save hours of troubleshooting later.
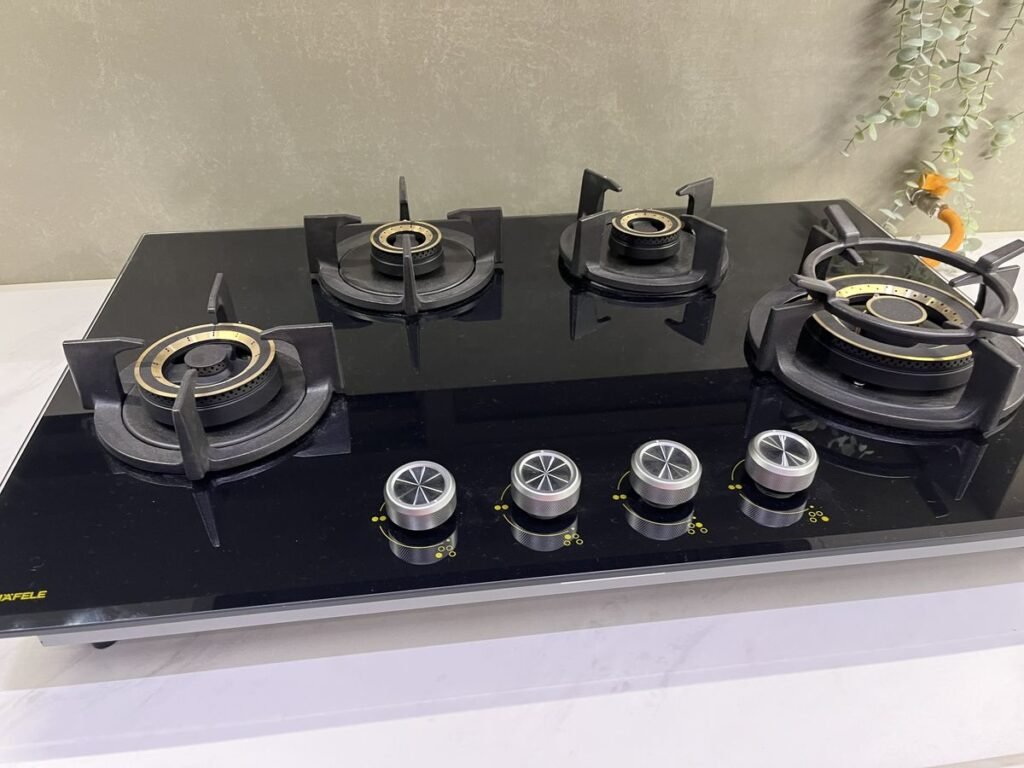
step 4: cleaning and aligning the burners
Burners are the heart of a gas stove, and they are also the most commonly overlooked part during installation and repair.
Over time, food particles, grease, and dust can clog the burner holes. This leads to uneven flames or difficulty igniting.
Remove the burners carefully and inspect them. If you notice blockages, clean them gently using a soft brush or a pin. Avoid using excessive force, as it can damage the holes.
Alignment is equally important. When placing the burners back, ensure they sit properly in their designated position. Misaligned burners can cause gas to flow unevenly, resulting in irregular flames.
A well-aligned burner produces a consistent, blue flame that spreads evenly across the cooking surface.
step 5: testing the ignition system
Modern gas stoves often come with automatic ignition systems. If the stove doesn’t light up quickly, the issue might lie here.
Start by turning the knob and listening for the clicking sound. This indicates the ignition system is working. If there’s no sound, check the power source or battery, depending on the model.
If you hear the click but don’t see a flame, the problem might be with the gas flow or burner alignment rather than the ignition itself.
In some cases, the ignition tip may need cleaning. Dirt or grease buildup can block the spark. A gentle wipe can often restore functionality.
Testing should be done carefully and briefly. Turn the gas on only when you’re ready to ignite and observe the flame closely.
step 6: final adjustments and performance check
Once everything is in place, it’s time to test the stove as a whole. Turn on each burner one by one and observe the flame.
Look for consistency. The flame should be blue and stable, without flickering or producing soot. If you notice any irregularities, revisit the earlier steps.
Adjust the control knobs and see how the flame responds. Smooth transitions from low to high indicate proper functioning.
This is also a good time to check for any unusual sounds or smells. A properly installed and repaired stove should operate quietly and cleanly.
Take a few minutes to simulate normal usage. Place a pot on the burner and observe how evenly it heats. This real-world test often reveals issues that basic checks might miss.
common mistakes that slow everything down
While these steps are designed to be fast, certain mistakes can undo your efforts. One of the biggest is skipping inspection and jumping straight to fixing.
Another common issue is using incorrect tools. Improvised tools can damage components and make repairs more difficult.
Ignoring small signs, like a slightly uneven flame or a faint gas smell, can also lead to bigger problems later.
The key to speed is not rushing but being precise. Each step builds on the previous one, creating a smooth and efficient process.
practical tips from real experience
Many experienced technicians follow small habits that make a big difference. For example, keeping a dedicated cleaning brush for burners can save time during maintenance.
Labeling parts during disassembly can help you reassemble them correctly without confusion. Even taking a quick photo before removing components can be useful.
Another helpful trick is working in good lighting. It sounds simple, but being able to clearly see connections and alignments can prevent errors.
over time, building confidence
The more you work with gas stoves, the more intuitive the process becomes. What initially feels technical and complex gradually turns into a series of familiar steps.
Confidence doesn’t come from memorizing instructions but from understanding why each step matters. Once you grasp the reasoning, you can adapt to different situations more easily.
Even small successes, like fixing a weak flame or correcting a misaligned burner, build the skills needed for more complex tasks.
faqs
- how do i know if my gas stove installation is safe?
You can check safety by ensuring there are no gas leaks, the connections are secure, and the flame burns blue and steady. A soap test on connections is a reliable way to detect leaks. - why is my gas stove flame yellow instead of blue?
A yellow flame usually indicates incomplete combustion. This can be caused by dirty burners, improper alignment, or insufficient air supply. - can i install a gas stove without professional help?
Yes, basic installation can be done if you follow safety guidelines and understand the process. However, if you’re unsure or dealing with complex connections, professional help is recommended. - how often should i clean my gas stove burners?
It’s a good idea to clean burners every few weeks, especially if you cook frequently. Regular cleaning prevents blockages and ensures efficient performance. - what should i do if i smell gas after installation?
Immediately turn off the gas supply, ventilate the area, and avoid using any electrical switches. Check connections for leaks using a soap solution before using the stove again. - why does my stove take longer to ignite?
Delayed ignition can be caused by dirty burners, a weak ignition system, or low gas pressure. Cleaning and checking the ignition components usually resolves the issue.
closing thoughts
Repairing and installing a gas stove doesn’t have to be overwhelming. By focusing on these six practical steps—safety, inspection, connection, cleaning, ignition, and testing—you can handle most basic issues with confidence.
The key is to stay patient, pay attention to details, and build your understanding over time. What starts as a simple repair task can turn into a valuable skill that saves time, money, and effort in the long run.