

Let me tell you about the night I almost ordered pizza because my stove decided to give up on me mid-cooking.
I had marinated chicken for two hours, got the pan hot, and then — nothing. The flame was so weak it looked like a birthday candle trying to heat a wok. I fiddled with the knob, turned it off and on, even blew on it like that would somehow help. Eventually I gave up and called a technician. He came the next day, poked around for about 12 minutes, and charged me a solid amount for what turned out to be a clogged burner cap.
That was my wake-up call.
After that embarrassing (and expensive) experience, I spent a lot of time learning how gas stoves actually work — what causes weak flames, what you can fix yourself, and when you genuinely need a professional. If your stove is giving you sad, barely-there flames, this guide is exactly what I wish someone had handed me back then.
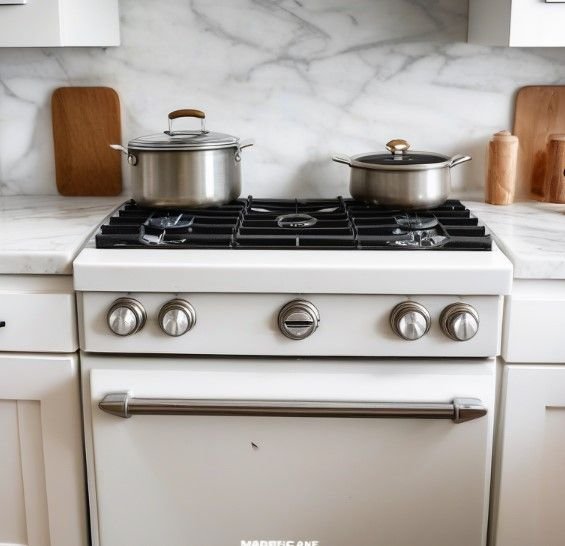
1. Clean the Burner Ports — This Is Almost Always the Culprit
Seriously. Nine times out of ten, a weak flame comes down to one thing: blocked burner ports.
Those small holes around the edge of your burner cap? That’s where the gas comes out. When grease, food particles, and boiled-over liquids build up in those tiny holes, the gas can’t flow properly. You end up with a flame that looks uneven, yellowish, or just pathetically small.
Here’s what I do now every few weeks:
What you’ll need:
- A toothpick or a thin needle (I use a sewing needle)
- An old toothbrush
- Warm soapy water
- A dry cloth
Steps:
- Make sure the stove is completely off and cooled down before touching anything.
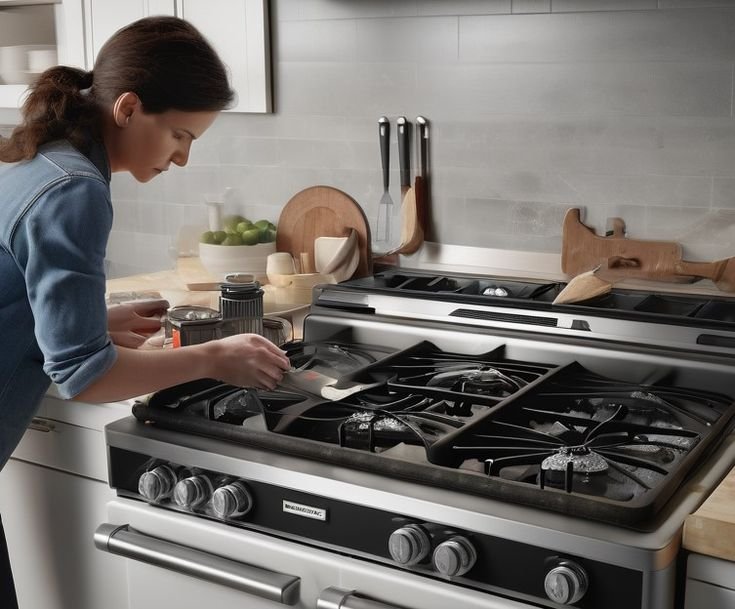
- Remove the burner grate and lift off the burner cap — it just sits on top, no screws.
- Look at the small holes (ports) around the edge of the cap. If they look clogged or discolored, that’s your problem.
- Use the needle or toothpick to gently poke through each port. Don’t use a toothpick that might break and get stuck inside — a sturdy metal needle is better.
- Scrub the cap with the toothbrush and warm soapy water.
- Rinse well and let it dry completely before putting it back. Moisture can mess with ignition.
I was skeptical the first time I tried this. Fifteen minutes later, my burner was roaring like it was new. Honestly felt like I’d discovered a superpower.
Mistake I made: I once used a wooden toothpick and the tip snapped off inside the port. Had to use a needle to dig it out. Stick to metal.
2. Check the Burner Cap Alignment — It Sounds Too Simple, But It Works
After cleaning, a lot of people put the burner cap back on slightly crooked or off-center and then wonder why the flame is still weird.
The burner cap has to sit perfectly flat and centered on the burner base. If it’s even slightly tilted, the gas distribution gets thrown off. You’ll get one side burning high and the other barely flickering.
This happened to me after I deep-cleaned my stove. I was in a hurry, slapped everything back together, and noticed the flame looked like it was leaning to one side. Took me a full day to figure out the cap was just sitting at an angle.
How to check:
- Remove the cap and set it back down slowly, making sure it sits flat.
- Look from the side — it should be perfectly level with the burner base.
- Some caps have a small tab or notch that fits into a groove on the base. Make sure that’s lined up.
Takes 30 seconds. But it makes a huge difference.
3. Inspect the Igniter and Electrode for Grease Buildup
The igniter — that small ceramic nub you see sticking up near the burner — does more than just create the spark. It also plays a role in how cleanly your flame burns once it’s going.
When grease coats the igniter electrode, it can cause weak, inconsistent flames even after the burner lights. The electrode sitting in a pool of grease also creates moisture issues that affect combustion.
I learned this when one of my burners kept lighting but burning with a strange orange-yellow flame instead of the clean blue I was used to. Cleaned the electrode with a dry toothbrush, and the color changed almost immediately.
What to do:
- Look at the small ceramic igniter near each burner.
- If it looks brown, greasy, or has visible buildup, it needs a clean.
- Use a dry toothbrush — no water near the igniter.
- Be gentle. The ceramic tip can crack if you scrub too hard.
- If there’s really stubborn buildup, a tiny bit of rubbing alcohol on a cotton swab works well.
For more detailed ignition-related fixes, I found this guide on 7 Powerful Gas Stove Repair Basics Ideas to Fix Ignition Problems really helpful when I was troubleshooting mine.
4. Check Your Gas Supply Pressure (Don’t Ignore This One)
This one took me a while to think about, because I assumed if the gas was on, the pressure was fine. Not quite.
Low gas pressure from the supply side — whether it’s a partially closed valve, a near-empty LPG cylinder, or an issue with your building’s gas line — can make every single burner on your stove burn weakly. If cleaning doesn’t help and all your burners are equally weak, this is likely your issue.
Quick checks you can do yourself:
| Possible Cause | What to Look For | DIY Fix? |
|---|---|---|
| Partially closed gas valve | Valve handle not fully parallel to the pipe | Yes — turn it fully open |
| Near-empty LPG cylinder | Cylinder feels very light when you tilt it slightly | Yes — replace cylinder |
| Kinked or pinched gas hose | Visible bend or crimp in the hose behind the stove | Yes — straighten or replace hose |
| Regulator issue | All burners weak, hissing sound from regulator | No — call a professional |
| Building gas supply issue | Neighbors with same problem | No — contact gas company |
The gas valve behind your stove is something most people never think to check. I once had weak flames for a week before realizing the valve had been accidentally bumped to a halfway position when I’d pulled the stove out to clean behind it.
Safety note: If you smell gas at any point while doing these checks, stop immediately. Don’t touch switches, open windows, and leave the area. Call your gas company.
5. Look at the Burner Base and Venturi Tube for Blockages
Okay, this one gets a little more technical but stay with me — it’s still very doable.
Under the burner cap sits the burner base (also called the burner head). Beneath that is the venturi tube — a short tube that mixes gas with air before it reaches the flame. If this tube gets blocked by insects (yes, really — small bugs love these warm tubes), debris, or even water from overcooking spills, the air-to-gas mixture gets thrown off and your flame suffers.
A blocked venturi can also cause that orange, sooty flame that doesn’t cook efficiently.
How to check and clean:
- Remove the burner cap and base.
- Look down into the burner opening with a flashlight. You should see the venturi tube.
- Check for any visible blockages — use a thin, flexible brush or a pipe cleaner to gently clear it.
- Avoid using water inside this area — just dry brushing.
- Reassemble and test.
I once found a tiny insect nest blocking one of my venturi tubes. The burner had been underperforming for months and I had no idea why until I finally looked inside. After clearing it, the flame jumped back to full strength.
If you want a broader checklist of what to inspect before starting any repair, this article on 9 Easy Gas Stove Repair Basics Troubleshooting Steps Anyone Can Try is a solid starting point.
6. Replace the Burner Cap If It’s Warped or Damaged
Sometimes, cleaning isn’t enough — the cap itself is the problem.
Burner caps can warp from years of high heat. A warped cap won’t sit evenly, which disrupts gas flow and gives you an uneven, weak flame no matter how carefully you align it. They can also develop hairline cracks that aren’t always obvious but affect performance.
How to know it’s time to replace the cap:
- The cap doesn’t sit flat even after multiple attempts to align it properly.
- There are visible cracks, chips, or warping when you look at it straight on.
- Cleaning made no difference to flame quality.
- The cap is discolored in a way that doesn’t clean off.
Replacement burner caps are surprisingly affordable — you can find them online or at appliance stores. Just note your stove’s brand and model number (usually on a sticker inside the door or on the back panel) and search for compatible parts.
I replaced two caps on my old stove and it was genuinely one of the most satisfying home repairs I’ve done. Took about five minutes total and cost very little compared to a service call.
Common Mistakes People Make When Dealing With Weak Flames
Before I wrap up the practical stuff, here are the mistakes I see (and made) most often:
Putting wet parts back on the stove. Moisture causes ignition issues and can interfere with flame quality. Always dry everything thoroughly — ideally air dry for 20-30 minutes.
Cleaning with metal skewers or sharp objects inside the venturi tube. This can scratch and widen the ports, making the problem worse long-term. Use soft bristle brushes or pipe cleaners for inside the tube.
Assuming it’s a serious problem right away. Most weak flame issues are cleaning problems. Before panicking or calling a technician, spend 20 minutes on a thorough clean. You’ll be surprised how often that’s all it takes.
Ignoring all burners being weak at the same time. If all four burners are equally weak (not just one), that’s almost never a burner-level issue — it’s a supply or regulator problem. Cleaning one burner won’t fix a gas pressure issue.
Using the stove right after cleaning with water. Give everything a full dry before reassembly. If you’re in a hurry, use a clean cloth to wipe off moisture, then let it air dry for at least 15-20 minutes.
For anyone who wants to go deeper on staying safe while doing these kinds of checks themselves, 10 Easy Gas Stove Repair Basics Safety Tips Every Beginner Must Know covers the basics really well.
When You Should Actually Call a Technician
I’m all for DIY, but there’s a line.
Call a professional if:
- You smell gas anywhere in your kitchen, even faintly, after checking that burners are off.
- The regulator looks damaged or is making unusual sounds.
- Flames are burning orange or yellow consistently across all burners even after a full clean.
- There’s a visible crack in a gas line or connection.
- Your stove is older than 10-12 years and multiple burners are failing at once.
These aren’t situations where poking around with a toothpick is the answer. Gas leaks specifically are not DIY territory — ever.
A Quick Reference: Weak Flame Diagnosis at a Glance
| Symptom | Most Likely Cause | DIY Fix |
|---|---|---|
| One burner weak, others fine | Clogged burner ports or misaligned cap | Yes |
| Flame is uneven (one side higher) | Burner cap not seated properly | Yes |
| Orange or yellow flame | Dirty venturi or electrode buildup | Yes |
| All burners weak | Gas supply pressure issue | Sometimes |
| Flame keeps going out | Wet burner or thermocouple issue | Partial |
| Clicking but weak flame | Dirty igniter or damp burner | Yes |
Final Thoughts
Gas stove issues look scarier than they usually are. The weak flame problem that had me reaching for the pizza app turned out to be a ten-minute cleaning job — something I could have done myself if I’d just known where to look.
Start with the simple stuff: clean the burner ports, check the cap alignment, wipe down the igniter. You’ll fix the problem 80% of the time without spending a rupee. For the remaining 20%, the table above will help you figure out whether it’s a DIY job or a call to the professionals.
And if you want to get ahead of these issues before they start, it’s worth reading up on regular maintenance habits: 11 Easy Gas Stove Repair Basics Cleaning Habits That Saved My Stove