

6 simple gas stove repair basics setup tricks anyone can do
There’s something oddly comforting about the soft click-click-whoosh of a gas stove lighting up just right. It’s a sound that says things are working as they should. But when that rhythm is off—when the flame sputters, refuses to ignite, or burns unevenly—it can turn even the simplest cooking task into a frustrating experience. The good news? Many of the most common gas stove issues aren’t as complicated as they seem.
You don’t need to be a professional technician to understand the basics. In fact, a handful of practical tricks, a bit of patience, and some awareness of how your stove actually works can save you time, money, and unnecessary stress. This article walks through six simple yet powerful gas stove repair and setup tricks that almost anyone can handle at home.
Rather than rushing through dry instructions, we’ll explore each trick with real-life scenarios, small insights, and practical adjustments that make a noticeable difference.
understanding the anatomy of your gas stove
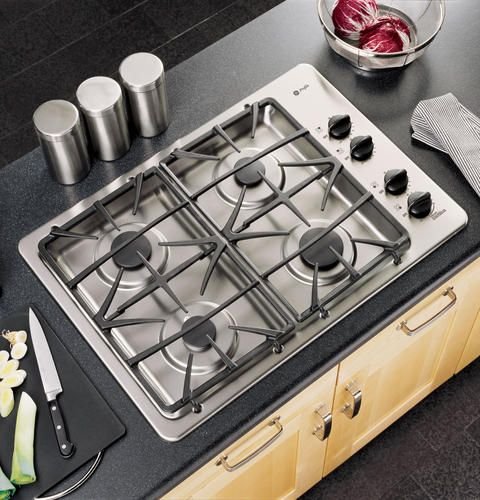
Before diving into fixes, it helps to understand what you’re working with. A typical gas stove has a few key components:
- burner caps
- burner heads
- ignition system (spark or pilot)
- gas supply line
- control knobs
- air shutter (for flame adjustment)
When something goes wrong, it’s usually one of these parts misbehaving. The trick is learning how to read the signs.
trick 1: clean the burner ports properly (not just the surface)
One of the most common issues is uneven flame or weak heating. Many people wipe the top of the burner and assume it’s clean—but the real trouble often hides inside the tiny burner ports.
what’s actually happening
Grease, food spills, and dust slowly clog the small holes where gas flows out. When even a few of these holes are blocked, the flame becomes uneven or yellow.
what you can do
Remove the burner cap and head carefully. Use a soft brush or even a toothpick to gently clear each hole. Avoid using anything too sharp that could widen the ports.
a small habit that helps
Instead of waiting until the stove struggles, give your burners a quick check once a week. It takes five minutes but prevents bigger issues later.
real-life note
Many people think their stove is “getting old” when the flame weakens. In reality, it’s just clogged.
trick 2: fix ignition problems with simple drying and alignment
Few things are more annoying than a burner that clicks endlessly without lighting. Before assuming something is broken, consider moisture and alignment.
what’s actually happening
Water or cleaning liquid can seep into the ignition system. Even slight dampness can stop the spark from doing its job. Misaligned burner caps can also prevent proper ignition.
what you can do
- make sure everything is completely dry
- remove and reposition the burner cap properly
- check if the spark is hitting the right spot
If needed, leave the stove uncovered for a few hours to air dry.
a practical observation
After deep cleaning, ignition issues often appear—not because anything is damaged, but because moisture is trapped.
trick 3: adjust the air-to-gas ratio for a perfect flame
A healthy flame should be blue and steady. If it’s yellow or orange, something is off.
what’s actually happening
Your stove mixes gas with air before burning. If there’s too little air, the flame turns yellow and produces soot.
what you can do
Locate the air shutter near the burner (this may require removing the stove top or accessing underneath). Adjust it slightly until the flame becomes blue and stable.
why this matters
- better cooking efficiency
- less soot on cookware
- safer combustion
a subtle tip
Make small adjustments. Even a tiny shift can change the flame dramatically.
trick 4: check gas flow issues before assuming major faults
Sometimes a burner simply won’t light or stays weak no matter what you try. The problem might not be the burner—it could be the gas flow.
what’s actually happening
- partially closed gas valve
- kinked gas hose
- low gas pressure
what you can do
- ensure the gas valve is fully open
- inspect the hose for bends or damage
- if using a cylinder, check if it’s running low
a reminder worth noting
Always prioritize safety. If you smell gas strongly, don’t experiment—turn off the supply and ventilate immediately.
trick 5: stabilize loose burners and components
A burner that feels wobbly or unstable might not seem like a big deal, but it can affect performance more than you’d expect.
what’s actually happening
Loose parts disrupt gas distribution and flame consistency.
what you can do
- make sure burner caps sit flat
- tighten any visible screws (if accessible)
- ensure the stove surface is level
a practical insight
Even a slight tilt can cause uneven cooking. A simple adjustment under the stove legs can fix it.
trick 6: maintain the ignition system without replacing it
Many people rush to replace ignition components when they stop working consistently. Often, they just need a little attention.
what’s actually happening
Carbon buildup or grease interferes with the spark.
what you can do
- gently clean the ignition tip with a dry cloth
- remove debris around the spark area
- avoid soaking this part with water
a useful habit
Keep liquids away from ignition areas during cleaning.
bringing it all together: a simple maintenance routine
Instead of waiting for problems, build a small routine:
weekly
- wipe burners
- check flame color
monthly
- deep clean burner ports
- inspect gas hose
occasionally
- adjust air shutter if needed
- check alignment and stability
This routine takes less time than dealing with a broken stove.

small signs you shouldn’t ignore
Sometimes your stove gives early warnings:
- clicking sound without flame
- yellow or flickering flames
- unusual gas smell
- soot buildup on pots
These are not random—they’re signals. Acting early prevents bigger repairs.
a brief story from everyday life
Imagine preparing tea early in the morning. You turn the knob, hear the clicks, but no flame. You try again. Still nothing. Frustration builds.
Now imagine knowing that it might just be moisture or a misaligned cap. You adjust it slightly, and the flame appears instantly.
That small difference—between confusion and understanding—is what these simple tricks offer.
tools you might find useful
You don’t need a toolbox full of equipment. A few basics will do:
- soft brush or old toothbrush
- toothpicks or thin wire
- dry cloth
- mild cleaning solution
Keep them in one place, and you’ll always be ready.
when to stop and call a professional
While many fixes are simple, some situations require expert help:
- persistent gas leaks
- damaged gas lines
- ignition system completely non-functional
- strong burning smell even after cleaning
Knowing your limits is part of being smart, not inexperienced.
final thoughts
Gas stove issues often feel more serious than they really are. The truth is, most problems come down to cleanliness, alignment, or small adjustments. Once you understand the basics, you start noticing patterns—and solutions become almost intuitive.
There’s a quiet satisfaction in fixing something yourself, especially something you use every day. It turns a frustrating moment into a small win.
frequently asked questions
- why is my gas stove flame yellow instead of blue?
A yellow flame usually means there’s not enough air mixing with the gas. Adjusting the air shutter or cleaning clogged burner ports often fixes this. - what should i do if my stove keeps clicking but won’t light?
Check for moisture around the ignition system and ensure the burner cap is properly aligned. Drying the area usually solves the issue. - is it safe to clean gas burners with water?
Yes, but make sure all parts are completely dry before using the stove again. Moisture can interfere with ignition. - how often should i clean my gas stove burners?
Light cleaning weekly and deeper cleaning once a month is a good routine for most households. - can i fix low flame issues myself?
Often yes. Check for clogged ports, gas flow problems, or partially closed valves before assuming a major fault. - when should i replace parts instead of repairing them?
If components are visibly damaged, worn out, or not responding after proper cleaning and adjustment, replacement may be necessary.
By learning these simple tricks and paying attention to small details, you turn your gas stove from a source of occasional frustration into something dependable again. And once you get the hang of it, you’ll wonder why it ever felt complicated in the first place.