

9 smart gas stove repair basics installation tips that saved me money
There was a time when every minor issue with my gas stove felt like a full-blown emergency. A weak flame, a clicking igniter, or a faint smell of gas would instantly push me toward calling a technician. Each visit chipped away at my wallet, and over time, I realized something uncomfortable: many of these problems weren’t complicated. They just felt that way because I didn’t understand the basics.
Learning a few simple repair and installation principles completely changed how I deal with my stove. It didn’t happen overnight. It came from small experiments, a few mistakes, and a lot of curiosity. What I discovered is that most gas stove issues follow patterns, and once you understand those patterns, you start saving money almost immediately.
Below are nine practical, experience-driven tips that helped me take control of my gas stove maintenance without turning it into a stressful or risky task.
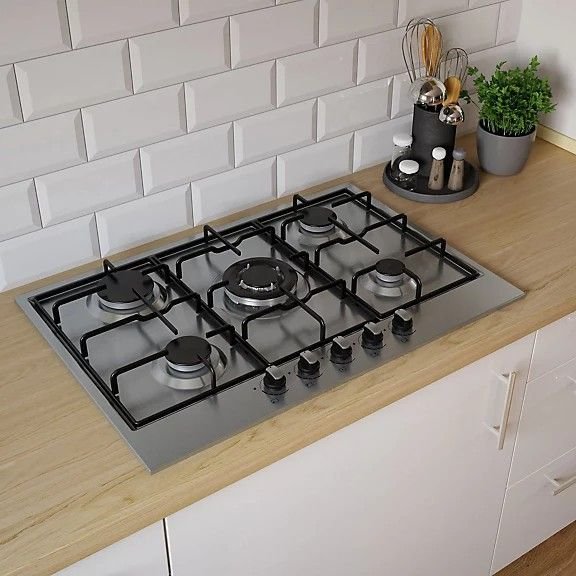
understanding your stove before touching anything
Before tightening a single screw or removing a burner, I learned one important lesson: don’t fix what you don’t understand. Gas stoves may look simple, but they rely on a combination of gas flow, air mixing, and ignition systems working together.
Take a moment to observe your stove. Notice how the flame behaves when you turn the knob. Listen for the clicking sound of the igniter. Check how long it takes for the burner to light. These small observations act like clues. They often point you directly to the problem.
This habit alone saved me from unnecessary repairs. Instead of guessing, I began diagnosing.
always start with a basic cleaning routine
It sounds too simple, but cleaning solved more problems than any tool I bought. Food spills, grease buildup, and dust can clog burner ports and disrupt gas flow.
One time, my stove started producing uneven flames. I assumed something serious was wrong. After removing the burner cap and cleaning the tiny holes with a thin needle, the flame returned to normal. No parts replaced, no technician called.
A weekly cleaning routine became my first line of defense. It includes:
- wiping burner heads
- clearing clogged holes
- cleaning under the grates
- drying everything before reassembling
It costs nothing but a little time, yet it prevents a surprising number of issues.
checking gas connections the right way
Loose or improperly sealed connections are not just inefficient; they can be dangerous. Early on, I made the mistake of tightening connections without properly checking for leaks.
A simple soap-and-water test changed that. After applying a soapy solution to the connection, I watched for bubbles when the gas was on. No bubbles meant no leaks. It’s simple, visual, and incredibly effective.
This small habit saved me from calling a technician just to confirm what I could check myself in minutes.
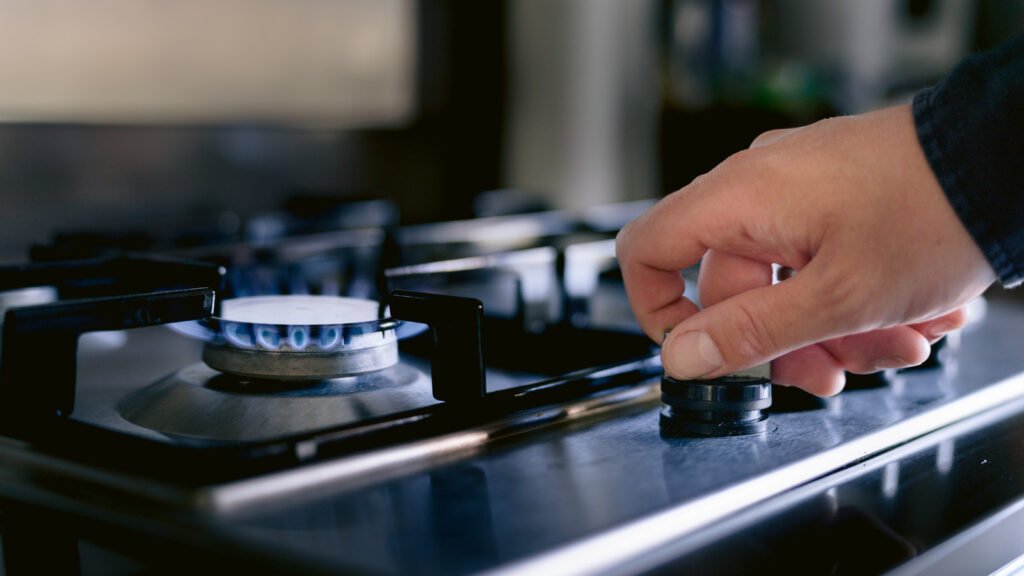
learning the difference between weak flame and low gas pressure
At first, I thought every weak flame meant a serious issue. In reality, it can be caused by several minor factors:
- clogged burner ports
- partially closed gas valve
- regulator issues
By testing one thing at a time, I learned to isolate the cause. If cleaning didn’t fix it, I checked the regulator. If other appliances had the same issue, it pointed toward the gas supply.
Understanding this difference saved me from replacing parts that were perfectly fine.
igniter problems are often simpler than they seem
When the stove clicks but doesn’t light, it feels like a complicated electrical issue. That’s what I thought too. But in many cases, it’s just moisture, dirt, or misalignment.
Once, after cleaning my stove, the igniter stopped working. I panicked, assuming I had damaged something. It turned out the igniter tip was slightly wet. After drying it thoroughly, it worked perfectly again.
Other times, gently adjusting the igniter position closer to the burner fixed the issue instantly.
Before assuming the worst, always check:
- moisture around the igniter
- dirt buildup
- alignment with the burner
most problems hide in small details
I used to overlook small components like burner caps and rings. But these pieces play a crucial role in how the flame forms.
One day, I reassembled the stove after cleaning and noticed the flame was uneven and noisy. After a closer look, I realized the burner cap was slightly misaligned. Fixing its position restored everything instantly.
This taught me that installation isn’t just about putting things back—it’s about putting them back correctly.
Now, I double-check:
- burner cap placement
- ring alignment
- proper seating of all removable parts
These details cost nothing but attention, yet they make a huge difference.
using the right tools instead of improvising
I used to rely on whatever tool was nearby. A kitchen knife instead of a screwdriver, a pin instead of a proper cleaning needle. It worked sometimes, but it also caused damage.
Investing in a few basic tools changed everything:
- a proper screwdriver set
- a soft brush
- a thin wire for cleaning ports
- a small wrench
With the right tools, tasks became easier, safer, and more precise. It also reduced the risk of damaging parts, which saved me from unnecessary replacements.
understanding when not to fix it yourself
This might be the most important tip. Not every problem should be handled at home. There’s a clear line between basic maintenance and technical repair.
I learned to step back when:
- there’s a strong gas smell that doesn’t go away
- internal components need disassembly
- the regulator appears damaged
- the stove behaves unpredictably despite basic fixes
Knowing when to stop is just as valuable as knowing how to fix something. It protects both your safety and your wallet in the long run.
keeping a simple maintenance schedule
Instead of waiting for problems, I started following a basic routine:
- weekly cleaning
- monthly inspection of connections
- occasional deep cleaning of burners
- checking ignition performance
This proactive approach reduced breakdowns significantly. It also made repairs easier because issues were caught early.
Think of it like maintaining a vehicle. Regular care prevents expensive repairs.
small adjustments can improve efficiency
One unexpected benefit of learning stove basics was improved efficiency. A properly adjusted flame burns cleaner and uses less gas.
I learned to recognize a healthy flame:
- blue in color
- steady and even
- not too high or too low
If the flame turned yellow or flickered, it usually meant poor air-gas mixing or dirt buildup. Fixing it not only improved cooking but also reduced gas consumption.
Over time, these small improvements added up to noticeable savings.
building confidence through experience
At the beginning, I hesitated to touch anything. The idea of working with gas felt intimidating. But each small success built confidence.
Fixing a weak flame. Cleaning a clogged burner. Adjusting an igniter. Each task reinforced the idea that I was capable of handling basic maintenance.
Confidence doesn’t come from knowing everything. It comes from solving one small problem at a time.
how these tips actually saved money
It’s easy to talk about savings in theory, but in practice, the difference was clear. Before learning these basics, I would call a technician for almost every issue.
Afterward:
- minor problems were fixed at home
- unnecessary part replacements were avoided
- maintenance reduced major breakdowns
- gas usage became more efficient
The savings weren’t just financial. There was also peace of mind. I no longer felt helpless when something went wrong.
practical mindset over technical complexity
What surprised me most was that gas stove maintenance isn’t about being highly technical. It’s about being observant, patient, and methodical.
Instead of rushing to fix things, I learned to:
- observe the problem
- test simple solutions first
- avoid assumptions
- stay calm
This mindset turned what used to be stressful situations into manageable tasks.
lessons learned from mistakes
Not everything went smoothly. I made mistakes along the way:
- reassembling parts incorrectly
- over-tightening connections
- ignoring early warning signs
But each mistake taught me something valuable. Instead of avoiding errors, I started treating them as part of the learning process.
The key is to learn quickly and avoid repeating them.
why basic knowledge matters more than tools
You can have the best tools in the world, but without understanding the basics, they won’t help much. On the other hand, even simple tools become powerful when you know what you’re doing.
Learning how gas flows, how burners work, and how ignition systems operate gave me an advantage that no tool alone could provide.
It turned guesswork into informed action.
making maintenance part of everyday life
Instead of treating stove care as a separate task, I started integrating it into my routine. While cooking, I pay attention to flame behavior. While cleaning the kitchen, I include the stove.
This approach keeps everything in check without requiring extra effort. It also ensures that problems don’t go unnoticed.
overcoming the fear factor
Gas appliances naturally create a sense of caution, and that’s a good thing. But fear shouldn’t prevent you from learning basic maintenance.
The key is to respect the system without being intimidated by it. Follow safety practices, stay within your limits, and focus on simple tasks.
Once you get comfortable, you realize that many issues are far less complicated than they seem.
the long-term impact of small habits
Looking back, the biggest difference didn’t come from one major fix. It came from small, consistent habits:
- regular cleaning
- careful observation
- proper reassembly
- timely adjustments
These habits reduced the need for repairs and extended the life of my stove.
Over time, they turned into second nature.
final thoughts
Gas stove repair and installation basics aren’t just technical skills. They’re practical life skills that save money, reduce stress, and build confidence.
You don’t need to become an expert. You just need to understand the fundamentals and apply them consistently.
The journey starts with small steps, and each step makes the next one easier.
frequently asked questions
- is it safe to repair a gas stove at home
Yes, but only for basic maintenance tasks like cleaning burners, checking connections, and adjusting parts. For complex issues or strong gas leaks, professional help is necessary. - why is my gas stove flame yellow instead of blue
A yellow flame usually indicates incomplete combustion, often caused by clogged burner holes or improper air-gas mixing. Cleaning the burner typically fixes it. - how often should i clean my gas stove burners
Light cleaning should be done weekly, while a deeper cleaning can be done once a month depending on usage. - what should i do if i smell gas
Turn off the gas supply immediately, ventilate the area, and avoid using electrical switches. If the smell persists, contact a professional right away. - why does my igniter keep clicking but not lighting
This is often due to moisture, dirt, or misalignment of the igniter. Drying and cleaning it usually resolves the issue. - can regular maintenance really reduce gas consumption
Yes, a clean and properly adjusted stove burns gas more efficiently, which can lower overall consumption over time.