

7 Quick Gas Stove Repair Basics Setup Tips That Actually Work
There’s something quietly satisfying about fixing a gas stove with your own hands. It isn’t just about saving money—though that’s a nice bonus—it’s about understanding the heartbeat of your kitchen. A gas stove is simple in theory: fuel, ignition, flame. But when something goes wrong, it can feel like a puzzle made of invisible pieces. The good news? Most issues are surprisingly fixable once you understand a few core principles.
This isn’t a technical manual filled with robotic steps. Think of it as a lived-in guide—part observation, part habit, part practical wisdom. These seven quick tips don’t require you to be an expert. They’re the kind of things you learn over time, often after a burner refuses to light right when you’re starving.
Let’s walk through them.
tip 1: always start with what you can see and hear
Before reaching for tools, pause. A faulty gas stove often gives subtle clues before it completely fails.
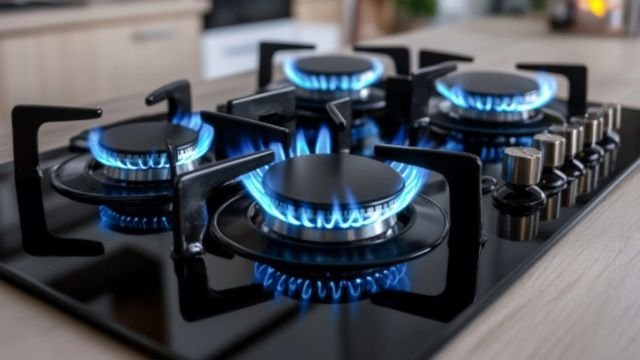
Is the flame weak or uneven? That usually points to blocked burner ports. Do you hear clicking but see no flame? Ignition may be working, but gas flow might be interrupted. No clicking at all? That’s likely an ignition issue or power supply problem.
Stand still for a moment and observe:
– Listen for the ignition spark
– Smell for gas (carefully)
– Watch the flame pattern
A healthy flame is steady and blue. Yellow or orange hints at incomplete combustion, often caused by dirt or improper air-gas mixture.
This step alone solves half the mystery. You’re not guessing anymore—you’re reading signals.
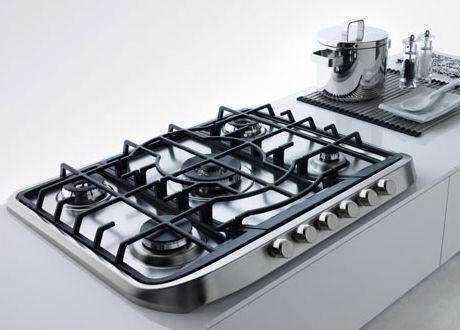
tip 2: cleaning is not optional—it’s the foundation
Most gas stove problems are not mechanical failures. They’re cleanliness issues disguised as breakdowns.
Food spills, grease, and dust slowly clog burner holes. Over time, even a thin layer of residue disrupts the gas flow. That’s when flames become uneven or burners stop lighting altogether.
Here’s a simple cleaning rhythm:
– Remove burner caps and grates
– Soak them in warm soapy water
– Use a soft brush or toothpick to clear tiny holes
– Dry everything completely before reassembling
Avoid using sharp metal objects. They can widen holes and permanently affect flame control.
A small detail many overlook: moisture. Even a drop of water trapped inside a burner can block ignition. If you’ve just cleaned your stove, give it time to dry fully before testing.
Think of cleaning not as maintenance, but as reset. It brings your stove back to its original state.
tip 3: check the gas supply before assuming the worst
It sounds obvious, but it’s surprisingly common to overlook.
If all burners fail at once, the issue is rarely with each burner individually. It’s usually the gas supply.
Check:
– Is the gas valve open?
– Is the cylinder empty (if using LPG)?
– Is there a kink in the gas hose?
Sometimes the regulator becomes faulty, especially in older setups. If you notice inconsistent flame strength across burners, the regulator could be limiting pressure.
A quick swap with a known working regulator can confirm this.
Safety note: if you smell strong gas without ignition, turn everything off immediately and ventilate the area. Never test ignition in that situation.
tip 4: understand your igniter—it’s small but critical
The igniter is the part that produces the clicking sound and spark. When it fails, the stove won’t light automatically.
Common issues include:
– Dirt blocking the spark path
– Loose wiring
– Moisture buildup
– Worn-out ignition switch
Try this:
Turn off the stove, clean around the igniter tip, and make sure it’s dry. Then test again.
If there’s no clicking sound at all, check if your stove is plugged in (for electric ignition models). It’s easy to forget that some gas stoves rely on electricity for ignition.
If clicking happens but no flame appears, the spark may not be reaching the gas. Slight repositioning or cleaning often fixes this.
In many homes, people switch to manual lighting (with a lighter) and forget the igniter altogether. But restoring it is usually easier than replacing it.
tip 5: burner alignment matters more than you think
A misaligned burner cap can cause uneven flames, delayed ignition, or even no flame at all.
After cleaning, it’s common to place parts back incorrectly. Even a slight tilt can disrupt gas distribution.
Make sure:
– Burner caps sit flat and centered
– Rings are properly aligned with gas outlets
– Nothing wobbles when placed
If your flame looks like it’s “escaping” from one side, alignment is the first thing to check.
It’s a small adjustment, but it often brings immediate results.
tip 6: don’t ignore weak flames—they’re early warnings
A weak flame is not just an inconvenience. It’s a sign that something is starting to go wrong.
Possible causes include:
– Partial blockage in burner ports
– Low gas pressure
– Regulator issues
– Internal valve wear
Instead of waiting for a complete failure, treat weak flames as a maintenance signal.
One practical habit: compare burners. If one is significantly weaker than others, focus your attention there. If all are weak, the issue is likely upstream (gas supply or regulator).
Addressing this early prevents bigger repairs later.
tip 7: know when to stop and call for help
There’s a fine line between basic repair and risky intervention.
You can safely:
– Clean burners
– Check alignment
– Inspect visible components
– Replace simple parts like knobs or grates
But avoid:
– Opening internal gas lines
– Modifying valves
– Attempting complex electrical repairs
If you notice persistent gas smell, irregular flame behavior despite cleaning, or ignition sparks in the wrong place, it’s time to step back.
A trained technician doesn’t just fix the issue—they ensure safety, which is the real priority.
a short practical checklist you can keep in your kitchen
Before assuming your stove is broken, run through this:
– Are the burners clean and dry?
– Is the gas supply steady?
– Are burner caps aligned correctly?
– Is the igniter clean and functional?
– Are flames consistent across burners?
This checklist takes less than five minutes but can save hours of frustration.
real-life scenario: a simple fix that feels like magic
Imagine this: you turn the knob, hear clicking, but nothing lights. You try again. Still nothing.
At this point, many people assume something is broken.
But instead, you remove the burner cap and notice a tiny food particle stuck in one of the holes. You clean it, dry everything, place it back—and suddenly, the flame returns like nothing ever happened.
That’s the nature of gas stove repair. Small causes, big effects.
building confidence over time
The first time you attempt a fix, it may feel uncertain. But each small success builds confidence.
You begin to recognize patterns:
– The sound of a healthy ignition
– The look of a proper flame
– The feel of correctly aligned parts
Over time, what once seemed like a technical problem becomes routine.
This isn’t about becoming a technician. It’s about becoming comfortable with your tools and environment.
a note on safety that should never be skipped
Gas appliances demand respect.
Always:
– Turn off the gas supply before cleaning
– Ensure proper ventilation
– Avoid using open flames to test leaks
– Keep flammable materials away
If something feels off, trust that instinct. Safety is not negotiable.
why these basics actually work
Because they focus on the root, not the symptom.
Instead of replacing parts immediately, you:
– Observe
– Clean
– Adjust
– Verify
This approach solves the majority of common issues without unnecessary cost or complexity.
And perhaps more importantly, it gives you control over a part of your home that often feels unpredictable.
closing thoughts
A gas stove doesn’t demand perfection. It just needs attention.
These seven tips are not secrets—they’re habits. Simple, repeatable, effective habits that turn confusion into clarity.
The next time your stove acts up, don’t rush to replace it or call for help immediately. Pause. Look closely. Try one small fix.
Chances are, that’s all it needs.
frequently asked questions
- why is my gas stove clicking but not lighting?
This usually happens when the igniter is working but gas isn’t reaching the burner properly. It could be due to clogged burner holes, misalignment, or moisture. Cleaning and drying the burner often solves the issue. - how often should i clean my gas stove burners?
Light cleaning should be done weekly, especially if you cook daily. A deeper clean, including soaking and clearing burner holes, can be done once or twice a month depending on usage. - is it safe to use a lighter if the igniter is not working?
Yes, but only if there’s no strong smell of gas. Turn the knob slightly, ignite with a lighter, and ensure the flame is stable. However, it’s better to fix the igniter for long-term convenience. - why is my flame yellow instead of blue?
A yellow flame indicates incomplete combustion, often caused by dirt or improper air-gas mixture. Cleaning the burner and ensuring proper airflow usually restores the blue flame. - what should i do if i smell gas near my stove?
Immediately turn off the gas supply, open windows for ventilation, and avoid using electrical switches or flames. If the smell persists, contact a professional technician. - can i replace gas stove parts myself?
You can replace simple parts like burner caps, knobs, and grates. For internal components like valves or gas lines, it’s safer to call a professional to avoid risks.
If you keep these basics in mind, your gas stove will rarely catch you off guard. And even when it does, you’ll know exactly where to begin.