
When I moved into my new apartment two years ago, I thought installing a gas stove would be a weekend job. Spoiler: it wasn’t — at least not the first time. I made every rookie mistake possible. I didn’t check the gas line pressure. I forgot to test for leaks properly. And I spent three hours figuring out why the igniter kept clicking without actually lighting.
After that disaster, I got serious about learning the right way to do this. I watched every tutorial I could find, talked to an appliance technician who lived in my building, and slowly built up a solid process. Now? I can set up a gas stove in under two hours without breaking a sweat.
Here are the 9 fast setup ideas that genuinely saved me time — and a few headaches too.
1. Always Do a Complete Unboxing Checklist Before Anything Else
I know it sounds obvious, but I once spent 45 minutes trying to install a stove before realizing the anti-tip bracket was still in the box under a cardboard flap. That one mistake added an extra hour to my day.
Now I lay everything out on the floor first. Every single component. Grates, burner caps, burner heads, drip pans, the installation manual, and any hardware bag included.
Quick Unboxing Checklist:
| Item | Check |
|---|---|
| Burner grates | ✓ |
| Burner caps & heads | ✓ |
| Anti-tip bracket | ✓ |
| Power cord (if applicable) | ✓ |
| Installation manual | ✓ |
| Flexible gas connector | ✓ |
| Hardware bag (screws/bolts) | ✓ |
This takes maybe 10 minutes and saves you from mid-install surprises. Trust me on this one.
2. Measure Twice, Slide In Once
The gap between your countertops needs to match your stove width almost exactly. Most freestanding gas stoves are 30 inches wide, but “almost 30 inches” and “exactly 30 inches” are two different things.
I once bought a stove that was 30.25 inches wide for a 30-inch gap. Getting it in required two people, a furniture slider, and a lot of creativity. Getting it out for a repair six months later was even worse.
Use a tape measure and check:
- Width of the opening
- Depth from front to back wall
- Height from floor to underside of countertop
- Location of the gas valve (left, right, or center back)
Write these down. Keep the paper near you during install. Simple, but effective.
3. Use a New Flexible Gas Connector Every Single Time
This was the biggest lesson I learned from the technician in my building. He looked at the old corrugated connector I was about to reuse and basically said, “Do you want to save $15 or do you want to sleep at night?”
Old flexible connectors develop micro-cracks, especially if they’ve been bent or moved multiple times. They’re not visibly damaged. They just… fail eventually.
A new stainless steel flexible gas connector costs around $15–25 and takes five minutes to install. It’s one of those upgrades where there’s genuinely no downside.
Connector Length Guide (approximate):
| Distance from Gas Valve to Stove Inlet | Recommended Connector Length |
|---|---|
| Up to 12 inches | 18-inch connector |
| 12–24 inches | 24-inch connector |
| 24–36 inches | 36-inch connector |
Don’t stretch or kink it. Give it a gentle curve and you’re good.
4. Apply Thread Sealant Tape Like You Mean It
Yellow Teflon tape (the gas-rated kind, not the white plumbing tape) is something most DIYers either skip or apply lazily. I was guilty of the latter.
Wrap it clockwise — in the same direction you’ll tighten the fitting — and do at least 3 full wraps. I usually do 4 just to be sure. Press the tape into the threads as you go so it seats properly.
One thing I learned the hard way: never use white plumbing Teflon tape on gas connections. It’s not designed for gas and can degrade faster. The yellow tape is specifically rated for gas lines and it’s what your technician uses too.
After applying tape, hand-tighten the connection first, then use a wrench to snug it. You don’t need to go crazy — just firm.
5. The Soap Bubble Test Is Non-Negotiable
I’ll be honest — the first time I installed a gas stove, I skipped the leak test because everything smelled fine. Bad idea. A slow leak doesn’t always smell strong right away, especially if there’s ventilation in your kitchen.
Now, before I ever turn the burners on for the first time, I do a proper leak test:
- Turn on the gas supply valve
- Mix dish soap with water in a small bowl (or use a pre-made leak detector spray)
- Apply the soapy water to every connection point with a brush or sponge
- Watch for bubbles — any bubble formation means there’s a leak
If you see bubbles, turn off the gas, tighten or reseal the connection, and test again. Don’t move on until it’s completely bubble-free.
This is covered in more detail in this helpful guide on 6 Essential Gas Stove Repair Basics Safety Ideas That Prevent Accidents — worth a read before your first install.
6. Level the Stove Before You Push It In All the Way
Most gas stoves have adjustable legs at the bottom. A lot of people (including past me) push the stove all the way in and then try to level it. That’s backwards and awkward.
Do it in the open:
- Place a bubble level on top of the stove surface
- Adjust the front legs until the level reads center
- Adjust the rear legs if accessible
- Re-check front and back, then side to side
A properly leveled stove means your pots don’t slide, liquid doesn’t pool to one side of a pan, and frankly the whole cooking experience is just better. It takes maybe 8 minutes and makes a real difference.
7. Install the Anti-Tip Bracket Before You Forget
This is the one most people skip. The anti-tip bracket is a small metal clip that attaches to the floor and catches one of the rear legs of the stove, preventing it from tipping forward if someone pulls on the oven door or a kid climbs on it.
It’s included with most new stoves. It’s required by safety codes in most countries. And it takes about 10 minutes to install.
Why people skip it: It requires either drilling into the floor or screwing into the base cabinet. It feels like extra work after you’ve already done the main install.
Why you shouldn’t skip it: A fully loaded oven door pulled open can tip a 150+ lb stove forward. That’s a serious injury risk, especially with children around.
Mark the floor position, screw in the bracket, slide the stove leg over it. Done.
For more safety guidance before and after installation, check out 8 Smart Gas Stove Repair Basics Safety Tips That Protect Your Family — it covers things a lot of install guides completely skip.
8. Set Up Your Burner Components in the Right Order
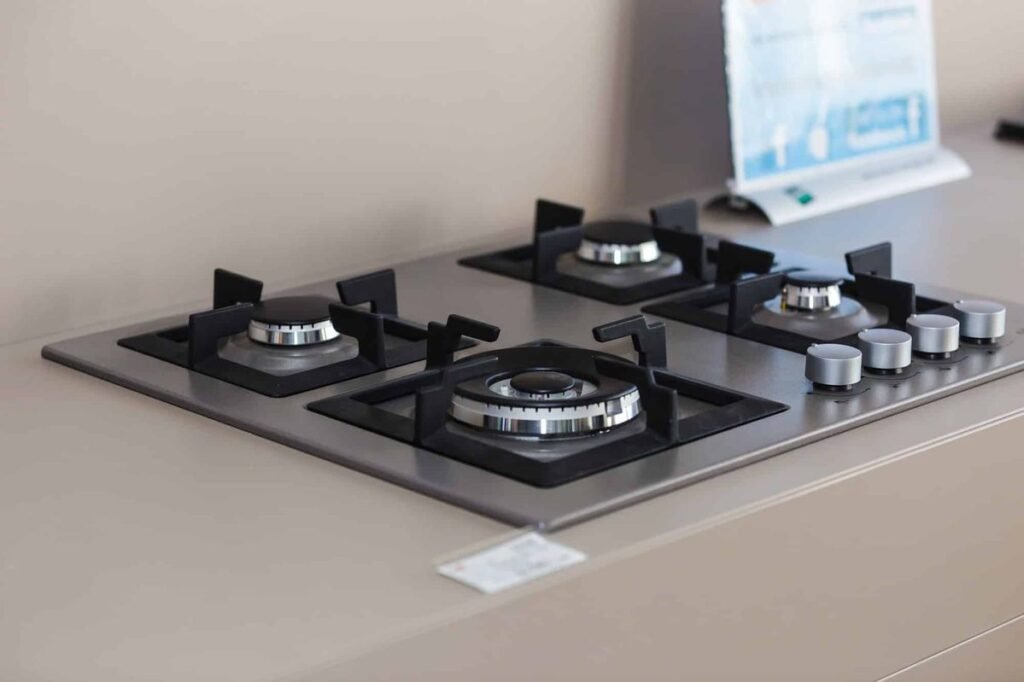
This sounds almost too simple, but I’ve seen people spend 20 minutes troubleshooting ignition issues because the burner cap was sitting slightly off-center. Burner components need to go on in the correct sequence, and each piece needs to sit completely flat and properly aligned.
Correct Burner Assembly Order:
| Step | Component | What to Check |
|---|---|---|
| 1 | Burner base/body | Seated flat, aligned with gas port |
| 2 | Burner head | Slots aligned with igniter tip |
| 3 | Burner cap | Flat and centered, no wobble |
| 4 | Grate | Stable, feet touching stove surface |
After placing each cap, give it a gentle twist. If it rotates freely without resistance, it’s not seated correctly. It should sit still and flat.
A misaligned burner cap is the #1 cause of uneven or weak flame right after installation — which I know all too well from my first setup. Speaking of which, there’s a great breakdown of flame issues in 7 Easy Gas Stove Repair Basics Troubleshooting Tips for Weak Flame.
9. Run a Full Burner Test Before Calling the Job Done
The last step that actually saves you time in the long run: a thorough test of every single burner before you declare the installation complete.
Here’s what I test:
- All four (or five) burners light on the first or second click — if one takes more than 3 clicks, there’s a problem
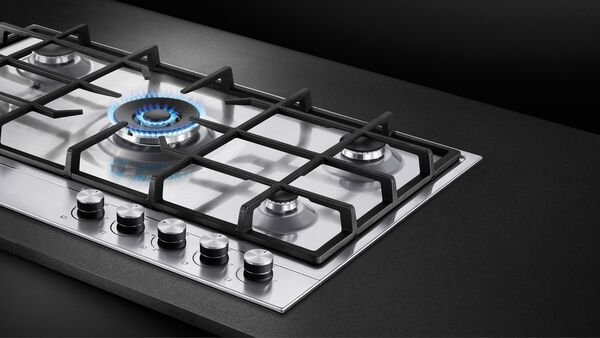
- Flame color is mostly blue with minimal orange or yellow tips
- Flame height is consistent across the ring, not strong on one side and weak on the other
- No clicking continues after the burner is lit (that’s usually moisture near the igniter)
- Oven igniter lights within 30–45 seconds on the first try
Burner Flame Health Quick Guide:
| Flame Appearance | What It Means |
|---|---|
| Steady blue flame | ✅ Everything’s good |
| Blue with small yellow tips | ✅ Normal, minor adjustment okay |
| Large orange/yellow flame | ⚠️ Air-to-gas ratio issue |
| Weak, low flame on all burners | ⚠️ Low gas pressure, check supply |
| Flame only on one side | ⚠️ Burner cap misaligned or clogged |
| No ignition after 3+ clicks | ❌ Igniter or gas flow problem |
If anything fails this test, it’s much easier to fix now before you’ve pushed the stove fully into its space and put all your pots back.
Common Mistakes I Made (So You Don’t Have To)
Look, I’m not too proud to admit I’ve made almost every mistake on this list personally.
Reusing an old gas connector — Saved $20, created unnecessary risk. Not worth it.
Skipping the anti-tip bracket — Didn’t think about it until I leaned on the open oven door. Stove shifted. Nothing bad happened but it could have.
Not checking the gas valve direction — Installed the flexible connector going the wrong direction, created a kink, had to redo the whole connection.
Assuming the floor was level — Turned on a burner with a pot of water, it pooled immediately to one side. Took the stove back out and leveled it properly.
Putting the burner caps on wet — Cleaned them right before install and didn’t let them dry fully. Igniter was clicking for five minutes before the moisture cleared.
These aren’t catastrophic errors (except maybe the connector one), but they’re time-wasters that add frustration to what should be a fairly straightforward job.
Final Thoughts
Installing a gas stove isn’t complicated, but it rewards people who take their time upfront. The ideas that saved me the most time weren’t fancy — they were just about having a system. Unbox properly, measure before cutting anything, use new hardware, test before you call it done.
The first time I installed a stove, it took most of a day and I still wasn’t confident it was right. The last time I did it, it took under two hours and I knew exactly what I was working with at every step.
If you’re tackling this for the first time, don’t rush it. And if something doesn’t look or smell right during the gas connection steps, stop and get a professional. Gas work is very DIY-friendly up to a point — but that point matters.
Frequently Asked Questions (FAQs)
Q1: Do I need a professional to install a gas stove, or can I do it myself?
In most places, connecting a gas appliance to an existing gas line using a flexible connector is legal for homeowners to do themselves. However, if you’re running a new gas line or modifying existing pipework, you’ll need a licensed gas fitter. Always check your local regulations before starting.
Q2: How do I know if my gas connector is the right type?
Look for a connector labeled “CSA approved” or “listed for gas appliance use.” It should be stainless steel corrugated tubing (not rubber or copper in most modern codes) and rated for natural gas or propane, depending on your supply. Yellow Teflon tape should also be gas-rated, not standard white plumbing tape.
Q3: My burner igniter keeps clicking even after the flame is lit — what’s wrong?
This almost always comes down to moisture. Either the burner area got wet during cleaning, or there’s humidity trapped near the igniter. Remove the burner cap, dry everything thoroughly, and try again. If it persists, the igniter switch cap itself may be cracked or worn.
Q4: How long does a gas stove installation typically take for a DIYer?
With everything laid out and measured in advance, most people can complete a freestanding gas stove installation in 1.5 to 3 hours. The time usually gets eaten up by leveling, leak testing (which shouldn’t be rushed), and assembling the burner components correctly.
Q5: Can I use my old gas hose/connector from my previous stove?
It’s strongly recommended that you don’t. Flexible gas connectors are designed for a single installation. Once bent, moved, or removed, the internal metal can develop micro-fractures that aren’t visible. They’re inexpensive to replace and the peace of mind is worth far more than the few dollars saved.
Want to go deeper on keeping your stove running well after installation? Read 10 Proven Gas Stove Repair Basics Fixes That Actually Work — it covers the most common post-install issues and how to fix them fast.

