

Gas Stove Repair 101: The Basics Can Save Your Time and Money!
Get these 9 simple maintenance tips that any homeowner needs to know before contacting a technician.
Nothing is more annoying than walking into the kitchen, turning on your gas stove and — nothing. No flame. No click. Just silence and the smell of gas.
Most folks panic right away and call a repair technician. But the reality is this: many common gas stove issues are problems you can solve on your own. No special training. No expensive tools. All you need is a little know-how and a few minutes of your time.
This guide will cover 9 basic gas stove repair tips and maintenance tricks every homeowner learns a little too late. Whether your burner refuses to catch fire, your flame looks strange, or your oven doesn’t seem to be heating evenly — here are real, practical solutions.
Let’s get into it.
The Importance of Knowing the Basics About Gas Stoves
Gas stoves are built to last. With proper care, a gas stove can operate dependably for 15 to 20 years. However, if left without basic maintenance, minor problems become major (and costly) problems in a hurry.
The thing is, most repair calls are for issues you can fix yourself for under $10. Knowing the basics will save you money, keep your kitchen safe, and prolong the life of your appliance.
Plus, gas appliances need a little more attention than electric ones. Understanding what’s normal and what’s not could literally save your house.
Tip #1: Start With the Burner Cap (It’s Almost Always to Blame)
When a burner doesn’t ignite, or the flame is uneven, most people jump to the worst conclusion. But nine out of 10 times it’s the burner cap that’s to blame.
What Is a Burner Cap?
The burner cap is the small round piece that sits on top of the burner. It distributes gas flames in the form of a ring. When it becomes dirty, shifted, or misaligned — the entire burner fails.
How to Fix It
- Turn off the stove completely.
- Remove the burner grate.
- Remove the burner cap and look underneath it.
- Make sure it is not blocked with food particles or grease.
- Wash it down with a soft brush and warm soapy water.
- Make sure to dry it well before putting it back.
- Be sure it is flat and centered.
That last step is crucial. Even a slightly askew burner cap can result in weak or uneven flames.
Pro tip: Always check your burners before cooking a complete meal after a deep cleaning. This makes it easier to catch alignment issues early.

Tip #2: Clean the Burner Ports Regularly — They Clog More Than You Think
Burner ports are those small holes around the burner head where gas escapes and ignites. These are small, easily overlooked details — and very important.
When those ports are clogged with grease or food debris, your flame burns unevenly or weakly — or won’t light at all.
How to Clean Burner Ports
You don’t need any specialized tools. A straightened paper clip or a toothpick works great.
- Take the burner cap and head off.
- Hold the burner head up to the light and inspect the ports.
- Use your paper clip or toothpick to carefully clear any blockage.
- Never use a plastic toothpick — it can shatter inside the port.
- Rinse the burner head in warm water.
- Allow it to air dry thoroughly; any moisture causes ignition problems.
If you cook regularly, do this once a month. It takes under five minutes and makes a huge impact.
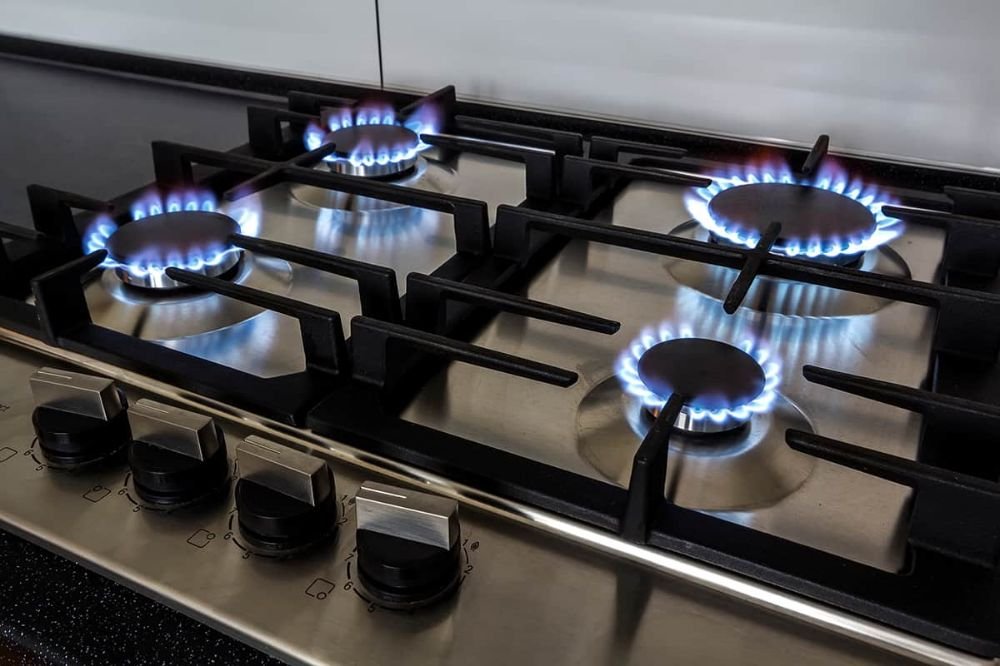
Tip #3: Know What a Healthy Flame Should Look Like
No one tells you about this until something goes wrong.
| Flame Type | Color | What It Means |
|---|---|---|
| Healthy | Blue with small yellow tips | Proper air-to-gas ratio |
| Too much air | Mostly blue, lifting off burner | Airflow adjustment needed |
| Too little air | Large orange/yellow flame | Incomplete combustion — carbon monoxide risk |
| Danger | Mostly orange or red | Call a technician immediately |
A blue flame means your stove is burning gas cleanly and efficiently. An orange or yellow flame is a sign that something is wrong — an incorrect mixture of air, or contamination.
If you ever notice a steady red or orange flame and you have not recently cleaned the stove, stop using it and contact a professional. This can be a sign of carbon monoxide generation.
Tip #4: Do Not Neglect the Igniter — Keep It Dry and Clean
The igniter is the small ceramic piece located near each burner that sparks to ignite the gas. It is a frequent source of trouble.
Signs Your Igniter Needs Attention
- All you hear is clicking, but no flame comes up.
- The clicking continues after the burner is ignited.
- One burner lights but another won’t.
The Fix Most People Miss
Moisture is the primary ignition killer. If you boil over a pot or use too much water cleaning the stove, it gets into the igniter and it quits working.
Here’s what to do:
- Remove the burner grate and cap.
- Pat around the igniter with a dry cloth or paper towel to absorb moisture.
- Dry the area with a hair dryer on low for 2–3 minutes.
- Reinstall everything and try again.
This simple trick resolves 60% of igniter problems without spending any money.
If the igniter is clearly cracked or damaged, it will need to be replaced. Replacement igniters are inexpensive — typically $10 to $30, depending on your make and model.
Tip #5: Verify and Secure the Gas Supply Connections
Important disclaimer: Try this only if you’re comfortable working near gas lines. If you smell gas strongly, leave the house and call your gas company immediately.
That said, loose connections are much more common than many people realize — and they’re often the culprits behind weak flames.
What to Check
- The gas valve at the back or beneath the stove.
- The flexible gas supply line that runs from the stove to the wall.
- The connection point on the back of the stove itself.
Safe Way to Check for Leaks
Mix dish soap with water and brush it onto the connection points. If bubbles appear, you have a small gas leak at that joint. Hand-tighten the fitting with a wrench.
If it keeps bubbling after you tighten, stop. Call a licensed gas technician. A professional repair is well worth it — both financially and for your safety.
Tip #6: How to Reset Your Stove’s Ignition System
Newer gas stoves come with electronic ignition systems. Sometimes, they just need a reset — like rebooting an unresponsive computer.
How to Reset the Ignition
- Set all burner knobs to the off position.
- Disconnect the stove from the wall outlet.
- Wait 60 seconds.
- Plug it back in.
- Test each burner.
This simple power cycle clears minor electronic glitches that can prevent the igniter from firing. It works more often than you’d think, and it takes less than two minutes.
If the problem returns after a few days, replacement of the ignition module could be in order — but try this first.
Tip #7: Clean Under and Around the Stove More Than You Think
Most people clean the stovetop. Few clean underneath it or around the burner area consistently.
Grease and food debris accumulate in hidden spaces and create two key problems:
- Fire danger — grease close to open flames is hazardous.
- Performance problems — clogged vents and greasy parts lead to inconsistent heating.
What to Clean and How Often
| Area | Frequency | Method |
|---|---|---|
| Top surface | After every use | Damp cloth, mild cleaner |
| Burner grates | Weekly | Dish soap and hot water |
| Burner caps and heads | Monthly | Soft brush, warm soapy water |
| Under the stovetop lift | Every 3 months | Damp cloth, degreaser |
| Behind and under the stove | Every 6 months | Vacuum, damp mop |
Lifting the stovetop (most gas stoves can be lifted) reveals a shocking volume of gunk that collects underneath. Clean this area every few months and you’ll notice those burners working better.
Tip #8: Get a Sense of Your Oven’s Temperature Calibration
If your baked goods are wrong — dried out in the middle, burnt on the edges, or just never quite right — you might have an oven temperature issue. This is very common and really easy to fix.
How to Test Your Oven Temperature
- Buy a simple oven thermometer (around $8 to $15 at any hardware store).
- Place it in the middle of your oven.
- Preheat the oven to 350°F (175°C).
- Wait 20 minutes for the temperature to stabilize.
- Check what the thermometer reads.
If there’s a difference of 25°F or more, your oven needs to be calibrated.
How to Calibrate
On most gas ovens made this century, you can change the temperature offset in the settings menu. Consult your owner’s manual — it should be in a “Settings” or “Oven Calibration” section. Normally, you can adjust it by +/- 35°F without calling anyone.
If your oven’s temperature is more than 35°F off, the temperature sensor or gas valve likely needs to be replaced.
Tip #9: Call in the Pros (And Don’t Feel Bad About It)
Here’s the simple truth about gas stove repair basics: some things are absolutely DIY. Others are not.
Fix It Yourself
- Cleaning burner caps and ports
- Drying a wet igniter
- Resetting the ignition system
- Adjusting oven calibration
- Replacing a burner cap or grate
Call a Technician
- Persistent gas smell (even faint)
- Orange or red flames after cleaning
- Gas valve issues
- Main gas line issues
- Oven does not heat at all even after calibration
- Any repair requiring access to internal gas components
Gas is not something to experiment with beyond basic upkeep. If your problem involves the actual gas supply, valves, or internal components, don’t hesitate to call a professional. Safety always comes first.
Quick Reference: Troubleshooting Chart for Gas Stove Problems
| Problem | Likely Cause | DIY Fix? |
|---|---|---|
| Burner won’t light | Wet or dirty igniter | Yes |
| Clicking never stops | Moisture in igniter | Yes |
| Weak or uneven flame | Clogged burner ports | Yes |
| Yellow/orange flame | Air-gas mixture issue | Maybe |
| Oven underheats | Needs calibration | Yes |
| Gas smell | Loose connection or leak | Call a pro |
| Burner cap rattles | Misalignment | Yes |
| Oven overheats | Faulty thermostat | Call a pro |
Building a Basic Gas Stove Maintenance Routine
You don’t have to do it all at once. A basic routine keeps your stove operating cleanly and safely for years.
Weekly:
- Clean the stovetop after cooking.
- Check burner grates for buildup.
Monthly:
- Remove and clean all burner caps and heads.
- Clear burner ports with a toothpick or paper clip.
- Test all igniters.
Every 3 Months:
- Lift the stovetop and clean under it.
- Visually check gas supply connections.
- Use an oven thermometer to test your oven temperature.
Every 6 Months:
- Move the stove and vacuum behind it.
- Check the gas supply line for cracks or wear.
- Check the oven door seal (gasket) for damage.
This routine takes about 30 minutes per month maximum. It will add years to your stove’s life and prevent most common repairs. For more in-depth guides and repair walkthroughs, visit Gas Stove Repair Basics — a dedicated resource for homeowners who want to stay on top of stove maintenance.
Gas Stove Repair Basics FAQs
Q: Is it safe for me to clean my gas burners myself? Yes, absolutely. When the stove is turned off and cool, cleaning burner caps, heads, and ports can be done safely. Just ensure everything is sufficiently dry before reassembly and testing.
Q: My gas burner keeps clicking even when it’s off. Why? This is almost always moisture. Food or liquid has entered the igniter area. Dry it out using a cloth and hair dryer, and the clicking should stop.
Q: How can I tell if my gas stove is leaking? You’ll smell it first — natural gas has a distinctive rotten-egg odor added specifically to help detect leaks. You can also apply soapy water to connection points and check for bubbles. If you suspect a leak, leave the house and call your gas company immediately. According to the U.S. Consumer Product Safety Commission, gas leaks and carbon monoxide exposure are among the leading causes of home safety incidents — so always take them seriously.
Q: Can I replace a gas stove igniter myself? In most cases, yes. On many stove models, surface igniters (the spark electrodes next to each burner) are user-replaceable. Just be sure to disconnect the stove before you begin, and confirm your replacement part matches your exact model number.
Q: My gas stove flame is orange, not blue — why? An orange flame typically indicates that the air-to-gas ratio is off, or that there’s contamination (like dust or cleaning products) in the burner area. Clean the burner completely and re-test. If the orange flame remains, call a technician to adjust the air shutter.
Q: How often do I need to get my gas stove professionally serviced? A good rule of thumb for a commonly used stove is a full professional inspection every 2 to 3 years. If you notice any performance issues or smell gas, don’t wait — call sooner.
Q: How long does a gas stove last with regular maintenance? A gas stove in good condition usually lasts 15 to 20 years. Some last even longer. Regular cleaning and timely small repairs are the most important factors in extending that lifespan.
Wrapping It Up
Gas stove repair basics are not as scary as they sound. Most issues come down to cleanliness, moisture, or alignment — problems that every homeowner can address with a little knowledge.
The advice in this guide covers the most frequent problems people encounter and the simplest, safest solutions. Whether it’s cleaning clogged burner ports or calibrating an oven that runs hot or cold, these are all tasks you can take on yourself.
It begins with good cleaning habits. Learn to recognize the signs of a healthy flame. Keep your igniters dry. And always know when it’s time to hand it over to a professional.
Your gas stove is one of the hardest-working appliances in your home. Take care of it, and it’ll continue to perform well for decades to come.