
I still remember the morning my gas stove decided to quit on me — right when I had guests coming over for dinner. The burner kept clicking but wouldn’t light. I called a technician, waited three hours, and paid 2,500 rupees for something that turned out to be… a dirty igniter cap. That’s it. A little grease blocking the spark.
That day I made a promise to myself: I’m learning how this thing works.
And honestly? Gas stoves are not as complicated as they seem. Most of the common problems — clicking igniters, weak flames, burners not lighting — can be fixed at home with basic tools and a little patience. You don’t need to be an engineer. You just need to know where to look.
Here’s everything I’ve figured out over the past few years, including a few embarrassing mistakes I made along the way.
1. Clean the Igniter Cap First (Seriously, Do This Before Anything Else) — 1
The number one reason a burner won’t light? It’s dirty.
I know that sounds too simple, but think about how much spills, grease, and food debris accumulate on a stove over weeks of cooking. The igniter cap — that little ceramic or metal piece sitting right at the center of your burner — gets clogged, and when it does, the spark can’t reach the gas properly.
What I do:
- Turn off the stove and let it cool completely.
- Remove the burner grate and lift off the burner cap.
- Use a soft toothbrush (I use an old one I keep specifically for this) dipped in warm soapy water to gently scrub the igniter.
- For stubborn grease, I use a toothpick or a needle to clear out any blocked ports around the burner head.
- Dry everything thoroughly — and I mean thoroughly — before putting it back.
Moisture is the enemy here. Even a little leftover water around the igniter will cause that annoying clicking sound to continue without any flame. Let it air dry for 20–30 minutes, or use a dry cloth and then a quick pass with a hairdryer on low.
The first time I did this properly, my burner fired up on the first try. I felt like a genius. It cost me zero rupees.

2. Fix a Weak or Uneven Flame by Unclogging the Burner Ports — 2
If your flame looks more like a sad little flicker than a proper ring of fire, or if it’s burning unevenly (strong on one side, weak on the other), the burner ports are probably clogged.
Those tiny holes around the edge of the burner head are where gas comes out. Food residue and grease block them over time, and the flame suffers for it.
Here’s what works:
- Remove the burner cap and burner head (it usually just lifts off).
- Soak the burner head in warm, soapy water for 15–20 minutes.
- Use a straightened paperclip or a needle to gently poke through each port hole.
- Rinse well and dry completely.
- Reinstall and test.
I made the mistake once of using a wooden toothpick — it broke off inside a port and made things worse. Stick to metal. A sewing needle or an unfolded paper clip works perfectly.
Quick Reference: Flame Problems and Likely Causes
| Flame Issue | Most Likely Cause | DIY Fix |
|---|---|---|
| Burner won’t light | Dirty igniter cap | Clean with toothbrush |
| Weak flame | Clogged burner ports | Soak and poke with needle |
| Uneven flame | Partially blocked ports | Clean individual port holes |
| Yellow/orange flame | Gas-air mixture issue | Adjust air shutter |
| Constant clicking | Wet igniter or cap | Dry thoroughly |
3. Stop That Annoying Clicking by Drying the Igniter System — 3
This one drives people absolutely crazy. The stove keeps clicking even when you’re not trying to light it — sometimes for hours after cooking.
Nine times out of ten, it’s moisture. Either from a spill, steam from a boiling pot, or even just humidity in the kitchen.
The fix is simple:
- Remove the burner cap.
- Use a dry cloth to wipe around the igniter electrode (the small metal or ceramic pin sticking up near the burner).
- Let it air out for a while, or gently use a hairdryer on low heat.
- If the clicking persists after it’s fully dry, check if the burner cap is sitting crooked — it needs to be perfectly seated for the spark to work.
This is something I check immediately now whenever a burner starts misbehaving after I’ve been boiling something or cooking with a lot of steam. Takes two minutes.
If drying doesn’t stop the clicking after a couple of hours, there might be a worn-out igniter switch — at that point you’re looking at a part replacement, which is still cheaper than a full service call if you buy the part yourself.
For more in-depth help on this specific problem, check out these 8 Smart Gas Stove Repair Basics Solutions for Clicking Igniters — it walks through some situations I haven’t covered here.
4. Adjust the Air Shutter for a Proper Blue Flame — 4
Here’s something most people don’t know exists: the air shutter.
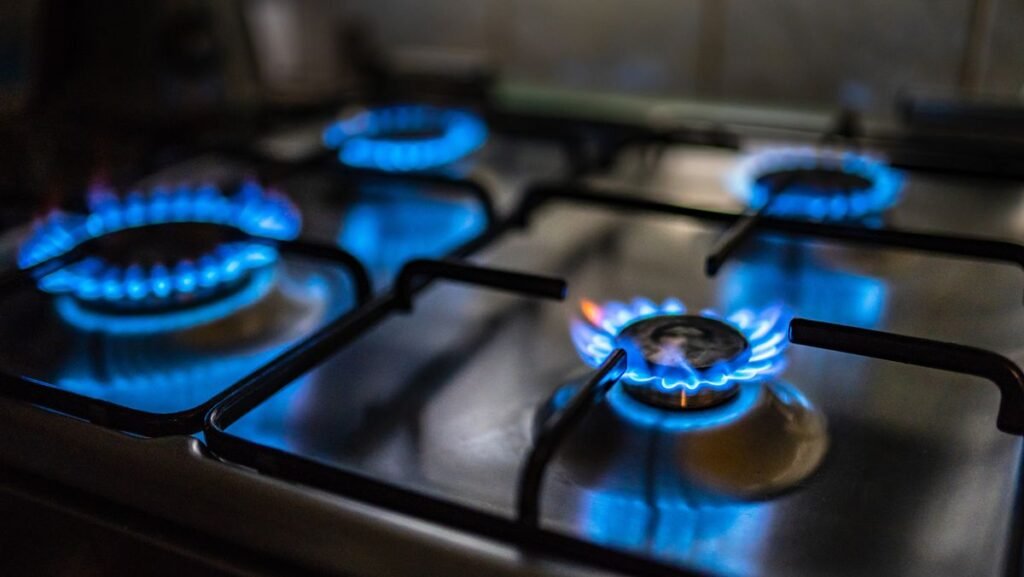
If your flame is burning yellow or orange instead of a clean blue, the gas-to-air ratio is off. A yellow flame means incomplete combustion — which isn’t just inefficient, it can also produce carbon monoxide over time. Not something to ignore.
The air shutter is a small adjustable sleeve at the base of the burner tube (right where the gas enters). It controls how much air mixes with the gas before it burns.
How to adjust it:
- Turn on the burner and observe the flame color.
- Locate the air shutter — it’s usually near where the burner tube connects to the stove body. You may need to remove a panel at the bottom front of the stove.
- Loosen the small screw holding the shutter in place.
- Slowly open or close the shutter while watching the flame.
- A proper blue flame with small yellow tips at the very top is what you’re aiming for. Fully yellow = too little air. Lifting off the burner = too much air.
- Tighten the screw once you find the right position.
I was honestly nervous the first time I did this, but it’s not as scary as it sounds. The key is making small adjustments and watching the flame change in real time.
Flame Color Guide
| Flame Color | What It Means | Action Needed |
|---|---|---|
| Blue with small yellow tip | Perfect combustion | No action needed |
| Fully yellow or orange | Too little air | Open air shutter slightly |
| Flame lifts off burner | Too much air | Close air shutter slightly |
| Blue but very small | Low gas pressure or clog | Check ports and gas supply |
5. Re-seat the Burner Cap Correctly (The Mistake Everyone Makes) — 5
This one is embarrassingly common, and I’ve done it myself multiple times.
After cleaning, we put everything back in a rush — and the burner cap goes on slightly crooked. The stove then refuses to light properly, clicks endlessly, or lights with a weak and uneven flame. And we spend 20 minutes trying to figure out what went wrong, convinced we’ve broken something.
You haven’t broken anything. The cap is just sitting wrong.
How to seat it correctly:
- After cleaning and drying, place the burner head back first, making sure it sits flat and the notch (if there is one) aligns with the igniter pin.
- Place the burner cap on top — again, perfectly flat.
- Give it a gentle press down and rotate slightly until it feels secure.
- There should be no rocking or wobbling.
Some burner caps have a small notch or groove that needs to align with a specific point. Check your stove’s manual if you’re unsure — even a quick search with your stove model number on YouTube will usually show you exactly how the cap seats on your specific model.
I also now make it a habit to check the burner alignment every time I clean — it takes five extra seconds and saves a lot of frustration later.
For a broader look at things you can fix quickly at home, these 6 Easy Gas Stove Repair Basics Repairs That Took Me 10 Minutes are worth bookmarking.
Tools You’ll Actually Use (Nothing Fancy)
I get asked sometimes what tools I keep handy for stove maintenance. Honestly, it’s nothing special:
| Tool | What It’s For |
|---|---|
| Old toothbrush | Scrubbing igniter caps and burner heads |
| Sewing needle or paperclip | Unclogging burner port holes |
| Microfiber cloth | Drying components properly |
| Hairdryer | Drying igniter area quickly |
| Mild dish soap | Cleaning burner parts |
| Small flathead screwdriver | Adjusting air shutter screw |
That’s really it. No special kit, no expensive equipment. Everything on this list is probably already in your home.
Mistakes I Made (So You Don’t Have To)
Using wire to clean ports. Wire is too rough and can widen or damage the port holes, which changes the flame pattern permanently. Use a needle.
Putting wet parts back. I did this once out of impatience. The burner clicked for two hours straight and refused to light. Always dry completely.
Adjusting the air shutter too aggressively. Small movements make a big difference. I once swung it too far and ended up with a flame that lifted clean off the burner. Go slow.
Ignoring a yellow flame for months. I kept thinking it was normal. It wasn’t. Once I adjusted the air shutter, the stove heated things noticeably faster. I wasted a lot of gas in those months.
Not checking the gas supply valve. Sometimes the simplest explanation is the right one. If nothing else works, make sure the main gas valve behind or below the stove is fully open.
If safety is something you think about too (and you should), this piece on 6 Essential Gas Stove Repair Basics Safety Ideas That Prevent Accidents covers some important ground that every home cook should read.
When You Actually Should Call a Technician
Look, I’m all for DIY — but there are situations where you step back and call a professional:
- You smell gas and can’t find the source.
- A burner won’t turn off even when the knob is fully closed.
- You’ve replaced the igniter and it still doesn’t spark.
- The gas pressure seems low across all burners (this is a supply issue, not a stove issue).
- Any issue involving the gas line itself — don’t touch that.
These aren’t things to experiment with. For everything else on this list? You’ve got this.
A Note on How Often to Clean
Based on my own experience (and a couple of learned-the-hard-way moments), here’s what actually works:
How Often to Clean What:
| Component | Cleaning Frequency |
|---|---|
| Burner grates | Weekly or after messy cooking |
| Burner caps | Every 2 weeks |
| Burner heads (ports) | Monthly |
| Igniter area | Monthly |
| Air shutter check | Every 3–6 months |
| Full deep clean | Every 3 months |
Regular cleaning genuinely extends how long a stove works well. I’ve seen my neighbor’s stove — same brand, same age — break down twice in the time mine has had zero issues. The only difference is that I clean mine.
FAQ
Q1: My burner lights but the flame goes out after a few seconds. What’s happening?
This usually points to a thermocouple or flame failure device issue — it’s a safety sensor that cuts the gas if it doesn’t detect a flame. If cleaning the burner doesn’t help, the thermocouple may need to be replaced or repositioned. It’s a repair that’s doable at home but requires a bit more disassembly.
Q2: Can I use WD-40 to clean my burner parts?
No — avoid WD-40 or any petroleum-based spray near burner components. It can leave a residue that becomes a fire hazard when heated. Stick to mild dish soap and warm water.
Q3: How do I know if my igniter electrode is damaged versus just dirty?
If cleaning and drying completely doesn’t produce a spark, look closely at the electrode tip. If it’s cracked, chipped, or the ceramic coating is damaged, it needs to be replaced. You can usually find replacement igniters for your stove model online for a few hundred rupees.
Q4: Is a yellow flame actually dangerous?
It can be over time. A yellow flame indicates incomplete combustion, which produces carbon monoxide as a byproduct. In a well-ventilated kitchen with occasional use, the risk is low — but it’s still worth fixing, both for safety and because you’re wasting gas.
Q5: My stove is clicking even when it’s turned off and completely dry. What do I do?
Check if the burner cap is seated correctly — a misaligned cap can cause continuous clicking. If that’s fine, the igniter switch itself may be faulty. Switching out an igniter switch is a relatively inexpensive repair — search your stove’s model number along with “igniter switch” to find the right part.
These are fixes that have genuinely saved me money over the years. Most stove problems aren’t mysterious — they’re just dirt, moisture, or a misaligned cap. Once you know what to look for, you’ll never panic-call a technician for a clicking burner again.
And if you want to go deeper on troubleshooting, this is one of the most practical guides I’ve come across: 9 Easy Gas Stove Repair Basics Troubleshooting Steps Anyone Can Try — great for when the basic fixes don’t quite solve the problem.

