

10 Smart Gas Stove Repair Basics Setup Hacks That Save Time
A gas stove is one of those everyday tools that quietly powers a home. It’s there in the background, boiling tea, simmering curries, frying eggs at sunrise. But the moment something goes wrong—a weak flame, a clicking igniter that won’t stop, or a burner that refuses to light—it suddenly becomes the center of attention. Most people assume these problems demand a technician. In reality, a surprising number of issues can be understood, prevented, or even fixed with a bit of practical knowledge.
This guide is not just a list of instructions. Think of it as a working notebook filled with small lessons, field-tested hacks, observations, and shortcuts that help you understand how your gas stove behaves. Each section introduces a simple idea, expands it into a usable habit, and shows how it saves time in real-life situations.
- Learn the anatomy before touching anything
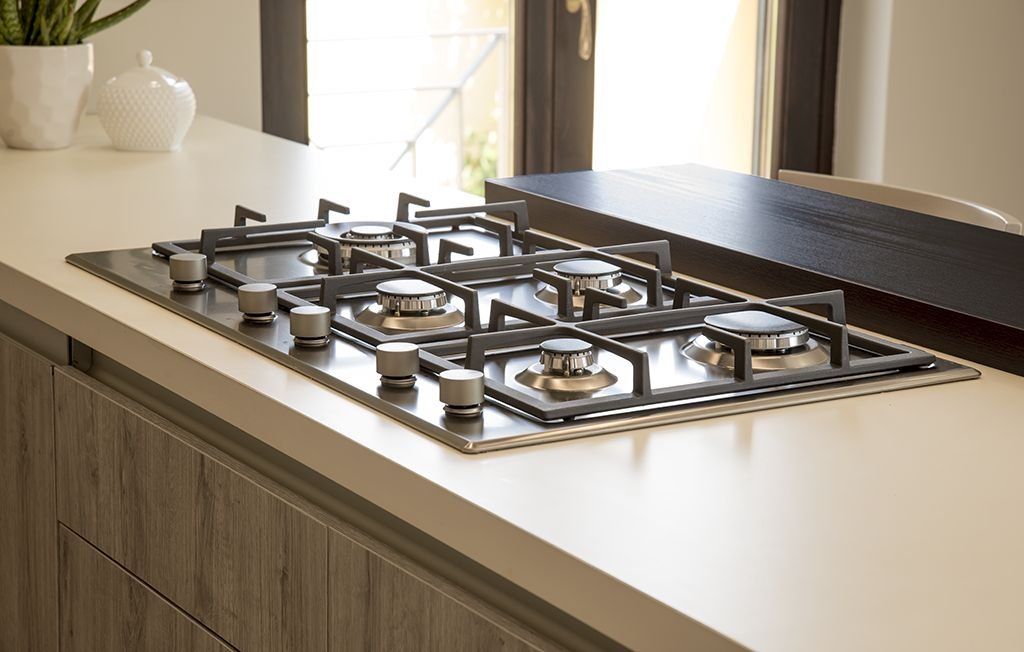
Before you repair anything, you need to understand what you’re looking at. A gas stove is not complicated, but it is precise. Each part has a job.
A basic gas stove includes:
- Burner head (where the flame comes out)
- Burner cap (sits on top)
- Igniter (creates spark)
- Gas valve (controls flow)
- Venturi tube (mixes air and gas)
If you remove the burner cap and look closely, you’ll notice small holes around the burner. These are flame ports. If even a few get blocked, the flame becomes uneven.
Time-saving insight:
The more familiar you are with these parts, the faster you can diagnose problems. Instead of guessing, you’ll recognize patterns—like a clogged port causing uneven flames.
Mini checklist:
- Can you remove and replace the burner cap easily?
- Do you know where the igniter sits?
- Have you seen the gas inlet holes?
If yes, you’re already ahead of most people.
- The “dry first” rule that prevents 50% of problems
Water is one of the most common causes of gas stove issues. Spills happen, especially during cooking. The problem begins when moisture reaches the igniter or burner ports.
Hack:
Always dry the stove thoroughly before trying to relight it.
Why it matters:
- Wet igniters fail to spark properly
- Moisture blocks gas flow in tiny holes
- Rust develops over time
Quick routine:
After cleaning:
- Wipe with a dry cloth
- Let it air dry for 10–15 minutes
- Turn on the stove only when completely dry
Time saved:
Instead of troubleshooting a “broken” igniter, you avoid the problem entirely.
- Use a pin, not a knife, for clogged burners
When flames look uneven or weak, the usual culprit is blocked burner holes. Many people grab a knife or toothpick, which can damage the holes.
Smart hack:
Use a thin pin or needle.
Steps:
- Remove the burner cap
- Gently insert the pin into each hole
- Do not widen the holes
- Clean debris, not metal
Why this works:
Precision cleaning maintains proper gas flow and flame pattern.
Field tip:
Hold the burner up to light after cleaning. You’ll instantly see if all holes are clear.
- The “listen before fixing” technique
Gas stoves communicate through sound. A clicking igniter, a hissing gas flow, or silence—all mean something.
Examples:
- Rapid clicking: igniter working, but maybe no gas or wet surface
- No click: ignition system issue or power problem
- Hissing without flame: gas is flowing but not igniting
Hack:
Pause and listen for 5 seconds before doing anything.
Time saved:
Instead of random fixes, you narrow down the issue immediately.
Think of it like this: your ears are diagnostic tools.
- Align the burner cap perfectly
A slightly misplaced burner cap can cause:
- Uneven flames
- Difficulty igniting
- Yellow instead of blue flames
Simple fix:
Remove and reposition the cap so it sits flat and centered.
Test:
Turn on the burner and observe:
- Flame should form a complete circle
- No gaps or flickering spots
Why it’s powerful:
This takes less than 10 seconds but solves one of the most common “mystery” problems.
- Keep the igniter tip clean (but gently)
The igniter produces a spark that lights the gas. If it’s dirty, the spark weakens or disappears.
Cleaning hack:
- Use a dry toothbrush or soft cloth
- Avoid water or harsh chemicals
Important:
Do not bend or scratch the igniter.
Observation trick:
Turn off lights and test ignition. You should see a clear spark.
Time saved:
A quick clean can restore ignition instantly without calling for repairs.
- Check gas flow before assuming a fault
Sometimes the stove isn’t the problem—the gas supply is.
Checklist:
- Is the gas cylinder full?
- Is the regulator properly attached?
- Is the valve open?
Quick test:
Try another burner. If none work, it’s likely a supply issue.
Real-life scenario:
Many people spend time cleaning and disassembling a stove when the cylinder is simply empty.
Lesson:
Always start with the simplest possibility.
- Use heat to dry internal moisture (carefully)
If moisture has entered deeper parts, surface drying may not be enough.
Hack:
Turn on the burner briefly (if it ignites) to evaporate hidden moisture.
Alternative:
Use sunlight—place removable parts outside for 20–30 minutes.
Why it works:
Heat accelerates evaporation where cloths cannot reach.
Safety note:
Never use open flames or external heat sources directly.
- Observe flame color like a technician
Flame color tells a story.
Ideal flame:
- Blue, steady, and quiet
Problems:
- Yellow flame: incomplete combustion (often due to dirt or poor air mix)
- Orange flicker: dust or impurities
- Weak blue: low gas pressure
Action plan:
- Clean burner holes
- Ensure proper airflow
- Check gas pressure
Time-saving mindset:
Instead of guessing, you read the flame as feedback.
- Create a 2-minute maintenance habit
The best repair is prevention.
Daily (30 seconds):
- Wipe surface spills
- Check for moisture
Weekly (2 minutes):
- Remove and clean burner caps
- Inspect igniter
- Clear visible debris
Monthly:
- Deep clean burners
- Check gas connections visually
Why this matters:
Small, consistent habits prevent major breakdowns.
Time saved:
You avoid emergency repairs and last-minute frustrations.
Practical repair scenarios and how these hacks apply
Scenario 1: Burner won’t light
- Check dryness (Hack 2)
- Listen for click (Hack 4)
- Inspect igniter (Hack 6)
Scenario 2: Uneven flame
- Clean holes with pin (Hack 3)
- Align cap (Hack 5)
Scenario 3: Weak flame
- Check gas supply (Hack 7)
- Observe flame color (Hack 9)
Scenario 4: Clicking but no flame
- Dry igniter (Hack 2)
- Clean tip (Hack 6)
These patterns reduce troubleshooting time dramatically.

A short field journal approach
Try this method for a week:
Day 1:
Notice how your stove behaves when working perfectly.
Day 2:
Clean burner caps and observe flame change.
Day 3:
Intentionally misalign a cap, then fix it.
Day 4:
Check igniter spark in low light.
Day 5:
Wipe and dry thoroughly after cooking.
By the end, you’ll understand your stove intuitively.
Common mistakes that waste time
- Over-cleaning with water
- Using sharp tools that damage parts
- Ignoring simple alignment issues
- Jumping to complex conclusions
- Skipping regular maintenance
Avoiding these mistakes is half the work.
Tools you actually need
You don’t need a toolbox full of equipment. Just:
- Soft cloth
- Thin pin or needle
- Toothbrush
- Mild detergent
That’s enough for most basic repairs.
The mindset shift
The biggest hack isn’t mechanical—it’s mental.
Instead of thinking:
“Something is broken”
Think:
“What is the stove trying to tell me?”
This shift turns confusion into clarity.
FAQs
- Why does my gas stove click but not ignite?
This usually happens due to moisture around the igniter, dirt buildup, or misaligned burner caps. Drying and cleaning typically solve the issue. - Is it safe to clean burners with water?
Yes, but only if you dry them completely before using the stove again. Moisture is a common cause of ignition problems. - What causes yellow flames on a gas stove?
Yellow flames often indicate clogged burner holes or improper air-gas mixture. Cleaning the burner usually restores a blue flame. - How often should I clean my gas stove burners?
Light cleaning should be done weekly, while deeper cleaning can be done monthly depending on usage. - Can I repair a gas stove without professional help?
Basic issues like clogged burners, wet igniters, and misaligned parts can be fixed easily. However, gas leaks or internal faults require professional assistance. - What should I do if I smell gas?
Turn off the gas supply immediately, ventilate the area, and avoid using electrical switches. Contact a professional right away.
Closing reflection
A gas stove doesn’t demand expertise—it rewards attention. The more you observe it, the easier it becomes to maintain. These small hacks are not just fixes; they are ways to build confidence in handling everyday problems.
In the end, saving time isn’t about rushing repairs. It’s about understanding the system well enough that most problems never grow big in the first place.