
1. That Moment You Realize Something’s Off With Your Stove
It started with pasta. I had the burner cranked up, water in the pot, and after fifteen minutes — barely a simmer. The flame was this sad, lazy blue ring barely doing anything. I remember thinking, did I forget to pay the gas bill?
Nope. Bill was paid. Gas was on. The stove was just… struggling.
Weak flames on a gas stove are one of those problems that sneak up on you. It doesn’t happen overnight. It’s gradual — one day you notice your tea takes longer, then your stir-fry is more of a slow-fry. By the time you actually stop and say “okay, something’s wrong,” the issue has usually been building for weeks.
The good news? In most cases, you don’t need a technician. I fixed mine in under an hour with things I already had at home. Let me walk you through exactly what I did — and what you should check first.
2. Why Weak Flames Happen (The Short Version)
Before jumping into fixes, it helps to understand what’s actually going on. A gas stove flame needs two things to burn strong: a clean gas supply and enough airflow. Mess with either one, and your flame suffers.
Most weak flame problems come down to:
- Clogged burner ports (the tiny holes the gas comes through)
- A dirty or misaligned burner cap
- A partially blocked gas valve
- Incorrect air-to-gas ratio (the air shutter is off)
- Low gas pressure from the supply line
Here’s a quick overview of the most common causes and how often they’re the culprit:
| Cause | How Common | DIY Fix? |
|---|---|---|
| Clogged burner ports | Very Common | Yes |
| Dirty/misaligned burner cap | Very Common | Yes |
| Blocked gas orifice | Common | Yes (carefully) |
| Air shutter misalignment | Less Common | Yes |
| Low gas pressure | Rare | Call a technician |
The first three causes cover probably 80% of weak flame situations. So that’s where we start.
3. Step 1 — Take Everything Apart and Actually Look at It
I know this sounds obvious, but hear me out. Most people wipe down their stove surface and call it clean. The burner cap, the burner head, the grate — those get ignored for months. Sometimes years.
Here’s what to do:
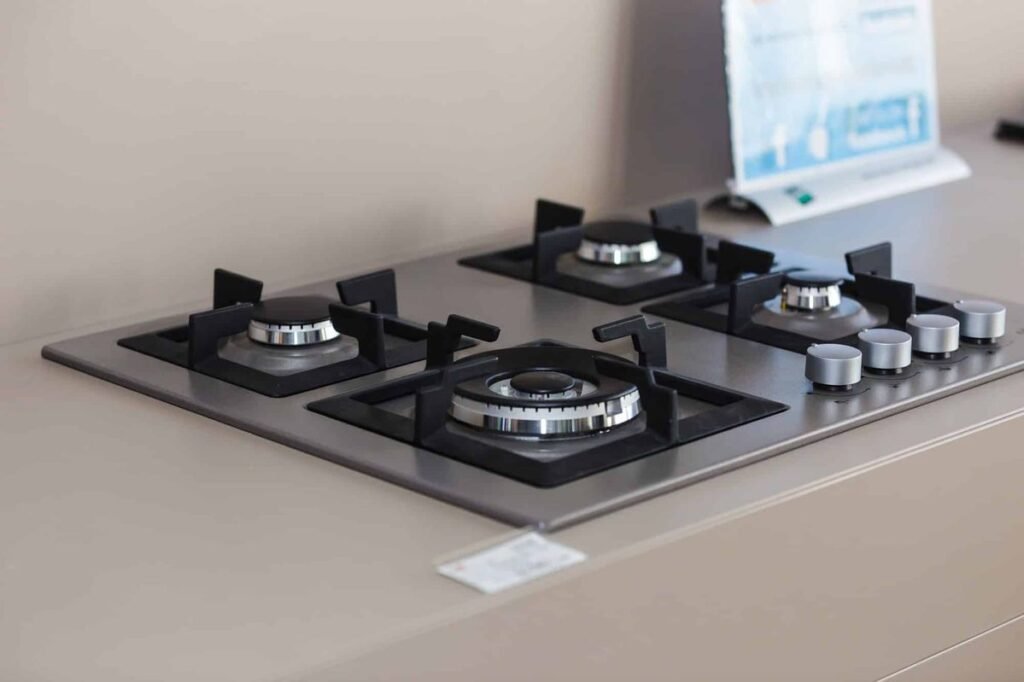
Turn off all burners and let everything cool completely. Then remove the grates, lift off the burner caps (they just sit on top), and pull off the burner heads (they usually just lift straight up).
Now look at the burner ports — those tiny holes around the edge of the burner head. If you see black gunk, grease buildup, or anything blocking even a few of those holes, you’ve likely found your problem.
On my stove, almost a third of the ports on the back-left burner were completely clogged. No wonder it was weak — it was basically running on reduced capacity.
Quick visual check:
| What You See | What It Means |
|---|---|
| Yellow or orange flame | Clogged ports or wrong air mix |
| Uneven flame around ring | Some ports blocked |
| Very small blue flame | Significant blockage or low pressure |
| Flame lifting off burner | Too much air, shutter needs adjusting |
| Normal blue flame, inner cone visible | All good |
4. Step 2 — Clean the Burner Ports Properly (This Is the Big One)
This step alone fixed my problem. And I’d honestly never done it in three years of owning the stove. Don’t be like me.
What you’ll need:
- A toothpick or straightened paperclip
- A soft-bristle toothbrush (old one works fine)
- Dish soap and warm water
- A bowl for soaking
- A dry cloth or paper towels
The process:
- Soak the burner heads in warm soapy water for 20–30 minutes. This loosens baked-on grease without you having to scrub aggressively.
- After soaking, use the toothpick or paperclip to gently poke through each burner port. You’re not drilling — just clearing. Go around every single port.
- Use the toothbrush to scrub the surface, especially around the ports.
- Rinse thoroughly and let them air dry completely. This part matters — if there’s water left inside, the igniter will keep clicking and the flame will be inconsistent.
- While you wait for them to dry, wipe down the burner base (the part that stays attached to the stove) with a damp cloth. Don’t get water into the igniter tip if you can help it.
One mistake I made the first time: I reassembled everything before the parts were fully dry. Cue 20 minutes of annoying clicking and sputtering flames. Let them dry fully — I usually leave them for an hour or set them near a sunny window.
For more detailed cleaning guidance, check out these 11 Easy Gas Stove Repair Basics Cleaning Habits That Saved My Stove — genuinely useful stuff in there.
5. Step 3 — Check and Realign the Burner Cap
The burner cap is that flat disc that sits on top of the burner head. It looks simple, but its job is important — it distributes the gas evenly around the ring of ports.
If it’s even slightly off-center or tilted, the flame will be uneven and weak on one side.
After cleaning, when you put the cap back, make sure it sits flat and centered. There are usually small tabs or notches that line up with the burner head — take a second to confirm they’re aligned before you test.
Signs the burner cap was the problem:
- Flame looks normal on one half of the burner, weak on the other
- One side of the burner lights, the rest doesn’t catch
- Flame seems to “lean” in one direction
This is a 30-second fix that people overlook because it seems too simple. I’ve seen people call technicians for this exact issue. Don’t.
6. Step 4 — Inspect the Gas Orifice (The Small But Mighty Part)
If cleaning the ports didn’t fully solve the problem, the next thing to check is the gas orifice — a small brass fitting at the center of the burner base where gas enters the burner tube.
It has a tiny hole in the middle. If that hole gets partially blocked with grease or debris, gas flow is restricted even if your burner ports are spotless.
How to check it:
Look down into the burner base after removing the burner head. You should see a small brass fitting. Use a flashlight — phone torch works great.
If it looks gunky, use a toothpick very gently to clear it. Do not use a drill bit or anything that could widen the hole — that would change the gas-to-air ratio permanently and actually make things worse.
Some people use compressed air (like keyboard cleaning spray) to blow out the orifice. That works well if the blockage isn’t too stubborn.
What NOT to do:
- Don’t use anything metal that could scratch or enlarge the orifice opening
- Don’t apply excessive pressure
- Don’t skip reassembling correctly afterward
This is also a good time to check the tube leading from the orifice into the burner — sometimes grease drips down and collects there. A thin bottle brush or pipe cleaner works well for this.
Want to understand more about fixing ignition and flame issues from scratch? These 9 Easy Gas Stove Repair Basics Troubleshooting Steps Anyone Can Try break it down really well for beginners.
7. Step 5 — Adjust the Air Shutter If the Flame Is Still Off
If you’ve cleaned everything and the flame is still weak, yellow, or lifting off the burner, it’s time to look at the air shutter.
The air shutter controls how much air mixes with the gas before combustion. It’s usually a small sliding plate or rotating collar near where the burner tube connects to the gas valve — sometimes visible from the front of the stove, sometimes you need to remove a bottom panel.
Signs the air shutter needs adjusting:
| Symptom | Likely Cause |
|---|---|
| Yellow/orange flame tips | Not enough air (shutter too closed) |
| Flame lifting off burner | Too much air (shutter too open) |
| Weak, soft flame | Could be either direction |
| Flame goes out when turned low | Too much air |
How to adjust:
- Light the burner and let it stabilize.
- Locate the air shutter — a flat sliding collar near the base of the burner tube.
- Loosen the small screw that holds it in place (just slightly).
- Slowly slide it open or closed while watching the flame.
- You want a steady blue flame with a small, defined inner cone. Once you have that, tighten the screw back.
This adjustment takes a little patience. Make small moves and wait a few seconds to see how the flame responds. I went back and forth three times before I got it just right.
Fair warning — on some stove models, getting to the air shutter requires pulling the stove away from the wall and removing a back or bottom panel. If your stove is built-in, this might be a good moment to call a professional rather than risk messing with gas connections behind the unit.
8. When to Stop DIY and Call Someone
Most weak flame issues are fixable at home. But there are situations where you should step back:
- You smell gas — stop everything, ventilate the kitchen, don’t light anything, and call your gas company
- The issue is on all burners simultaneously — likely a gas pressure or supply problem
- You’ve cleaned and adjusted everything and nothing changed — could be a faulty gas valve
- The stove is older than 15 years and has never been serviced — a professional check is worth it
Low gas pressure is usually a supplier issue or a problem with the regulator (the device that controls pressure from the main supply to your appliance). That’s not a DIY territory — a certified gas technician needs to measure and fix it.
Here’s a rough cost comparison if you do end up needing professional help:
| Service | Approx. Cost (DIY vs Pro) |
|---|---|
| Cleaning burner ports | DIY: Free / Pro: $50–$100 |
| Burner cap realignment | DIY: Free / Pro: $50–$80 |
| Gas orifice cleaning | DIY: Free / Pro: $60–$120 |
| Air shutter adjustment | DIY: Free / Pro: $80–$150 |
| Gas pressure regulator fix | Pro only: $100–$300 |
The savings are real. And honestly, once you’ve done it once, it takes maybe 20 minutes the next time.
9. Mistakes I Made (So You Don’t Have To)
Reassembling while parts were still wet. Already mentioned this, but it caused a solid day of igniter clicking and frustration. Let everything dry.
Not checking the burner cap alignment. I cleaned everything meticulously, tested it, still had an uneven flame — spent another 30 minutes before realizing the cap was just slightly tilted.
Using a wire brush on the ports. I thought it’d be more thorough. It actually damaged one of the burner heads by enlarging a few ports unevenly. The toothpick method is gentler and safer.
Ignoring the problem for too long. A weak flame uses more gas to do the same job. My gas bills were slightly higher for months before I dealt with it. Regular maintenance — even just a quarterly wipe-down and port check — prevents this.
For anyone wanting to stay ahead of these issues, these 4 Smart Gas Stove Repair Basics Maintenance Lessons I Learned Late are worth reading before something breaks, not after.
10. One Last Thing Before You Start
Safety first — always, without exception. Before touching anything:
- Turn all burners to OFF
- Turn off the gas supply at the valve behind or beneath the stove (if accessible)
- Let the stove cool down completely
- Keep the kitchen ventilated while working
Gas stoves are pretty forgiving when it comes to cleaning and minor adjustments, but you have to respect the basics. Don’t rush, don’t force parts, and if anything smells off — stop and call a pro.
A well-maintained stove is genuinely satisfying. Flames that look strong, even, and blue; burners that light first-click every time; cooking that actually works the way it should. You don’t realize how much a poorly performing stove affects your daily cooking until you fix it and suddenly everything feels faster and easier.
Take the 45 minutes this weekend. Your stove will thank you.
Also worth reading: 7 Powerful Gas Stove Repair Basics Ideas to Fix Ignition Problems — great companion piece if your igniter is also giving you trouble alongside the weak flame issue.
Frequently Asked Questions
Q1: How do I know if my gas stove flame is weak or just set to low?
Turn the burner to its highest setting. A healthy, full flame at maximum should form a strong, even blue ring with a small inner cone. If it still looks small, soft, or yellowish at full power, the flame is genuinely weak — not just set low.
Q2: Can a dirty stove top actually cause weak flames, or is it always a burner issue?
It’s almost always a burner issue — specifically clogged ports or a misaligned cap. Surface-level stove top grime doesn’t directly weaken the flame, but it does eventually work its way into the burner components if you let it build up. Regular cleaning prevents it from getting that far.
Q3: My flame is blue but still weak — why?
Blue means the air-to-gas ratio is roughly correct, which is good. But blue doesn’t always mean strong. The most likely culprit for a blue but weak flame is clogged burner ports restricting total gas flow, or low gas pressure. Start with cleaning the ports and orifice before worrying about pressure.
Q4: How often should I clean my burner heads to prevent this?
A light wipe-down of the burner caps and surface every week or two goes a long way. A deeper clean — removing and soaking the burner heads — every 2–3 months is ideal for regular home cooks, or more often if you cook heavy, greasy meals frequently.
Q5: Is it safe to use the stove if one burner has a weak flame?
The other burners are usually fine to use. But avoid using the weak burner for anything that needs high, consistent heat — it’s unreliable and uses more gas. Fix it sooner rather than later; weak flames can sometimes indicate the start of a larger issue with that burner’s components.

